The project page is the area where you can see all the details associated with the project. We encourage building out the high-level details using the project schedule and the Project worklist, then handling adjustments to project assignments on the schedule.
Use project brief to build and manage projects
All users can see the project brief for projects they are a part of.
From the project page, you can:
- Set a project budget in time, fee, or expenses (non-labor costs). This is your estimated goal to meet your targeted profitability or deadline.
- Add people to the project and create a work plan that fits the estimated budget.
- Create work items and assign project responsibilities and due dates to your team.
- View real-time progress of the project and monitor your budget.
- Use quick links to project reports to analyze the data behind the work progress
Project brief
The project brief is the project's landing page. It displays an updated synopsis of the project, including the project description, people currently working on the project, a visualization of the project timeline, and progress of current work. All project properties are also visible on this page. The project brief updates automatically to reflect the project's progress.
The project brief includes:
- Client name
- Project name
- Project start and end dates
- Project owner
- Project description (up to 2,048 characters, including line breaks)
- Clickable links in the description
Project status and reports
Status for the project's work, time, and fees appear on the left side of the project page brief. The show dropdown filters what data is displayed in this menu pane.
You can see information about:
- The entire project (default)
- Non-phase specific
- Specific phase
Quick links to the time + fees and budget reports are at the bottom of the left pane.
You can use the project brief in weekly team meetings as an agenda and a way to record and communicate each person's responsibilities.
Schedule
The schedule displays project phases and people scheduled to work on the project. Click anywhere on this schedule to access the project schedule tab. Right-click (or CTRL + select) to save the schedule image for sharing with your team or other key stakeholders
Worklist
The Worklist shows project information:
- Current project status
- Phases
- Team members
Information for each team member:
- Percent allocation
- Work items
And project assignment information:
- Project assignment dates
- Status of each assignment
Manage the project schedule
You can edit the project timeline and any associated assignments. You can create phases and assignments, and see the impact of those changes on the project's time and fee status.
By default, the schedule auto-zooms to fit the length of your project. Use the sliders at either end of the phase or assignment bars to change dates.

Adding items to the project schedule
To add phases:
- Click the schedule where you'd like the phase to begin and then select Add Phase.
- Choose from one of the default phase names, or create a new phase name. The phase automatically extends to the end of the project, but you can edit it as needed.
To add assignments:
- Click anywhere on an empty date slot or phase and then select Add Team Member.
- Select a team member from the list. You can also choose a placeholder if you don't have a resource in mind. The assignment starts on the current day (or the project start date if it’s in the future) and extends to the end of the project or phase, but you can edit it as needed.
To add descriptions of work:
- To add work to an existing assignment, click on a team member's assignment and then choose Work Item. Enter your details in the text box.
- To add a description of work when without assigning it to a team member, click anywhere on a blank portion of the schedule and select Add Work Item. Enter in text to create a new work item that starts on the current day (or the project start date if it’s in the future) and extends to the end of the project.
Manage tasks and assignments with the project worklist
Resourcing Administrators, Project Managers, and People Schedulers can use the project worklist to manage tasks and assignments but can't create worklists.
Use the worklist to:
- See all the work, its status, and who it’s assigned to
- Create and edit project plans
- Indicate who should work on what and when
- Add work items for key deliverables or milestones
Before you can use the worklist, you must set up a project.
Phases
Phases break a project into different kinds of work. Add phases first, then add work items to each phase.
To add phases to worklist
- At the top left of the Worklist, select Phase. A new phase row appears at the bottom of the worklist.
- Name the phase. Use the Enter key to add more phases; select anywhere on the screen when you’re done.
- To edit the phase, select the new row. The properties pane opens in the right sidebar.
To adjust phase dates
- Select the start or end date on a phase row to open the calendar.
- Select the new dates from the calendar.
Set the dates for each phase as you create them; the next phase you add will start immediately after the previous phase ends.
Add work items to the worklist
Work Items define project deliverables, expectations, and responsibilities for the project, phase, or person.
To add work items
- Hover over a person, then select Work Item.
- In the right pane, fill out the Work Item properties.
Hovering over a row activates + Work Item at the bottom of the project or phase grouping so you can add details about the item.
To assign work items
- Select the Work Item row to open the Work Item details.
- Select Assign Team Member.
Or:
- Hover over the work item and then select Assign.
Copy work items in the worklist
You can duplicate a work item, copying it to either the project or a phase in the project. Copy work items when:
- You have multiple people working on the same thing. Copy the work item multiple times and assign each copy to the people working on it.
- You have similar assignments across many project phases, such as a design review. Copy the work item for each phase and edit the dates.
- You need to move a work item. Copy the work item to the new phase and delete the old work item.
To copy a work item
- Select the work item you want to copy on the Worklist.
- At the bottom of the right details pane, select Copy.
- Select the project or phase where you want to copy the work item.
Delete work items from the worklist
Only Resourcing Admins and Portfolio Editors can delete work items. Deleting a work item deletes the entire row and all its contents, including the assignment. Time already tracked to the assignment is not deleted.
- Select the Work Item row.
- At the bottom of the right pane, select Delete.
Add people to the worklist
To add a team member to a phase
There are two ways to add a team member to the worklist:
- Select the project or phase, then select + Add Team Member from the right panel.
- Hover under the last phase or project entry and select Team Member. Your team directory appears in the right panel.
To add a team member to multiple phases
- At the top of the Worklist, select Team Member.
- In the right panel, select the Phases you want to add team members to. You can also select the whole project.
- At the bottom of the panel, select Add Phases.
- Select the Team Member you want to add.
All assignments have start and end dates. Depending on whether the person is assigned at the project or phase level, assignments will inherit the project or phase start and end dates by default.
Specify work status in the worklist
You can specify a status for each work item. Resourcing Admins, Portfolio Editors, and the person assigned to the work can change status throughout a project.
Use status to identify items that need attention. You can customize status settings to suit your organization’s unique vocabulary.
Status appears wherever a work item appears. Learn more about work status.
Shift dates in the worklist
Project and phase dates change. If you have defined phases and assignments, you can shift dates without editing each item.
To shift dates
- In the Worklist, select the project or phase name. It’s in bold at the top of the project or phase section.
- In the right pane, select Shift Dates.
- Enter a new start date, and then select Save
Shifting a project moves all phases, assignments, and task due dates.
About work items
When you add a work item to a person's project assignment, the item appears on the today view of their personal page.
Add a work item to a project
- Open the project.
- Select Worklist.
- Select + Work Item for the entire project of the specific phase.
- Describe the work, outcome, or deliverable.
- Select the row, and use the column on the right to edit the work item assignment, dates, phase, notes, and task list.
Stay informed with notifications and the activity feed
Resourcing Administrators can adjust notification settings for the entire account. All other users can adjust their individual notification settings if notifications are enabled on the account.
Notifications can help you:
- Know the status of your assignments or tasks
- Know if a project you’re tracking has any changes
- Get the rundown on what’s happened during the day
The activity feed aggregates these important changes and displays them in a historical timeline on each project page and on your personal page.
Activity feed
The activity feed is a record of key project changes. It shows changes to people, projects, and assignments. Each change appears with a time and date stamp.
The activity feed is only available in English. View Resource Management in different languages.
Email notifications
Email notifications alert you about important changes to your assignments or projects. If you make multiple changes close together, they're all sent in one email to reduce inbox noise. You can also choose to receive a daily digest of the day’s activity.
Some email notifications are only available in English. View Resource Management in different languages.
Edit your personal notification settings
To change how often you receive notifications:
- Select Settings in the top right corner.
- Select My Preferences from the drop-down list.
- In the Notification Preferences section, select any of these options:
- Off: No email notifications. You can still see changes in your Activity feed.
- Immediately: Notifications go out as soon as changes are made. When multiple changes occur in a short time period, they’ll be grouped and sent in one email.
- Daily (default): You’ll receive an email each morning detailing changes made during the past 24 hours.
Project notifications
By default, notifications are enabled for all projects.
If you’re resourcing or planning a tentative project and don’t want to overload your team with notifications, Resourcing Admins and Portfolio Editors can mute notifications on the Project Settings page.
Following a project
You can follow the projects you’re not assigned to and get updates in your personal Activity Feed. If you're set to do so, you'll also receive email notifications about project changes.
To follow a project
- Go to the Projects page and open a project.
- Select the Activity tab.
- At the top of the Activity feed, toggle on the Follow option.
Edit account-wide notifications settings
Email notifications for people in your account are enabled by default.
If you’re a Resourcing Admin, you can set preferences in the Notifications section of the Account Settings page. Only Resourcing Admins can change notification preferences for all active people.
- Open Account Settings.
- If you are working in Resource Management in Smartsheet, select the kebab menu in the top right corner, then select Account Settings.
- If you are working in standalone Resource Management, select Settings > Account Settings.
- Scroll down to the Notifications section. Select one of the following options:
- Enable Notifications: Notifications go to all people in your account. Each person can still set their own email notification preferences from their My Preferences page.
- Disable Notifications: Turns off notifications for all people in your account and hides email notification preferences from the My Preferences page.
- Select Save.
Set up project templates
Create a template project like any other project.
Use naming conventions that make it clear the project is a template. For example:
- Project Name = TEMPLATE: X-Project
- Project Type = Tentative
- Project Tag = TEMPLATE
Duplicate the template to create a new project.
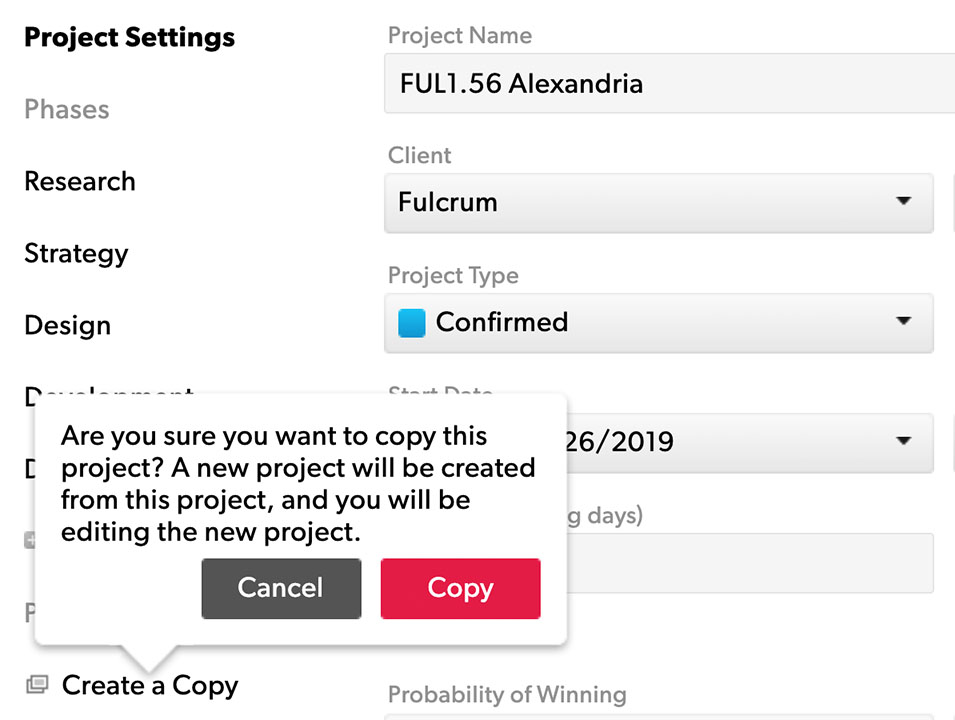
To duplicate a project:
- Go to the template's project page and select Project Settings.
- On the left sidebar, select Create a Copy.
If you have repeat projects with the same client, create a template project with the bill rates you charge that client and label it accordingly. Save it as an Internal or Tentative project type, so it’s clear it’s just a template. Now, you can copy this project every time you need that specific rate card.
Transfer time from one project to another
To transfer historical time tracked from one project to another, you can gather the total amount of hours for each person in the first project and create a new project. In the new project you will add each person with the total number of hours they worked in the old project and change the date in which they worked on the project to a date in the past.
Alternatively, you can tag projects with the same custom field or tag, so when you view the schedule or reports, you can filter to see data associated with all projects with that tag or custom field.
You cannot merge projects in Resource Management.