USM Content
In this topic learn how to create and manage budget information in Resource Management.
Create and manage budgets
USM Content
Resourcing Administrators can create and manage budgets for an account.
All the budgets are in the Project Settings. To access them, go to the project you want to review and select Project Settings.
Time budgets
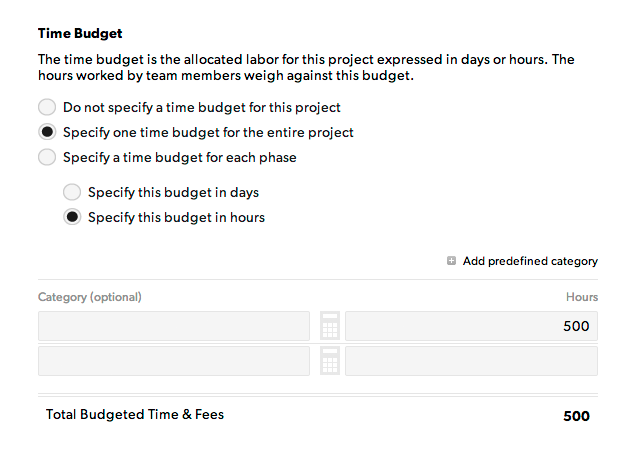
A time budget is the allocated labor for a project expressed in work hours or days. Your team's hours count against this budget.

Fee budgets
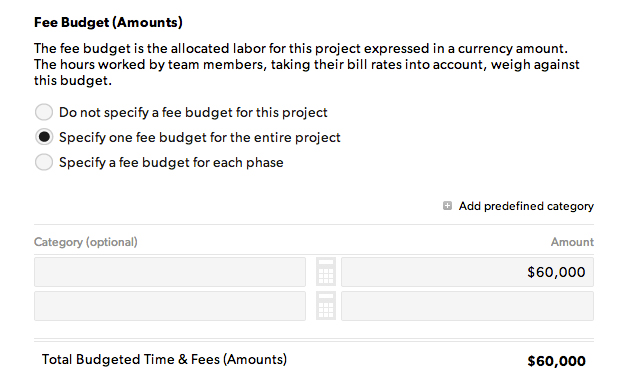
The fee budget is the labor allocated for this project, expressed in a fee amount. Your team's hours worked, multiplied by their bill rates, weigh against the budget.

Expense budgets
Expenses are non-labor-related project costs. Examples of expenses are costs incurred when hiring outside vendors, ordering prototypes, or travel costs.
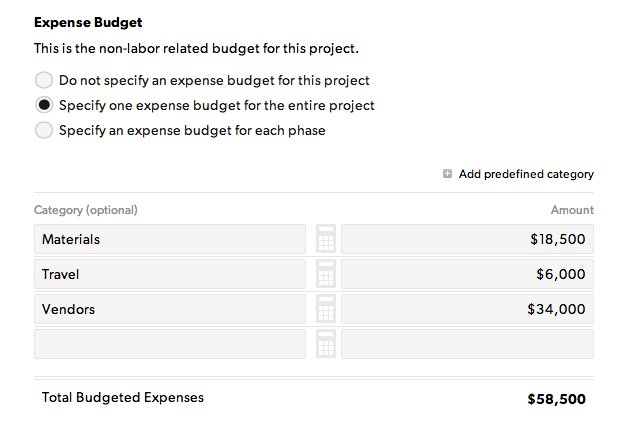
Use Expense categories to estimate costs at the beginning of the project and track incurred expenses for these categories. Examples of expense categories might include travel, materials, or consultants.

If project contractors or consultants bill your project a fixed fee for work performed, consider adding them as expenses rather than project labor. Estimate the fees and then enter their cost when you receive their invoices.
Budgeting expenses by category
Use categories to estimate and track specific expenses. You can use predefined categories or create your own.
When you add a predefined expense category to your budget, a suggested cost appears for that category. For category items, you can use the suggested cost or use the calculator to set the cost for them.
For example, you can estimate travel expenses for a project using the expense tracking tool or budget the time you anticipate needing for marketing, billable tasks, or meetings using the fee or time tracker.
Edit project bill rates
USM Content
New projects use your organization’s default bill rate matrix from account settings. When tracking fees for a project, multiply the incurred hours times the bill rate, and the output is the incurred fees for the project (incurred hours x the bill rate = incurred fees for a project).
To use bill rates, first create a default bill rate matrix in account settings.
If you change bill rates in the default matrix, the changes only apply to new projects.
Custom bill rates
If you have custom rates for a project or client, edit bill rates in project settings so they apply only to that project.
View or edit bill rates for team members
- Go to the project and, in the top-right corner, select Project Settings.
- Scroll down to Bill Rates.
Varied bill rates
If resources have more than one rate for a project, you can set custom rates for each phase of the project. When the team member reports hours for that specific phase, Resource Management will assign the correct bill rate for the phase.
For example:
Tamika works as a Creative Director for $150/h. She also works as a Designer for $100/h on the same project. Set bill rates for each of Tamika's roles in Project Settings.
Then, create two phases for the project: Creative Direction and Design.
Now, assign Tamika to both phases. When Tamika enters time, or you make assignments on the schedule for either phase, appropriate rates apply.