Customize your forms by changing their layout, showing or hiding Smartsheet branding, and adding security settings.
Hide or make a field visible in your form
You can change your form settings to either hide or show fields in the form.
- Select Forms > Manage Forms.
- In the Forms dialog, select the form you need to edit.
- Select the field you need to check once you’re in the form builder.
- Use the toggles to set your field as Required or Hidden in the Field Settings pane on the right.
To manage your form, follow these steps:
- Select Form > Manage Forms...
- Open the form you want to customize.
- Once you’re in the form builder, go to the Settings tab.
Customize your form layout
- Select Form > Manage Forms...
- Open the form you want to customize.
- Once you’re in the form builder, go to the Settings tab.
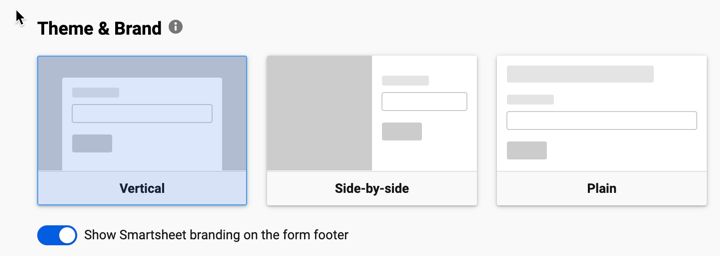
- In the Theme & Brand section, select a layout from these options:
- Vertical: You want your logo, title, description, and form to have a center alignment.
- Side-by-side: You want your description to be visible while scrolling through the form.
- Plain: You want to embed your forms in a website without including any logos, colors, or formatting from the form.
In the Colors Settings & Logo form, edit the color and logo of your form.
Show Smartsheet branding in the form footer
This option appears enabled by default, but you can remove it by turning off the Show Smartsheet branding on the form footer toggle.
This removes Smartsheet branding from:
- Form footer
- Form confirmation footer
- Mobile web form
Only Business and Enterprise plan subscribers can deactivate this option.
Security settings of your form
Your System Admin may have set minimum security settings on your account. Not all users see all the options listed here.
- In the Settings tab of the form builder, go to the Security section.
- Turn on the security settings you want to use for the form.
Security setting details
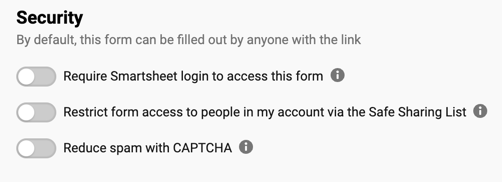
By default, all forms are available to anyone with the link.
When you use Require people to log in to Smartsheet to access this form, anyone accessing your forms needs to log in with their Smartsheet account.
When you use Restrict form access to people in my account via the Safe Sharing List, anyone accessing also needs to log in or create an account, and their user login domain must match an approved domain in your Safe Sharing List in the Admin Center.
Safe Sharing is only available in Enterprise plans.
Reduce spam with CAPTCHA
reCAPTCHA detects any suspicious activity and challenges suspected bots. You can enable reCAPTCHA to prompt users to prove they’re not bots. When a user chooses to receive a copy of their responses, Smartsheet automatically enables reCAPTCHA on all forms.
If you don't want to send copies of your form, turn off that option in the Send Email of Submissions option in the form builder.
China blocked the invisible reCAPTCHA on their internet platforms. Form submitters in China may experience issues if you’ve enabled this option or if they’ve selected Send me a copy of my responses.
Set up what the submitter sees after the form is complete
- In the Settings tab of the form builder, go to the What should happen after the form is submitted section.
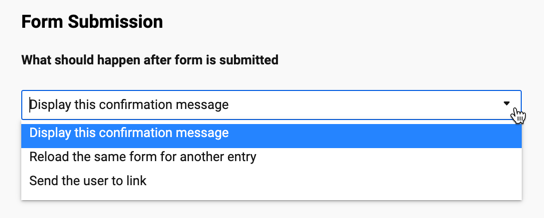
- From the dropdown list, select the action you want to apply.
- Display this confirmation message: You want only those who complete the form to see the default confirmation message: Success! We've captured your response. You can also modify the message.
- Reload the same form for another entry: Choose this option if you anticipate multiple responses.
- Send the user to link: Use this feature if you need the user to go to a website after submitting their form responses. You need to enter the URL where you want the user to land.
Specify where new submissions should appear on the sheet
You can add the new form entries at the top or bottom of the sheet.
- In the Settings tab of the form builder, go to the New Submissions should appear on the... section.
- Select where you want to add the new form responses.
If submissions appear after several blank rows, remove those blank rows.

Smartsheet doesn't add new submissions under a specified parent row or cell.
Send the user a copy of their form responses
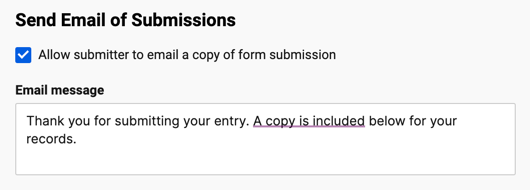
- In the Settings tab of the form builder, go to the Send Email of Submissions section.
- Select Allow submitter to email a copy of form submission.
- Type over the default text if you want to customize the message.
Anyone with access to the form can use it to submit information to the sheet.
Privacy of a form submitter’s email address
The user’s email address is anonymous. If there's a Created by column, the value form owners see in it is web-form@smartsheet.com. However, if the form allows only Smartsheet users to submit responses, it reflects the submitter’s email address.
Using a URL query string for the Send Email Submissions feature
When you use a URL query string in your unique link, the Send me copy of my responses option is on by default. Submitters still have an option to deselect it if they want to.
With a URL query link, submitters don't have to fill in the Email address field.
However, URL query strings can't help you automate form confirmation emails to sheet owners and collaborators. Instead, you should use automated workflows if you want to receive email alerts when new entries come in.