Follow the step-by-step instructions below to create and rename a sheet.
USM Content
A sheet is the foundation of your work in Smartsheet and where all of your data lives. The way you set up your sheet will determine how you can take advantage of the many Smartsheet capabilities.
The default sheet view is the familiar-looking grid, which you can easily customize with multiple column types, hierarchies, attachments, collaborative communication, and more.
The other sheet views— table, board, timeline, Gantt, card, and calendar—are discussed later in this learning track.

Create and organize Smartsheet items
USM Content
What are Smartsheet items?
Smartsheet items include:
| Smartsheet item name | Overview |
|---|---|
| It has no predefined columns, it's a clean slate. Use this when you want to start from scratch. | |
| It has no predefined columns, it's a clean slate. Use this when you want to start from scratch. | |
| Includes standard columns needed to create a project and enable Gantt chart functionality. | |
| Provides what you need to start a card-based, Kanban-style project. | |
| Creates a basic three-column sheet with a form attached to it. Use this when you know you want to collect information from others with a form. | |
| Work with real-time data from across multiple sheets in a single view. | |
| It lets you create a visual summary of sheet data or an information hub. | |
| Visualize related tasks and milestones across time. |
You can create sheets to track different workflows, including tasks, project deadlines, punch lists, inventories, or customer information, whatever you need. You can also create reports, dashboards, forms, and other items to build out your solution.
You don't always need to start from scratch. You can Import files to create new sheets, or start with a template.
The sheets and other items you create are visible only to you unless you share them with others. Learn more about Share sheets and reports.
How to create an item
There are multiple ways to create a new item in Smartsheet.
From +Create
- Select +Create on the left navigation bar.
- Use the Location dropdown to select where your item lives. Select Browse all to see all available workspaces, or select New workspace to create a net new workspace.
- Use the displayed menu to select the item type you want to create. Remember, you can also import data to start a sheet.
Brandfolder Image
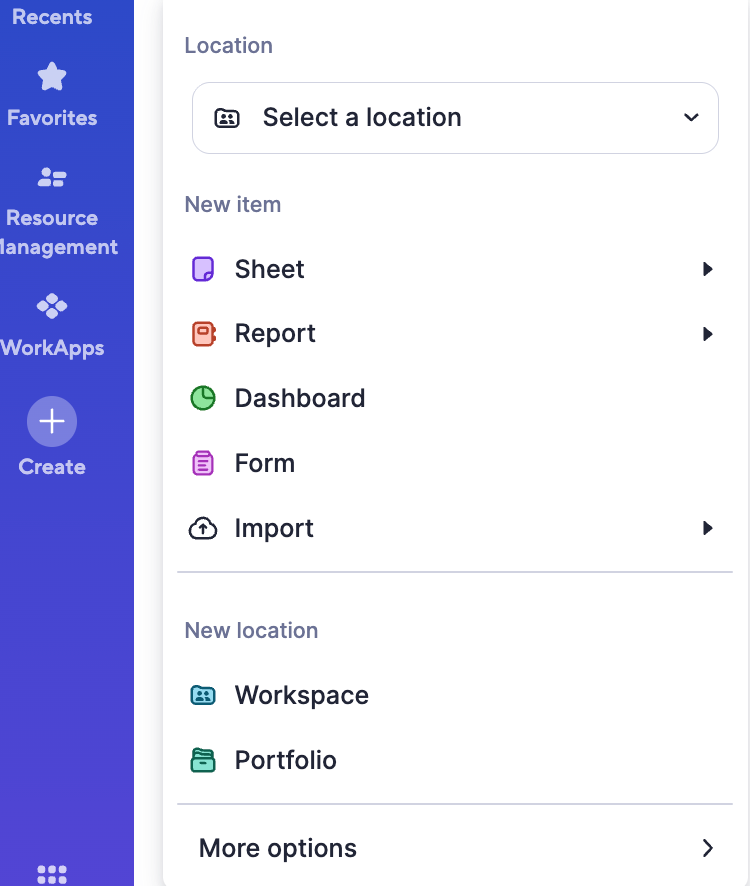
Alternatively, select More options > at the bottom of the menu to access the Let's start a new project, program, or process page. Any item created from this page appears in a new workspace.
From Home
- Select Home on the left navigation bar.
- Select +Create in the upper-right corner to choose which item to create and where to create it. Or, open the Workspaces tab and select the workspace where you want to store your new item.
Brandfolder Image

Select the star on a workspace or item to mark it as a favorite.
From an existing workspace
- In the left bar, open Browse, navigate to Home > Workspaces.
- Select the workspace where you want to house the new item. This opens the workspace panel.
Select +Add to workspace at the top of the workspace panel, then the item type you want to create.
Brandfolder Image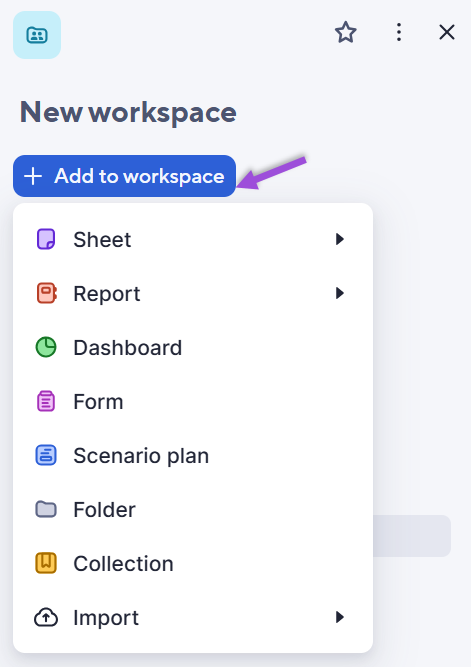
- Enter a name for the new item and select OK.
From a template
- Select +Create on the left navigation bar.
- Select More options.
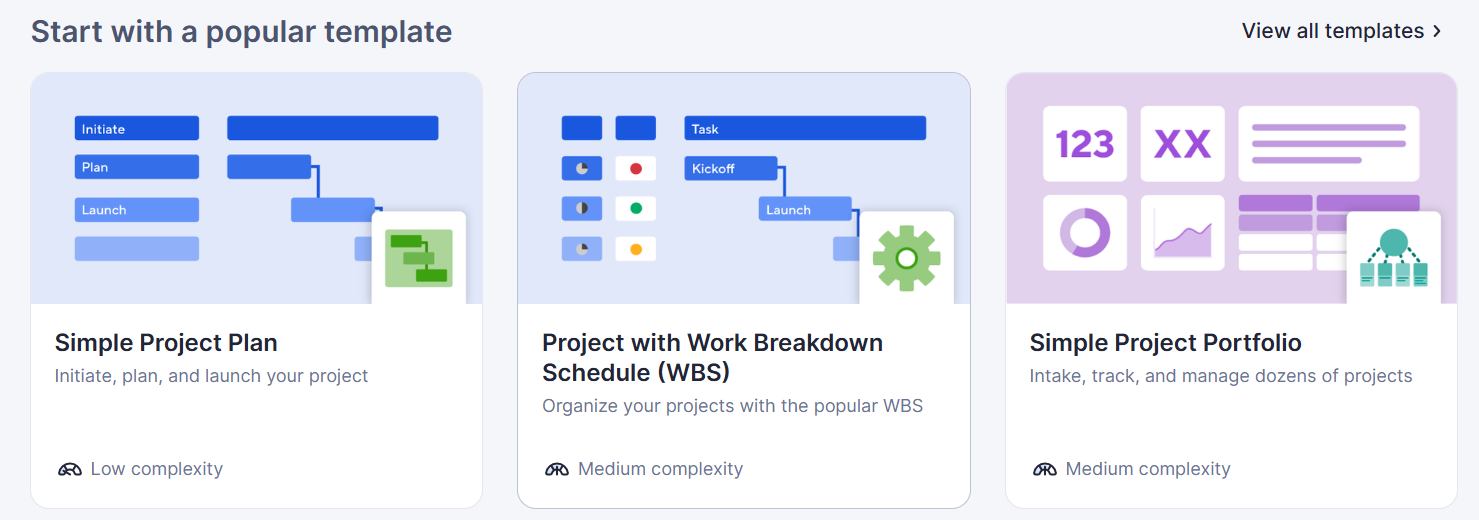
- Select any of the options from Start with a popular template, or select View all templates > to browse all available templates in the template gallery.
Brandfolder Image
How to rename an item
You can rename any existing Smartsheet item created; you only need to be the item's Owner or Admin.
- From Browse in the left panel, navigate to the workspace or folder containing the item.
- Select the checkbox to the left of the item name.
- On the top bar, select Actions > Rename...
- Enter the item's new name and select OK.