Learn more about working with the calendar view.
Calendar View is one of the four ways to view your sheet in Smartsheet and provides an interactive and easily customizable view of your work on a calendar. Smartsheet Calendar View also allows to publish or overlay on Google calendar or an iCal in Outlook or Apple calendars.
Just like the other sheet views in Smartsheet, Calendar View is driven by the column types in your sheet. In order to create a Calendar, you must have at least one Date column, and can get more comprehensive with both a start and end date for a task.
Work with Calendar View
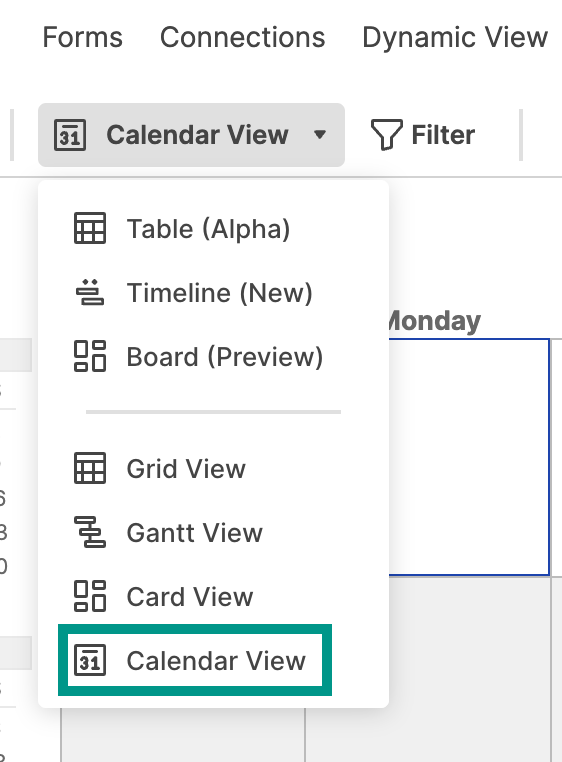
Any sheet or report containing at least one date column can display information as a calendar by selecting the Calendar View from the drop-down in the toolbar.
Brandfolder Image
To add a date column, you can either insert a new column and set the column type to date or change an existing column to date.
You can change the format of dates by adjusting your settings to an appropriate Language (Country) in the Personal Settings window of your Smartsheet account.
Select dates to display
- Switch to Calendar View.
- Select the Settings icon on the right (gear icon below the Share button) to display the Calendar Settings form.
- From the form, you can make the following adjustments:
- Select a column from the Display only dates in this column drop-down list to group all tasks with a date listed in the column on a single date space in the calendar.
Use the Display date ranges drop-down list to select two date columns in your sheet. In this case, each task with a date in both columns shows up in the calendar extended across the date range. This feature is most helpful when tracking a task from start to finish.
If you're working in a report, the Calendar View can reflect dates spread across multiple sheets. Make sure all your sheets contain column names that exactly match what you've selected in the Calendar Settings. Tasks from sheets that don't contain these columns don't appear in the calendar as expected.
If you have set up row hierarchy in your sheet, you can choose whether to Display Summary Tasks. Uncheck this option to hide the top-level parent row and only display sub-tasks in the Calendar View.
This removes the summary tasks from the Calendar View, but not from the version published to Google or iCal.
As row hierarchy doesn't appear in the Grid View of a report, the option to Display Summary Tasks isn't available in the Calendar View of a report.
Select Display My Reminders to display a reminder icon (a bell) on each day in the calendar that a reminder is scheduled to be sent to you. All sheet collaborators have the option to display their own reminders.
You can't create reminders from a report, so Display My Reminders isn't available in the Calendar View of a report.
Each bar in the calendar displays the text from the primary column of the sheet or report. When you expand parent rowsnin a sheet, you can set bar colors for child rows by right-clicking (PC) or Ctrl+clicking (Mac) on the bar and selecting Color Settings.
If you don't want all tasks to appear in the calendar, create a new date column (i.e. Calendar Date) in Grid View. Only place dates in this column if you want the task to appear in the calendar. Switch back to Calendar View and select your new date column in the Calendar Settings form.
Keep in mind you can't schedule a task to take place at a certain time, only at a certain date. Project sheet tasks with duration in partial days, hours, or minutes still span across full days in the Calendar View, as well as in any published versions of the calendar.
Edit row information
You can change the date for a task by dragging the bar and dropping it on a new day. Drag tasks that span a start and end date from the left or right edge to extend their duration.
You can edit rows from the Calendar View by double-clicking the calendar bar. The Edit Row form appears for you to edit all cells in the row. Changes you make here appear in the Grid View.
The drag functionality isn't available in a report's Calendar View, or for parent rows (any row with sub-tasks indented underneath) in a sheet if dependencies are enabled.
Change the calendar timeframe
Click the right or left arrow at the top and select your desired units of time.
Print your calendar
Once you have configured your Calendar View, you can either Print the calendar to PDF, publish it to an external calendar program, or send it to a recipient via email by selecting File > Send as Attachment.
When you print a Calendar, it always prints 4 weeks of calendar information per page, and the size of the boxes can't be adjusted.