This article provides step-by-step instructions on creating a dynamic dropdown list in a Smartsheet form. This setup is useful for inventory or scheduling use cases, such as managing appointment time slots, to ensure that selected slots remain unavailable for future form submissions.
USM Content
Dynamic dropdowns in Smartsheet forms enhance real-time inventory management by linking dropdown options to the statuses of items in a source sheet.
When users select an item in the form, the system automatically marks it as unavailable in the source sheet, removing it from the dropdown list for others. This approach prevents double-booking and ensures data accuracy, facilitating efficient scheduling and resource allocation.
To achieve this dynamic behavior in a form, you need two separate sheets and a VLOOKUP formula:
- Sheet 1 (data source): This sheet contains the full list of available time slots and tracks which slots have been selected.
- Times (Column 1): Lists all possible time slots. For example, 1:00 p.m., 2:00 p.m., 3:00 p.m.
- Is Selected (Column 2): A Text/Number column that holds a VLOOKUP formula. It automatically updates when someone selects a time slot in the form.
- Available Time Slots (Column 3): This is a Text/Number column that holds an IF/IFERROR formula to determine which time slots are still available.
- Sheet 2 (form source): Use this sheet to create the form. It contains a dropdown column that links back to the Available Time Slots column on Sheet 1.
Follow these steps in Table view of your sheets to set up the dynamic dropdown list.
Step 1: Set up the data source sheet
- In Sheet 1, create the following three columns in Table view:
- Times (Text/Number column type).
- Is Selected (Text/Number column type).
- Available Time Slots (Text/Number column type).
Enter the time slots into the Times column. Leave the other columns blank for now.
Brandfolder Image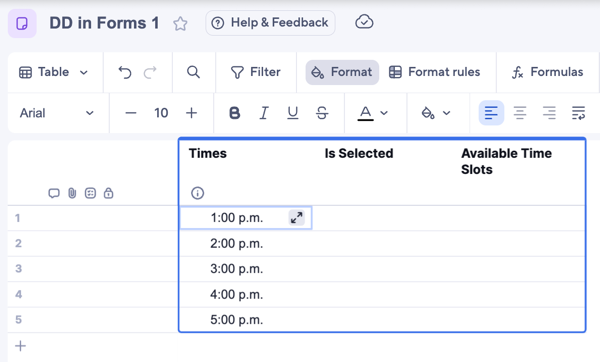
Step 2: Create the dropdown in the form source sheet
- Navigate to Sheet 2 and ensure you're in Table view.
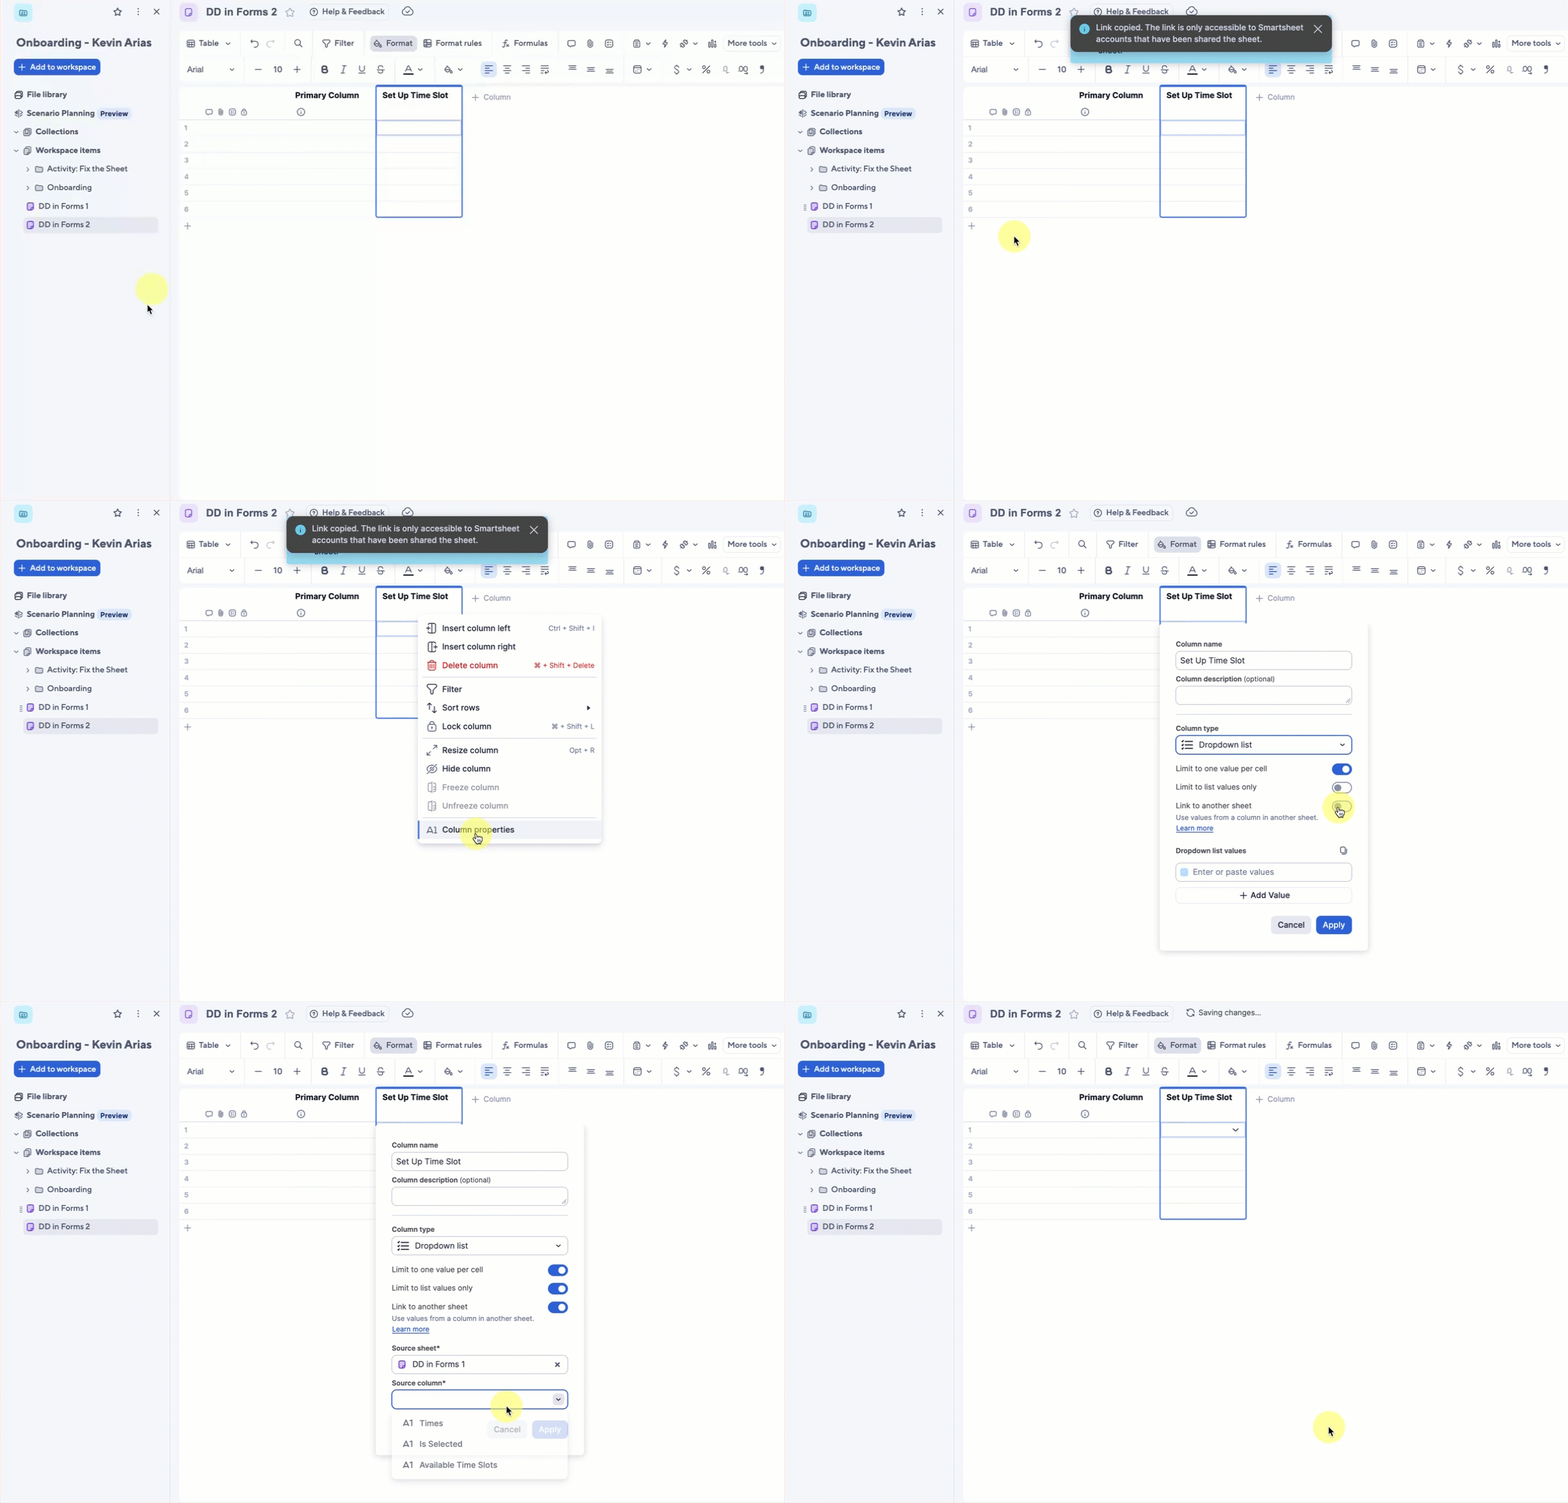
Right-click on the desired column header and select Column properties. This example uses the Set Up Time Slot column.
Brandfolder Image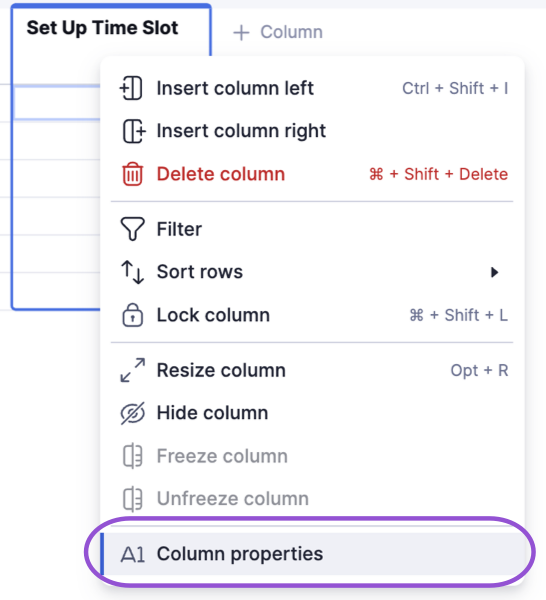
Change the Column type to Dropdown list.
Brandfolder Image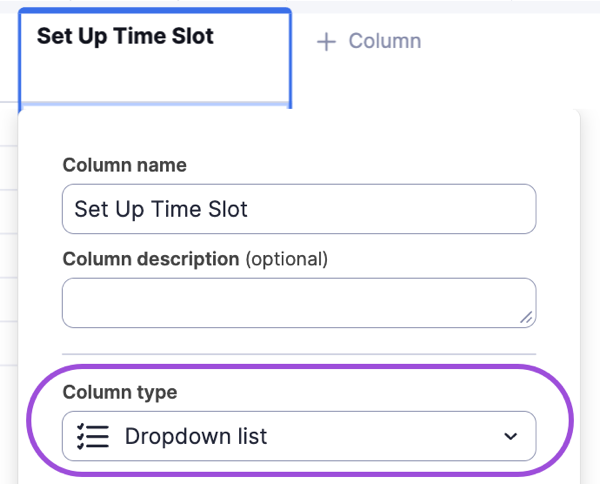
Under the Dropdown list options, toggle on Link to another sheet.
Brandfolder Image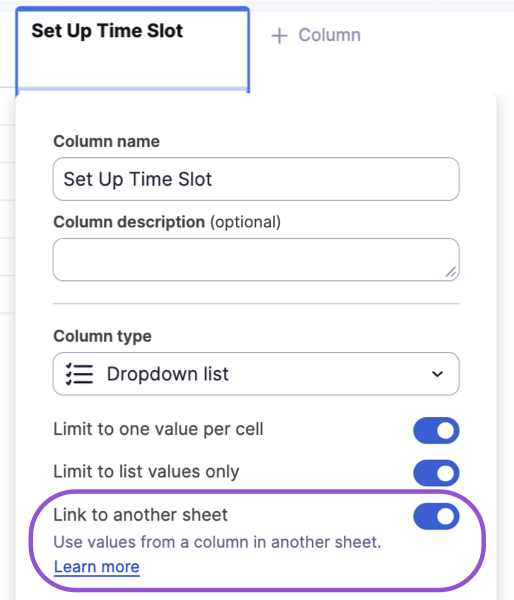
- In the Source sheet* field, paste the link of Sheet 1.
Select the Available Time Slots column from Sheet 1 as the Source column* for the dropdown.
Brandfolder Image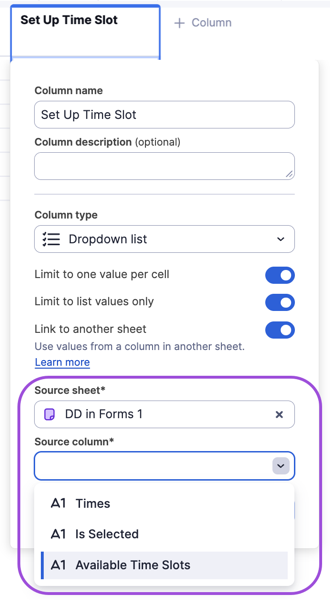
Select Apply.
This step links the dropdown choices in your form to the time slots marked as available based on the formula in Sheet 1, which you set up in the next steps.
Step 3: Add the VLOOKUP formula to track selections
You can also use an INDEX/MATCH formula as an alternative to the VLOOKUP function.
- Go back to Sheet 1 and switch over to Grid view.
In the first cell of the Is Selected column, enter the following VLOOKUP formula:
=VLOOKUP(Times@row,In the tooltip that displays, select Reference Another Sheet.
Brandfolder Image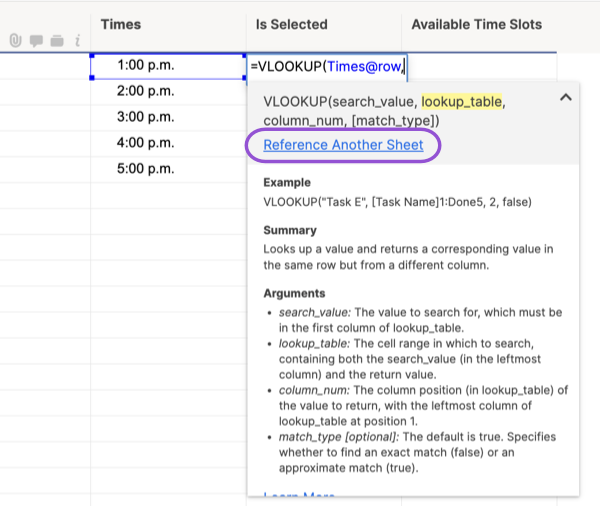
Use the Search for a data source field in the top left to find and select Sheet 2. In this example, Sheet 2 is referred to as DD in Forms 2.
Brandfolder Image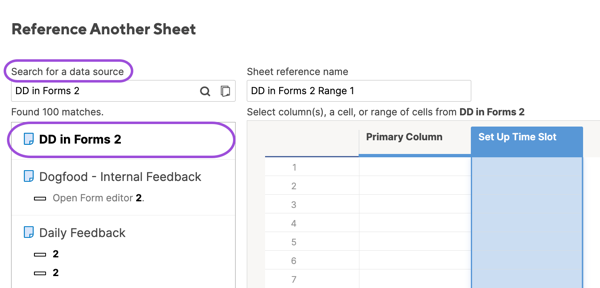
Select the column header from Sheet 2 and select Insert Reference. This example uses the Set Up Time Slot column.
Brandfolder Image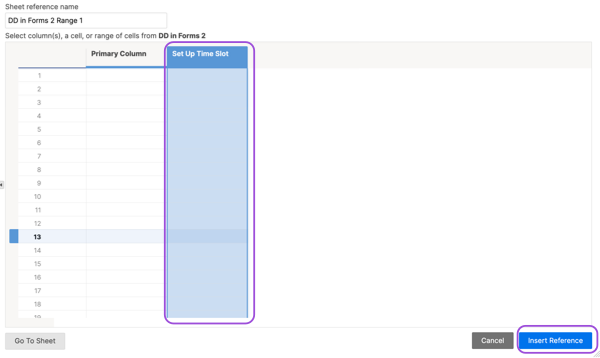
Update the formula in the Is Selected column to the following:
=VLOOKUP(Times@row, {DD in Forms 2 Range 1}, 1, false)- Times@row: This is the search value.
- {DD in Forms 2 Range 1}: This refers to the range of the columns in Sheet 2 that contain the selected time slot. It looks at the primary column and the column where the selection occurs.
- 1: This is the column index from the range to return; in other words, the selected time slot itself.
- False: This indicates an approximate match.
Brandfolder Image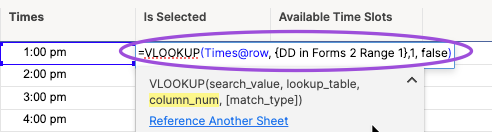
- Press Enter. Since no one has selected a time slot in the form, this cell displays #NO MATCH. This is the correct initial result.
Right-click the cell and select Convert to Column Formula to apply it to all rows in the Is Selected column.
Brandfolder Image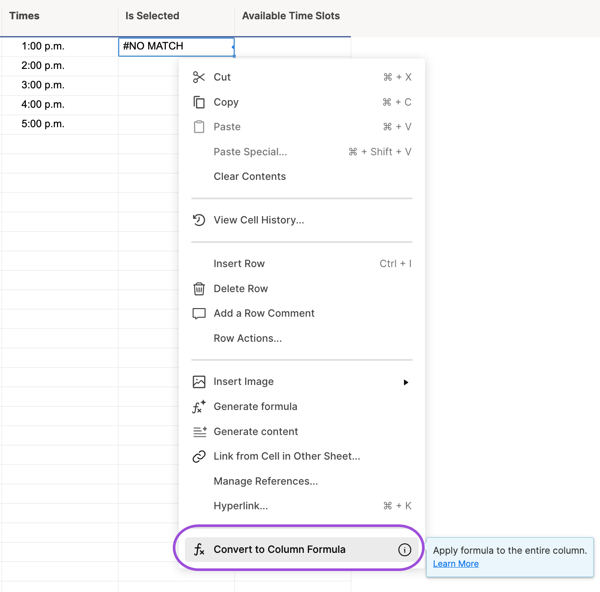
Step 4: Add the IF/IFERROR formula to determine availability
In the first cell of the Available Time Slots column in Sheet 1, enter the following IF/IFERROR formula:
=IF(IFERROR([Is Selected]@row, true) = true, Times@row, "")This formula checks if the Is Selected column resulted in an error (#NO MATCH) and, if so, returns the time slot, indicating it's still available.
- [Is Selected]@row: References the result of the VLOOKUP in the current row.
- = true: Checks if the time slot has been selected.
- Times@row: If the time slot hasn’t been selected (the VLOOKUP returns an error), the formula returns the time slot text, making it available.
- “”: If someone selects a time slot using the form, the formula returns a blank value, making it unavailable in the dropdown.
Press Enter.
Brandfolder Image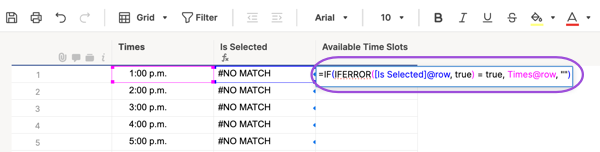
- Right-click the cell and select Convert to Column Formula to apply it to all rows in the Available Time Slots column.
Step 5: Create and test the form
- Navigate back to Sheet 2 and select Forms > Create form.
- Customize the form by keeping only the Set Up Time Slot field (or the name of your dropdown column) and select Save.
Select Open Form.
Brandfolder Image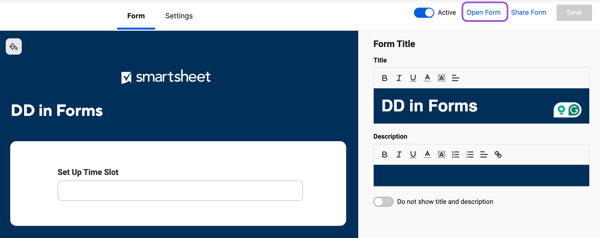
In the opened form, choose a time slot and select Submit.
Brandfolder Image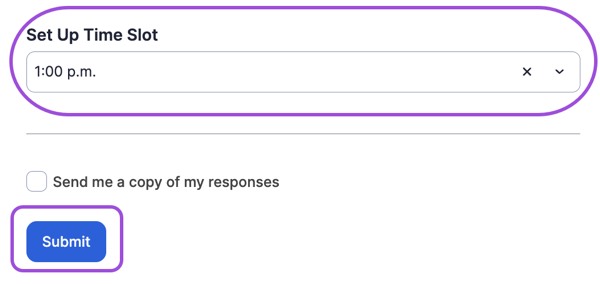
Go back to Sheet 1. You can see that the Is Selected column shows the time you just submitted, and the Available Time Slots column is now blank for that row.
Brandfolder Image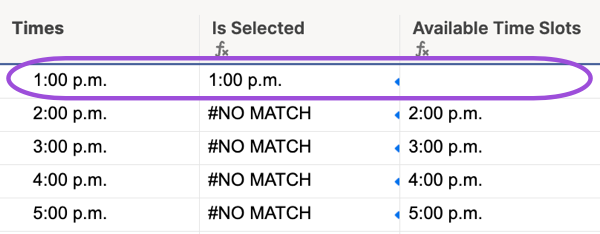
Return to the form and refresh your browser to view the updated dropdown list.
Brandfolder Image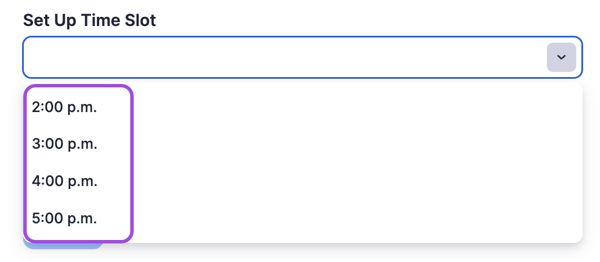
There may be a delay of up to one minute between form submission and the sheet update/form refreshing the dropdown choices. After a refresh, the time slot you selected disappears, confirming the setup works correctly.