Learn how to create sheets, reports, dashboards, and forms.
Smartsheet items include:
- Sheets: The foundation of your work in Smartsheet. Usually starting from Grid View, but the Card View and Gantt View are available as well.
- Forms: Forms require an underlying sheet to exist. You can start them from an existing sheet, or create a form and Smartsheet automatically creates its underlying sheet for you.
- Reports: You can create two types of reports:
- Row Report: Allows you to view row information from multiple sheets.
- Sheet Summary Report: Allows you to take data from the Sheet Summary of multiple sheets.
- Dashboards: The visual layer of your work in Smartsheet. Dashboards start as a white canvas, but they take shape as you add widgets. Widgets help you display the data you want to share in the dashboard, from titles to links and images, you can even embed a report in your dashboard!
Workspaces can contain multiple Smartsheet items and they’re great for sharing your items with your team. To access workspaces:
Select the folder icon in the left navigation bar.
Select Workspaces, under the browse panel. This displays a list of your existing workspaces, indicating the Name, Sharing Status, Owner and Last Update.
Select the workspace to open an existing workspace.
Create a sheet
There are two different ways to create a sheet:
From the left navigation bar
- Select the plus icon on the left navigation bar or select the Start a new program, project or process button in the Home screen.

- Select Grid under the Choose a new workspace starting point section.
After executing these steps, Smartsheet automatically creates your sheet in a new workspace.
The workspace panel opens so you can see your new sheet and workspace. You can rename them easily by clicking on their current name and typing in the new name.
From a workspace
- Open the existing workspace where you want to store your new sheet.
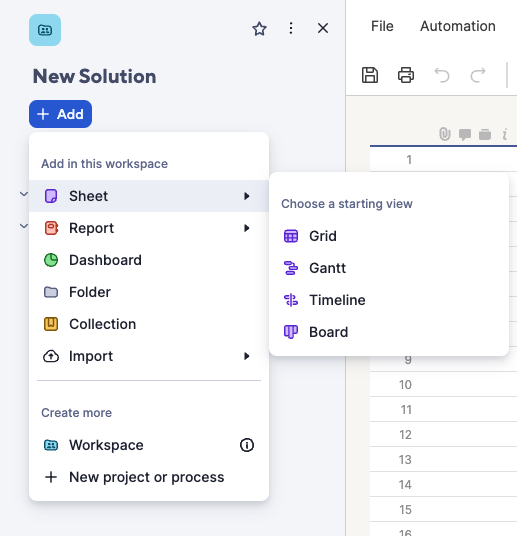
- Select Add > Sheet.
- Select the view you want to start with.
You can switch between the views in the sheet as needed.
After executing these steps, Smartsheet automatically creates your sheet in the workspace you were working on.
From the workspace panel
- Open a Smartsheet item located in a workspace.
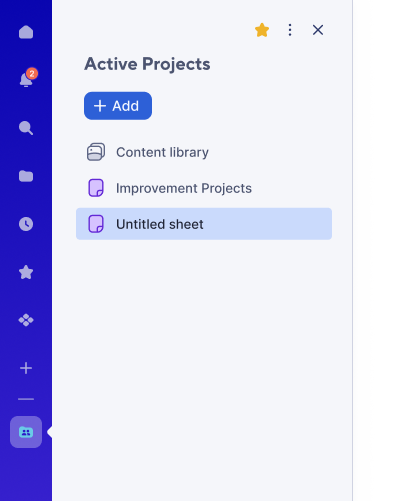
- Open the Workspace panel
Brandfolder Image
 in the right navigation bar.
The Workspace panel only appears when you're in an item located in a workspace.
- Select Add > Sheet.
- Select the view you want to start with.
You can switch between the views in the sheet as needed.
Smartsheet creates your new sheet in the workspace where you were working. You’ll see your new sheet appear in the workspace panel. Go ahead and edit it!
Create a report
From a workspace
There are two different ways to create a report:
- Open the existing workspace where you want to store your new sheet.
- Select Create, at the top-right of the screen.
- Select Report.
- Name your report and select the report type you want to create.
- Select OK.
After executing these steps, your new report is added to your workspace. You can open it and edit as required.
From the workspace panel
- Open a Smartsheet item located in a workspace.
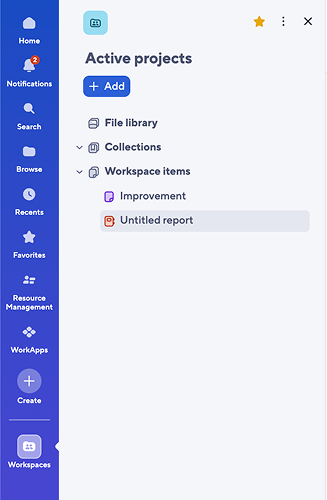
Open the Workspace panel in the right navigation bar.
The Workspace panel only appears when you are in an item located in a workspace.
- Select Add.
- Select Report.
- Select the report type that you want to create.
Smartsheet creates your new report in the workspace where you were working. You’ll see your new report appear in the workspace panel. Go ahead and edit it!
Create a dashboard
There are two different ways to create a dashboard:
From a workspace
- Open the existing workspace where you want to store your new dashboard.
- Select Create, at the top-right of the screen.
- Select Dashboard/Portal.
- Name your dashboard and select OK.
The new dashboard appears in your workspace. You can open it and start adding widgets!
Widgets help you display the data from your sheet to your dashboard. See Add and edit widgets on your dashboard for more details.
From the workspace panel
- Open a Smartsheet item located in a workspace.
Open the Workspace panel at the right navigation bar.
The Workspace panel only appears when you are in an item located in a workspace.
- Select Add.
- Select Dashboard.
Smartsheet creates your new dashboard in the workspace where you were working. You’ll see your new dashboard appear in the workspace panel. Go ahead and edit it!
Create a form
There are two different ways to create a form:
From an existing sheet
- Go to the sheet, where you want to add the collected information from the form.
- Select Forms, at the top left of your sheet.
- Select Create Form…
- Edit the form. Give it a title, a description, add or remove fields as desired.
- Once it’s ready, select Save at the top-right corner of the form.
From the left navigation bar
- Select the plus icon on the left navigation bar or select Start a new project, program or process on the Home screen.
- Select Form under the Choose a new workspace starting point section.
After executing these steps, Smartsheet automatically creates the form and its underlying sheet in a new workspace.
- Edit the form. Give it a title, a description, add and remove fields as desired.
- Once it’s ready, select Save at the top-right corner of the form.
Share your form by selecting Share Form, at the top-right corner of the form. There you can send it via email, get the link to share it or the HTML code to embed it.
You can then go back to the created sheet with the arrow at the top-left corner, and edit it as you want.