USM Content
Before configuring a workflow:
- Identify the Jira project(s) that you want to connect with Smartsheet and ensure you have access to the projects.
- Select the correct type of project (team-managed versus company-managed).
- Identified the sheet in Smartsheet that will be synced with the Jira Project (you can also create the sheet during the workflow creation).
- Review the Jira Create Issue screen to identify the fields available on the Jira Connector. Fields must be on the Create Issue screen in the Jira application to appear as options in the workflow wizard (This can/will be different from customer-to-customer and Jira project-to-project).
- The Jira Connector will update a backup of the sheet, as data can be replaced or modified if the workflow has not been configured correctly.
- Use Smartsheet filters to test the connector on a row or a subset of rows before allowing the workflow to update the entire sheet.
- Use a test Jira project (preferably a Jira Test environment) and a test sheet to test the workflow configuration, as there is no development environment for the Jira Connector with Smartsheet.
Creating a workflow requires navigation through six steps, some of which are mandatory and others optional. Below are the best practices for each step.
Step 1: Workflow Settings
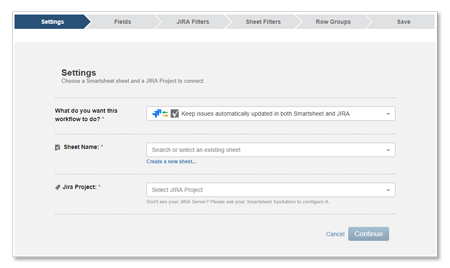
Topic | Best Practices/Limitations |
|---|---|
Data Synchronization |
Once the workflow is saved, the direction of the workflow can’t be changed. However, the direction of field mappings can be changed (i.e., if you select bidirectional, you can modify a field’s unidirectional or bidirectional settings). |
Sheet Name |
There is no way to identify in Smartsheet if a sheet is being used in a Jira Connector workflow or the direction of the data synchronization. |
Jira Project |
|
Step 2: Map Jira fields to sheet columns
Do:
- Select the best data synchronization direction according to the use case for each field when using a bidirectional workflow.
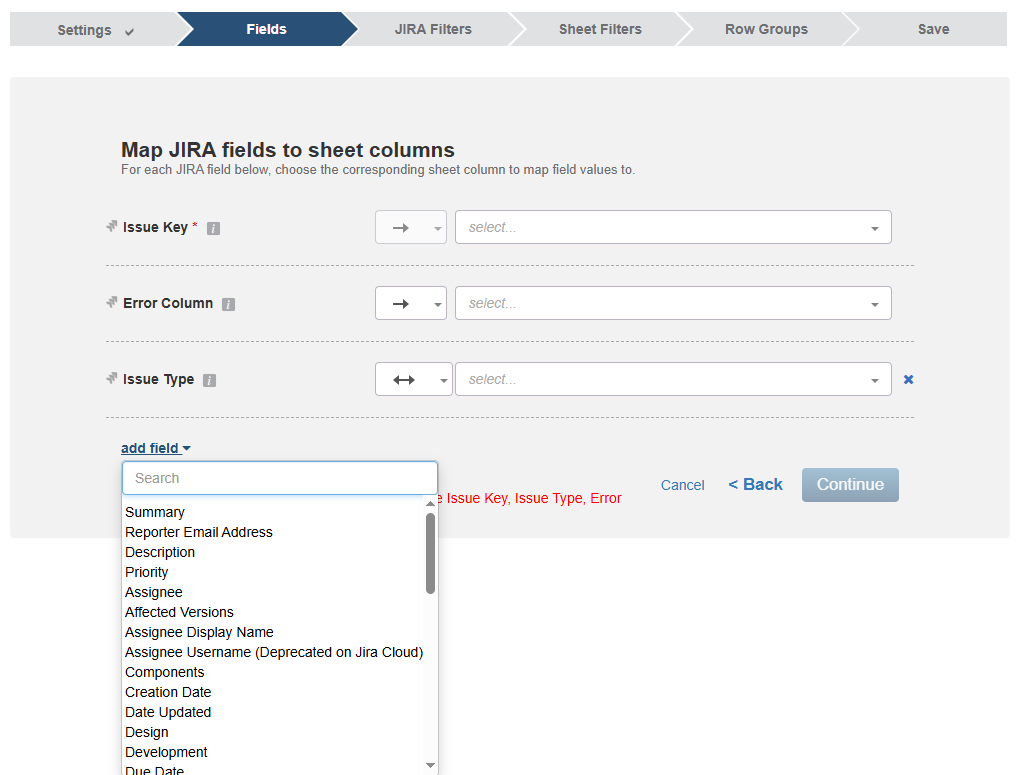
- Ensure you have an issue key: the Issue Key is the primary identifier for issues in Jira. Without this required hyperlinked value, the Smartsheet for Jira Connector cannot write changes back to that Issue in Jira.
- Specify a Smartsheet column to map fields to. These cannot be left blank.
- Use the assignee field in Jira with a contact list column in Smartsheet, and make sure the user’s email is the same as the user's Jira login.
- If you are creating Epics, add fields in your mappings, such as Epic Name and Epic Link (or any value indicating the Epic mapping).
Limitations
- Only fields on the Jira Create Case screen are available on the Jira Connector Add Field dropdown.
- Jira Connector cannot write to dependency columns. Instead, you can create a unidirectional update (Smartsheet to Jira).
- Map the Error Column and Issue Key to Smartsheet columns. These are required fields and cannot be removed in the workflow. They can only flow from Jira to Smartsheet
- The column that the Issue Key column is mapped to cannot be changed once the workflow is saved.
- Always specify a Smartsheet column to map Jira fields to
- Certain fields from Jira will appear with only a unidirectional mapping option (Issue Key, Jira Link, Issue Link, Created Date, etc.). These fields are read-only from Jira and cannot be written from Smartsheet
- Jira hierarchies above epics are not supported since JIRA does not make hierarchy information above Epic level available via their API for JIRA server or Data Center
Step 3: Jira Filters
Do:
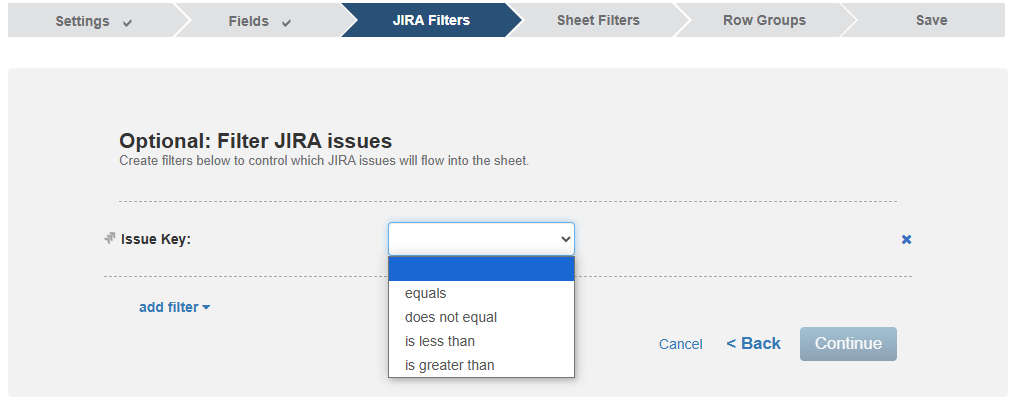
- Use filters to better control the volume and type of issues you work on in Smartsheet.
- Use filters to avoid duplicated issues in both products
- Only use native Jira functionality concerning filtering via JQL. See Jira Documentation
- Leverage the use of filters to mitigate performance issues to avoid overlap on what will trigger webhooks
- Filter criteria that appear by default depend on the Jira project types you mapped.
- Select the Add field at the bottom of the filter page to add more criteria.
Limitations
- If you create multiple filters using the workflow wizard, remember that filter criteria always use an AND operator for successive filters. Criteria and operators will be specific to the Jira projects used in the workflow.
- Filter operators vary depending on the field type (for example, text fields will have operators appropriate for text).
- For Jira Cloud, you can only use certain fields to filter Jira issues in the Jira Connector.
Step 4: Sheet Filters
Do:
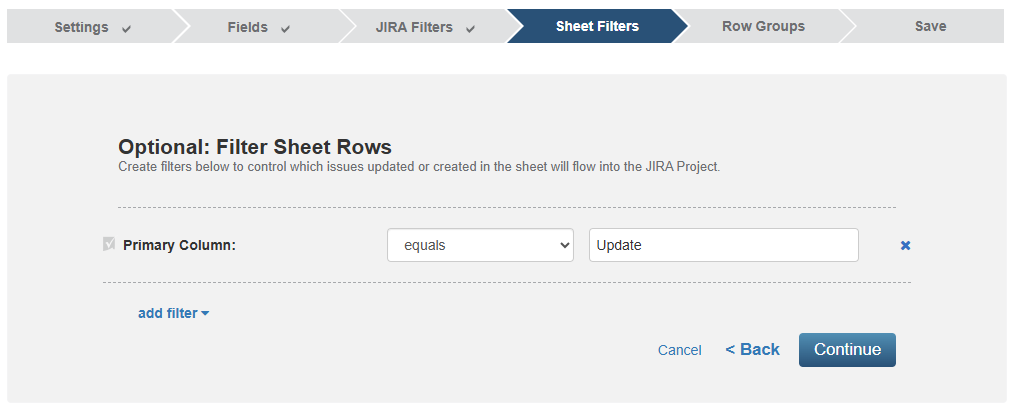
- Utilize sheet filters to reduce the range of rows on the sheet that won’t be synced with Jira.
- Select the column that will exclude the most number of Jira records first
- For additional control over which rows push data back to Jira, create an Update Issue in the Jira column in the sheet and a filter in the Smartsheet for Jira workflow.
- You plan to connect to the Jira project in the sheet, create a new column, select the Checkbox type, and name the column Update Issue in Jira.
- Add a filter that syncs only rows from the sheet with the Update Issue in the Jira column checked.
Limitations
- If you create multiple filters using the workflow wizard, filter criteria will always use an AND operator for successive filters.
- Filter criteria will depend on the columns present in your sheet. If you want to filter on other options that are not listed, you must add the new column you want to filter onto the sheet.
Filtering operators will vary depending on the field type (Ex, text fields will have operators appropriate for text, such as is blank or contains).
Step 5: Row Groups
Topic | Best Practices/Limitations |
|---|---|
Row Groups |
|
Add Custom Groups |
|
Step 6: Save Workflow
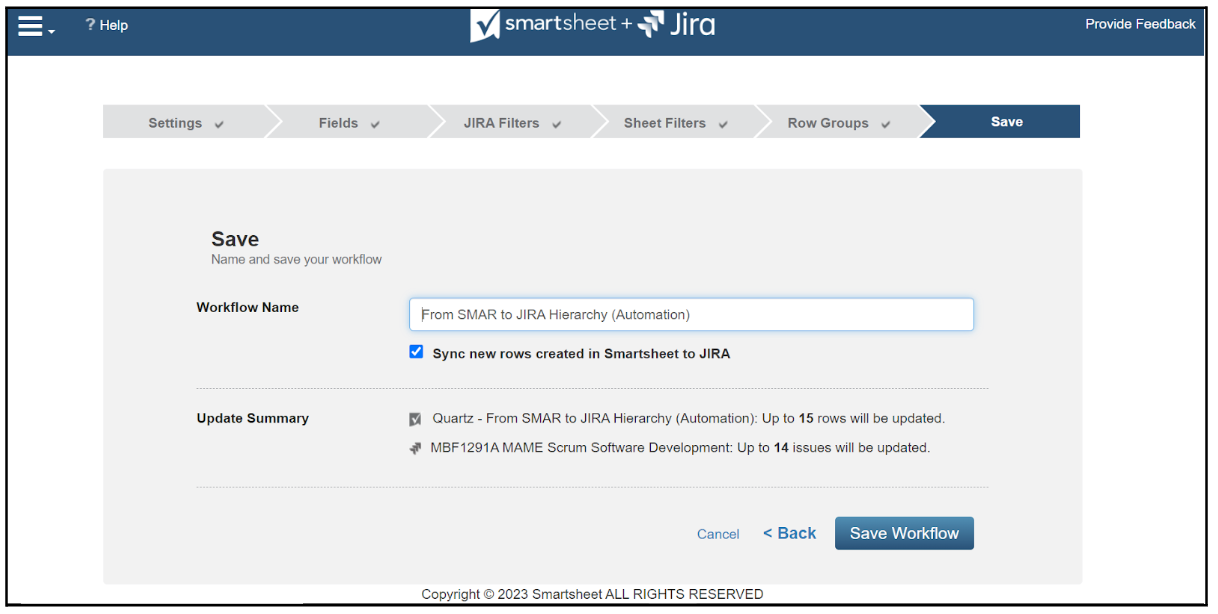
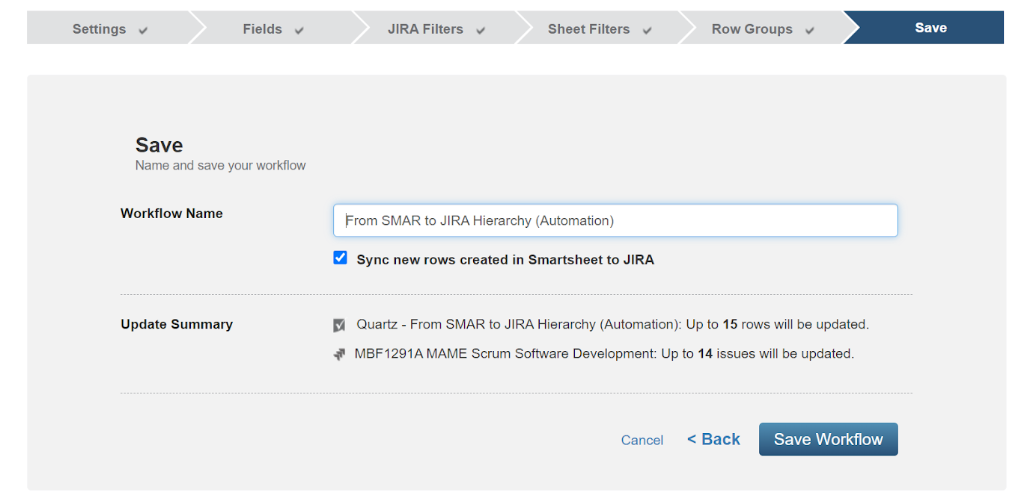
Topic | Best Practices |
|---|---|
Workflow Name | Indicate in the name the action of the workflow for easier management and maintenance (i.e., Jira to Smartsheet | Project A, Bidirectional | Projects A, B, C) |
Update Summary | Before saving the workflow, confirm that the sheet in Smartsheet, the Jira Project, and the Data Synchronization direction have been selected correctly. You will not be able to change these settings after saving the workflow. |