Smartsheet Control Center provides a simple interface to collect and respond to requests for new projects.
Smartsheet Control Center: Set up an intake sheet
The role of the intake sheet in a blueprint
An intake sheet uses the data collected to automatically populate your project sheets' Summary section (or profile data).
With an intake sheet, you can standardize and restrict access to profile data for each project and lock items like Budget or Project Due Date to prevent team members from changing important data points.
You don’t have to lock all your fields—you can also allow manual data entry when creating a project.
An intake sheet also helps manage demand.
Here’s an example of a typical workflow:
- Your team submits proposals or requests for new projects through a form
- Managers then review and approve or deny each project, all from a single sheet
- You can now create approved projects in Smartsheet Control Center
Create and configure the intake sheet
To get started, open Smartsheet:
- Open the workspace panel or select Home > All workspaces...
- Locate the Admin workspace in the left panel if you've already created one.
- Create a new sheet.
- Type a name for your intake sheet.
- Save any changes you make to the sheet.
Configure the intake sheet with specific columns.
A Project Name column is always required.
Ideally, create the following columns in your intake sheet:
Project Name (Required)
Enter the name of each project in this column. When you create a project, this information is the name for the entire project. Place it in the Primary Column in your Summary.
Approval (Optional)
An Approval column restricts which projects you can create in Control Center. You can only create approved projects when you use the Require an approval state. Without an Approval column, any project on the intake sheet can be provisioned.
Use a checkbox or dropdown column and update it whenever you approve a project. This way, you only create approved projects in Control Center.
Project Created (Optional)
A Project Created column restricts the project to a single instance. If you mark a project as created, it doesn't appear as an option to be provisioned again.
Use a checkbox or dropdown column and update it when you approve each project to help prevent duplicate projects.
Project Link (Optional)
In the Intake Settings screen of the blueprint builder, you get the option to add a project link.
This is a shortcut to the project itself that is placed on the intake sheet. Clicking the link takes you to the project directly.
Intake Profile Data (Optional)
- Additional columns can automatically populate the Intake Profile Data when you create a project.
- Give these columns the same exact name that you did in your profile data.
- Configure this as a Contact List column if you want to use profile data for setting permissions.
Best practices to streamline your intake process
- If you approve projects, restrict sharing to Editor-level permissions.
- Create a Smartsheet form to make it easier for people to make project requests.
- Build an alert to notify project approvers when a new project request comes in.
- When setting up your blueprint, use the Advanced intake options section to allow users not added as Additional Leads to provision projects.
- Add more columns to track multi-stage approval processes. You only need the final approval to create the project.
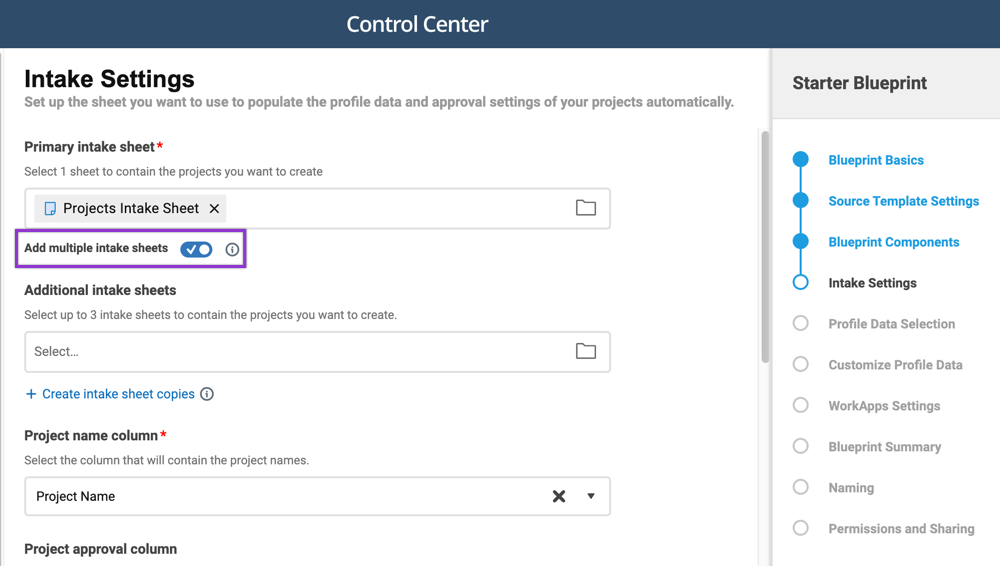
Add additional intake sheets
You can create a maximum of four intake sheets and manage up to 5000 projects per sheet.
To include additional intake sheets, you should:
- Select Manage Program and choose your blueprint.
- Navigate to Intake Settings.
- Turn on the Add multiple intake sheets toggle.
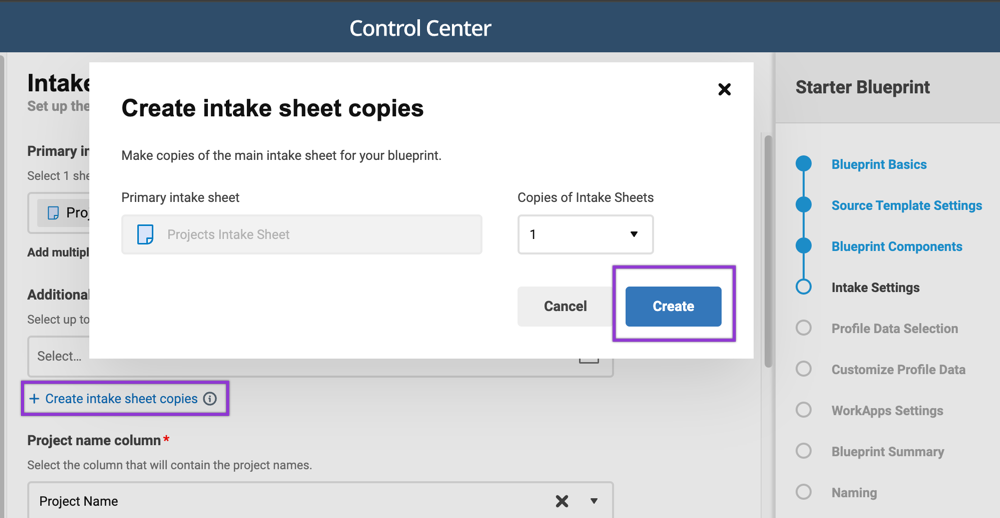
Duplicate your intake sheet
You can duplicate your current intake sheet by selecting Create intake sheet copies > Create.
Things to consider if you have multiple intake sheets:
- Each time you create a copy, the system copies the existing intake sheet.
- Your blueprint now identifies that you have multiple intake sheets.
- The system automatically synchronizes your profile data with your multiple intake sheets.
- You can provision projects from either of your intake sheets.
- Use multiple intake sheets for blueprints that have more than 1000 projects.
Things to avoid if you have multiple intake sheets:
- Don’t move projects between sheets to avoid breaking cell links.
- Don’t delete project rows from the intake sheet as you can’t retrieve them.
- Don’t use multiple intake sheets on multi-tier blueprints.
- Don’t use multiple intake sheets for blueprints that have fewer than 1000 projects.


