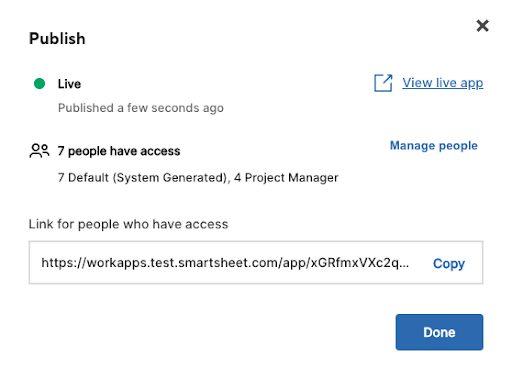
Once you configure the roles, publish the app, and add collaborators and stakeholders to each role, your team can start using the app.
Once an app is published it's made available automatically on both desktop and on Smartsheet mobile app.
Before publishing your app
You can personalize your app using your organization’s branding. To do so, select the gear icon in the top right corner, and then select App theme. to edit or include a logo, an accent color, a thumbnail image, or a bookmark icon.
you can also select Restore all to default to set all your branding to the default branding options provided by Smartsheet.
Select Done when ready.
Publish your WorkApp
You can view the publish status of your app under the name when the app is open, or directly in WorkApps Home . The inital status is Draft.
To publish your app:
- Select the Publish button in the top-right corner.
- Optional: select Manage sharing to add collaborators to roles. Open the Manage sharing window by selecting the collaborators icon
.
- Select the role you want to assign people to, then enter the names (if they're in your contact list), email addresses, and contact groups you want to assign. You can also remove people from this tab.
- Select Done when you’re ready.
Once you’ve published your app and added people to roles, those people can access the app from Smartsheet, mobile, or through the app link, which you can find by selecting Publish again and copying the link.

Once published, you can't unpublish the app. You need to either remove all the roles, remove people, or delete the app.
Edit a published WorkApp
If you make structural changes to the app, like adding or deleting new pages or roles, or updating app branding after you’ve published it, you need to select Publish draft to make those changes visible.
If you make any page permission changes, such as changing a sheet page permission from Viewer to Editor for a role or adding/deleting people from a role, you don't have to republish the app to make the changes available to your end user.