Learn about the areas in account settings that impact key project settings such as setting up default names for phases, categories, clients, and work status.
Import or update multiple projects at once
Download the template, fill out the fields, and import your data back into Resource Management.
Prepare your data
To add new projects
- Go to Settings > Account Settings > Project Import.
- Select Download Template.
- Using a spreadsheet program, add new projects by filling in the information into blank rows.
- Save the file as CSV UTF-8.
To update existing projects
- Go to Settings > Account Settings > Project Import.
- Select Export Project List.
- Using a spreadsheet program, change the attributes of the projects you want to update.
- Save the file as a CSV UTF-8.
Tips and tricks
Follow these guidelines to prepare your data:
- Make sure to encode CSV files in UTF-8 to prevent errors on rows with special characters.
- Each project must have a Project Name and Project Type. All other fields are optional.
- Project start and end dates must be in YYYY-MM-DD format.
- You can create new clients in your spreadsheet.
- Custom field values entered in this sheet must match available options in Account Settings > Project Custom Fields.
- To add multiple custom field values, separate each field value with a semicolon “;”.
- To add multiple project tags, separate each with a semicolon “;”.
- Leaving fields blank applies blank values.
- To save time combine new projects and project updates in the same spreadsheet and upload them together.
Upload your updated project list
- Go to Settings > Account Settings > Project Import.
- Select Choose file and then select your updated CSV file.
- Click Upload.
You can navigate away from the page once the upload starts. The import will run in the background, and you'll receive an email when it's complete.
If there were errors during the import, the email will include a link to the status page. Select the link to download a list of errors with directions on how to fix them.
Column inputs and formatting
This table provides details for each column in your spreadsheet.
| Fields | Required field | Description | Formatting requirements |
|---|---|---|---|
| project_id | Yes* (for editing projects) | The Project ID stores all project attributes. Exporting the project list will include Project IDs for existing projects. | Must be a valid Project ID in the organization.
To create new projects, leave the Project ID column blank.
To update attributes for existing projects leave the Project ID intact. |
| project_name | Yes | Project name or title. | 0-255 characters |
| client | Optional | Client name. A new client will be created if it doesn’t already exist. | 0-255 characters |
| project_type | Yes | Define the type of project. | Confirmed Tentative Internal |
| start_date | Optional | Set the project start date. If no date is provided today’s date will be applied to the start date. | Date format: YYYY-MM-DD |
| end_date | Optional | Set the project end date. If no end date is provided the end date will be two months after the start date. | Date format: YYYY-MM-DD |
| project_code | Optional | Add an external code to reference the project in another tool. | 0-255 characters |
| project_tags | Optional | Add tags to identify unique characteristics for the project. | 0-255 characters
Separate multiple entries with a semicolon. |
| time_entry_locking | Optional | Set the project to lock incurred hours. | Off = Disables On = Enables Number = Locks time entries older than the specified number |
| CF_## “name” (text field) | Optional | Add a string of text to the custom field. | 0-255 characters |
| CF_## “name” (drop down) | Optional | Set an existing custom field value for the project. | Ensure any values entered in this column are saved as options for this field in the Account Settings > Project Custom Fields page |
| CF_## “name” (multi-select drop-down | Optional | Set existing custom field values for the project. | Ensure any values entered in this column are saved as options for this field in the Account Settings > Project Custom Fields page.
Separate multiple entries with a semicolon. |
| project_owner | Optional | Define the person who owns the project. | Format: [User ID] [Full Name] Can be left blank. |
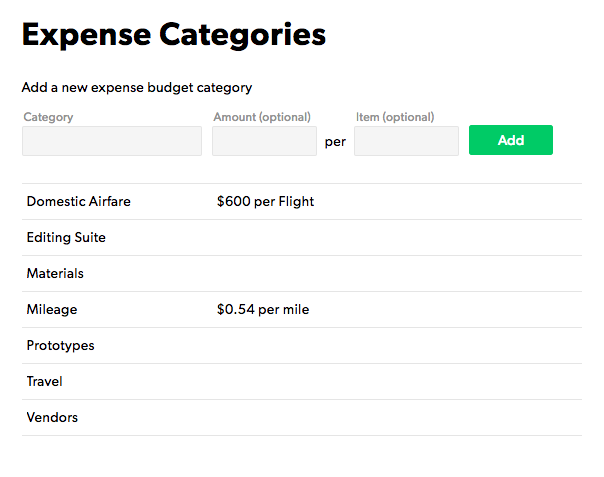
Manage expense categories
Expense categories make it easy to track recurring expenses, and you can use them when you create projects. You call also set suggested amounts for each category. Your team will use these categorize when they submit their expenses.
Create company wide expense categories
- Go to Settings>Account Settings.
- On the left sidebar, click Expense Categories and add your new category.
Create project specific categories
- Go to Project > Project Settings.
- Scroll down to Fee Budget (Amounts).
- Select either Specify one fee budget for the entire project or Specify a fee budget for each phase.
Add new expense categories as needed.
Categories added here are for this project only.
Add time and fee categories
Time and fee categories are classifications of time entry hours. Using the itemized time tracking tool, team members can report actual incurred hours for each category of time. Time & fee categories can include things like travel, meetings, research, or production. Frequent, standard work activities make good categories and provide useful data in reports.
You can create additional, project specific categories in the budget settings for each project. Also in reports, you can group data so you can see how much time is spent on each category.
Standardized categories means everyone is using the same categories; this gives you more useful data.
Create a new category
You can add new categories at any time.
- On the top bar, select Settings and then select Account Settings.
- On the left side bar, select Time & Fee Categories.
- Enter a name for the new category and then click Add.
Create a project specific category
- In the top right corner of the project, select Project Settings.
- Under Fee Budget (Amounts), select Specify one fee budget for the entire project or Specify a fee budget for each phase
- Enter a new category for each line item you want to track.
- Scroll down to the bottom of the page and select Save. The new category appears in reports for this project.
Add project or people tags
Tags work well when you have basic requirements for filtering, but custom fields offer a lot more power. Custom fields can push default values to people and projects, provide dynamic filtering, and integrate with Smartsheet's advanced capabilities. Learn more about custom fields.
Resourcing Administrators can add, edit, and delete tags. It’s good practice to have strong communication between administrators and project managers to maintain consistency in tagging.
Create new tags
- Log in to rm.smartsheet.com.
- In the top right corner, select Settings > Account Settings.
- On the left sidebar, select People Tags or Project Tags.
Project tags
Add project tags to create project categories or characteristics for filtering projects on the project portfolio page and in reports.
Deleting or updating a tag removes or updates the tag for all associated projects.
People tags
Add people tags to identify skills or other characteristics. You can search tags or skills in Reports and on the Approvals page.
Use custom fields to increase employee profiles' depth and usability with properties like certifications, managers, and organizational structure.
Some examples of people tags are:
- Java
- Mentor
- French-proficient
- UX/UI
- Storytelling
- Illustration
People can have multiple tags.
Deleting or updating a tag removes or updates the tag for all associated people.
Add people or project tags to a profile or project
- Select the profile or project you want to work with.
- For a person, at the top right, select Edit Profile. For a project, at the top right, select Project Settings.
- At the bottom of the screen, select Add Tags.
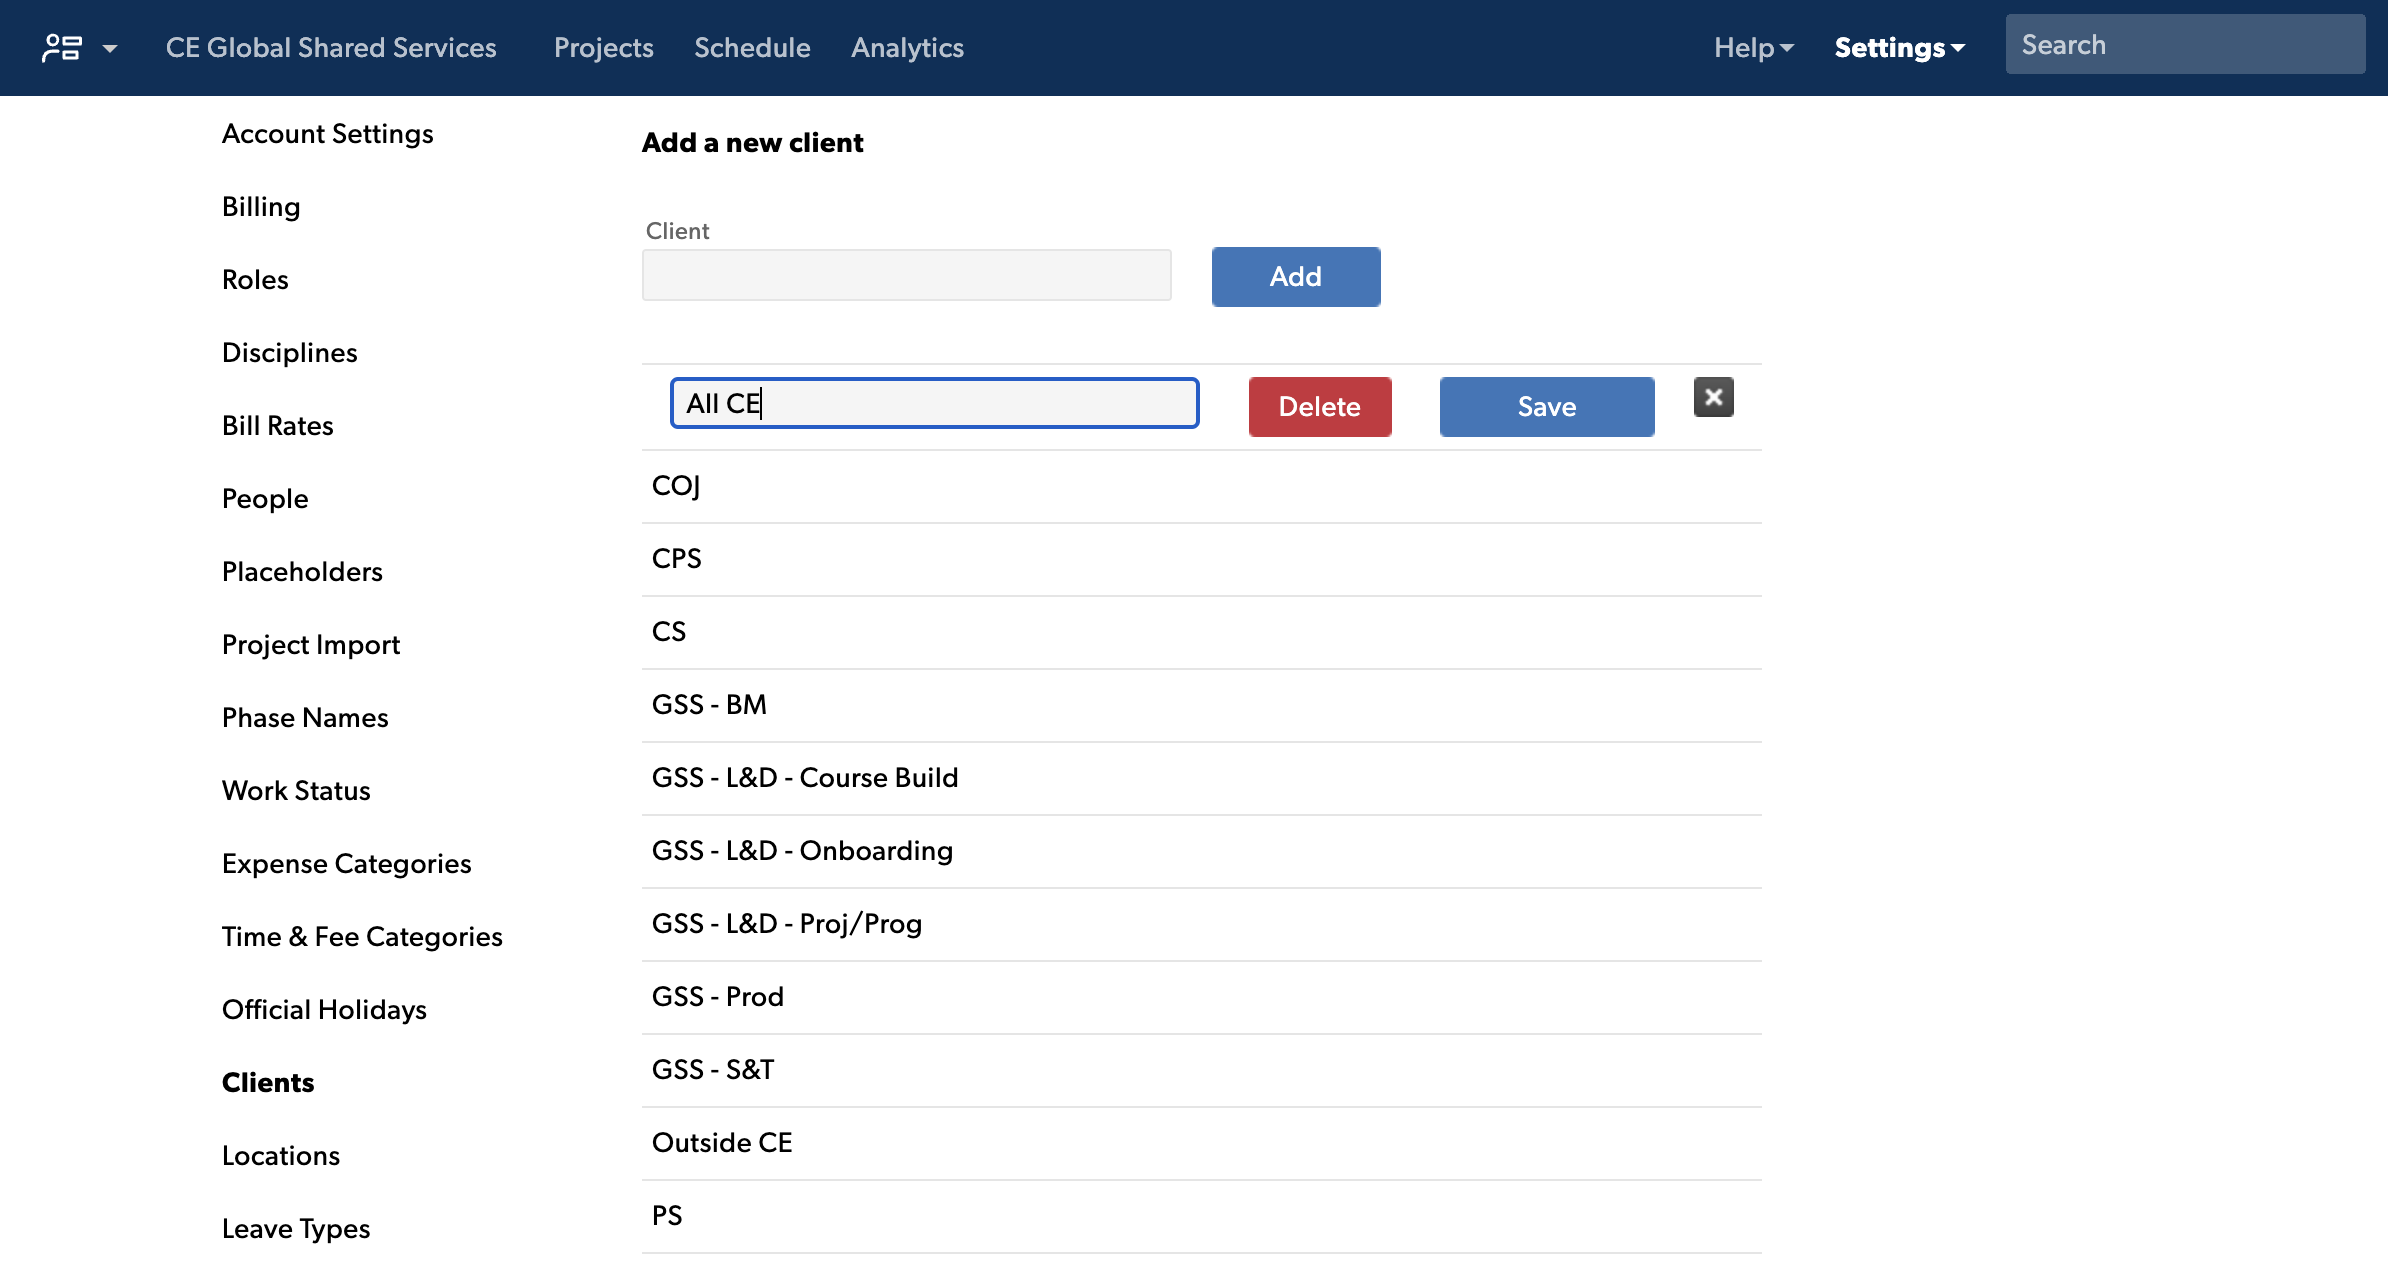
Create a client list
In account settings, you can establish a list of clients. When you create a project, you can associate that project with a client from this list. Client names can be useful when you have multiple projects per client, and you want to filter on specific clients.
Clients do not have any data associated with them other than their names. When you delete a client, they're removed from the system entirely and will no longer be associated with any projects.
Add clients
- In the top right corner in Resource Management by Smartsheet, select Settings > Account Settings.
- From the navigation menu list on the left, select Clients.
- Enter the name of the new client and then select Add. You can now associate your projects with the client.
Edit your client list
- In the top right corner in Resource Management by Smartsheet, select Settings > Account Settings.
- From the navigation menu list on the left, select Clients.
- Select the row of the client you want to edit. Then, the name field becomes editable, or you can delete the client.
- Save any changes.
Create custom work status labels
Team members can update their work status in the today view from their personal page.
To create a new work status:
- Select Settings then Account Settings.
- On the left sidebar, select Work Status.
- At the top of the screen, select a color, enter a name, and select a stage for the status.
- Select Add.
Status label tips
- Each status is a subcategory of three main categories: Planned, In Progress, or Completed
- Text labels are limited to 64 characters.
- Hover over a label and use the up and down arrows to reorder the status list.
- If you edit a work status label, the change will show on all items using the label.
- If you delete a label, items using that label remain unchanged; only the status label is deleted.
Filter by work status
To find assignments with specific statuses, filter on either the project worklist or the schedule.
To filter on the worklist
- Go to the project you want to work with and then select Worklist.
- In the top right above the worklist, select Status and check the statuses you want to see.
To filter on the schedule
- On the left sidebar in the schedule, select Work Status.
- Select the items you want to filter on.
Stay informed with notifications and the activity feed
Notifications can help you:
- Know the status of your assignments or tasks
- Know if a project you’re tracking has any changes
- Get the rundown on what’s happened during the day
The activity feed aggregates these important changes and displays them in a historical timeline on each project page and on your personal page.
Activity feed
The activity feed is a record of key project changes. It shows changes to people, projects, and assignments. Each change appears with a time and date stamp.
The activity feed is only available in English. View Resource Management in different languages.
Email notifications
Email notifications alert you about important changes to your assignments or projects. Notifications are smartly aggregated, meaning if you make multiple changes close together, they're all sent in one email to reduce inbox noise. You can also choose to receive a daily digest of the day’s activity.
Some email notifications are only available in English. View Resource Management in different languages.
Edit your personal notification settings
To change how often you receive notifications:
- Select Settings in the top right corner
- Select My Preferences from the drop-down list
- In the Notification Preferences section, select any of these options:
- Off: No email notifications. You can still see changes in your Activity feed.
- Immediately: Notifications go out as soon as changes are made. When multiple changes occur in a short time period, they’ll be grouped and sent in one email.
- Daily (default): You’ll receive an email each morning detailing changes made during the past 24 hours.
Project notifications
By default, notifications are enabled for all projects.
If you’re resourcing or planning a tentative project and don’t want to alarm or overload your team with notifications, Resourcing Admins and Portfolio Editors can mute notifications on the Project Settings page.
Following a project
You can follow the projects you’re not assigned to and get updates in your personal Activity Feed. If you're set to do so, you'll also receive email notifications about project changes.
To follow a project
- Go to the Projects page and open a project.
- Select the Activity tab.
- At the top of the Activity feed, toggle on the Follow option.
Edit account-wide notifications settings
Email notifications for people in your account are enabled by default.
If you’re a Resourcing Admin, you can set preferences in the Notifications section of the Account Settings page. Only Resourcing Admins can change notification preferences for all active people.
There are two account-wide notifications settings:
- Enable Notifications: Notifications go to all people in your account. Each person can still set their own email notification preferences from their My Preferences page.
- Disable Notifications: Disables notifications for all people in your account and hides email notification preferences from the My Preferences page.