USM Content
Configs are the workflows that bring data from your source (a sheet or report you have Viewer permissions on or higher) to target (a sheet you have Admin permissions on or higher).
Create a new DataMesh Config
USM Content
To create a DataMesh, in the source, you need Viewer permissions or higher for a sheet, and Admin permissions or higher if using a report. Similarly, you need Admin permissions or higher in the target sheet.
Follow these steps to learn how to create a new config and then run your DataMesh.
Step 1: Create a New Config
- Select the Launcher on the left navigation bar and select DataMesh. If this is your first time using DataMesh, you may need to first log in at datamesh.smartsheet.com.
- Select New Config in the upper-right corner of the screen.
Step 2: Select the source
You must have Viewer permissions or higher on the source sheet or Admin permissions or higher in a source report.
You can’t use sheet summary reports as a source.
Search or browse to find the sheet or report that contains the data you want to display in the meshed sheet.
Select the sheet or report and choose Next.
Step 3: Select the target
You must have Admin permissions or higher on the target sheet.
You can’t use reports as targets.
- Search or browse to find the sheets to which you want to copy the data.
- Select the target sheet and then select Next.
Step 4: Map sheet columns
- Identify the fields and columns to map in both the source and target sheets, and determine the information to transfer.
- The lookup values column should be the common column between the two sheets and should have unique values listed in the source.
- For example, if you want the Lookup Values to be email addresses, select the columns on both sheets that contain email addresses. Your source could be a contact sheet with client information. You create the config to pull the client’s phone number to the target sheet based on matching email addresses on the source and target.
In the Lookup Values box under Source Sheet, select the value that’s common between both sheets.
The values in the Lookup Value aren’t copied between sheets.
Brandfolder Image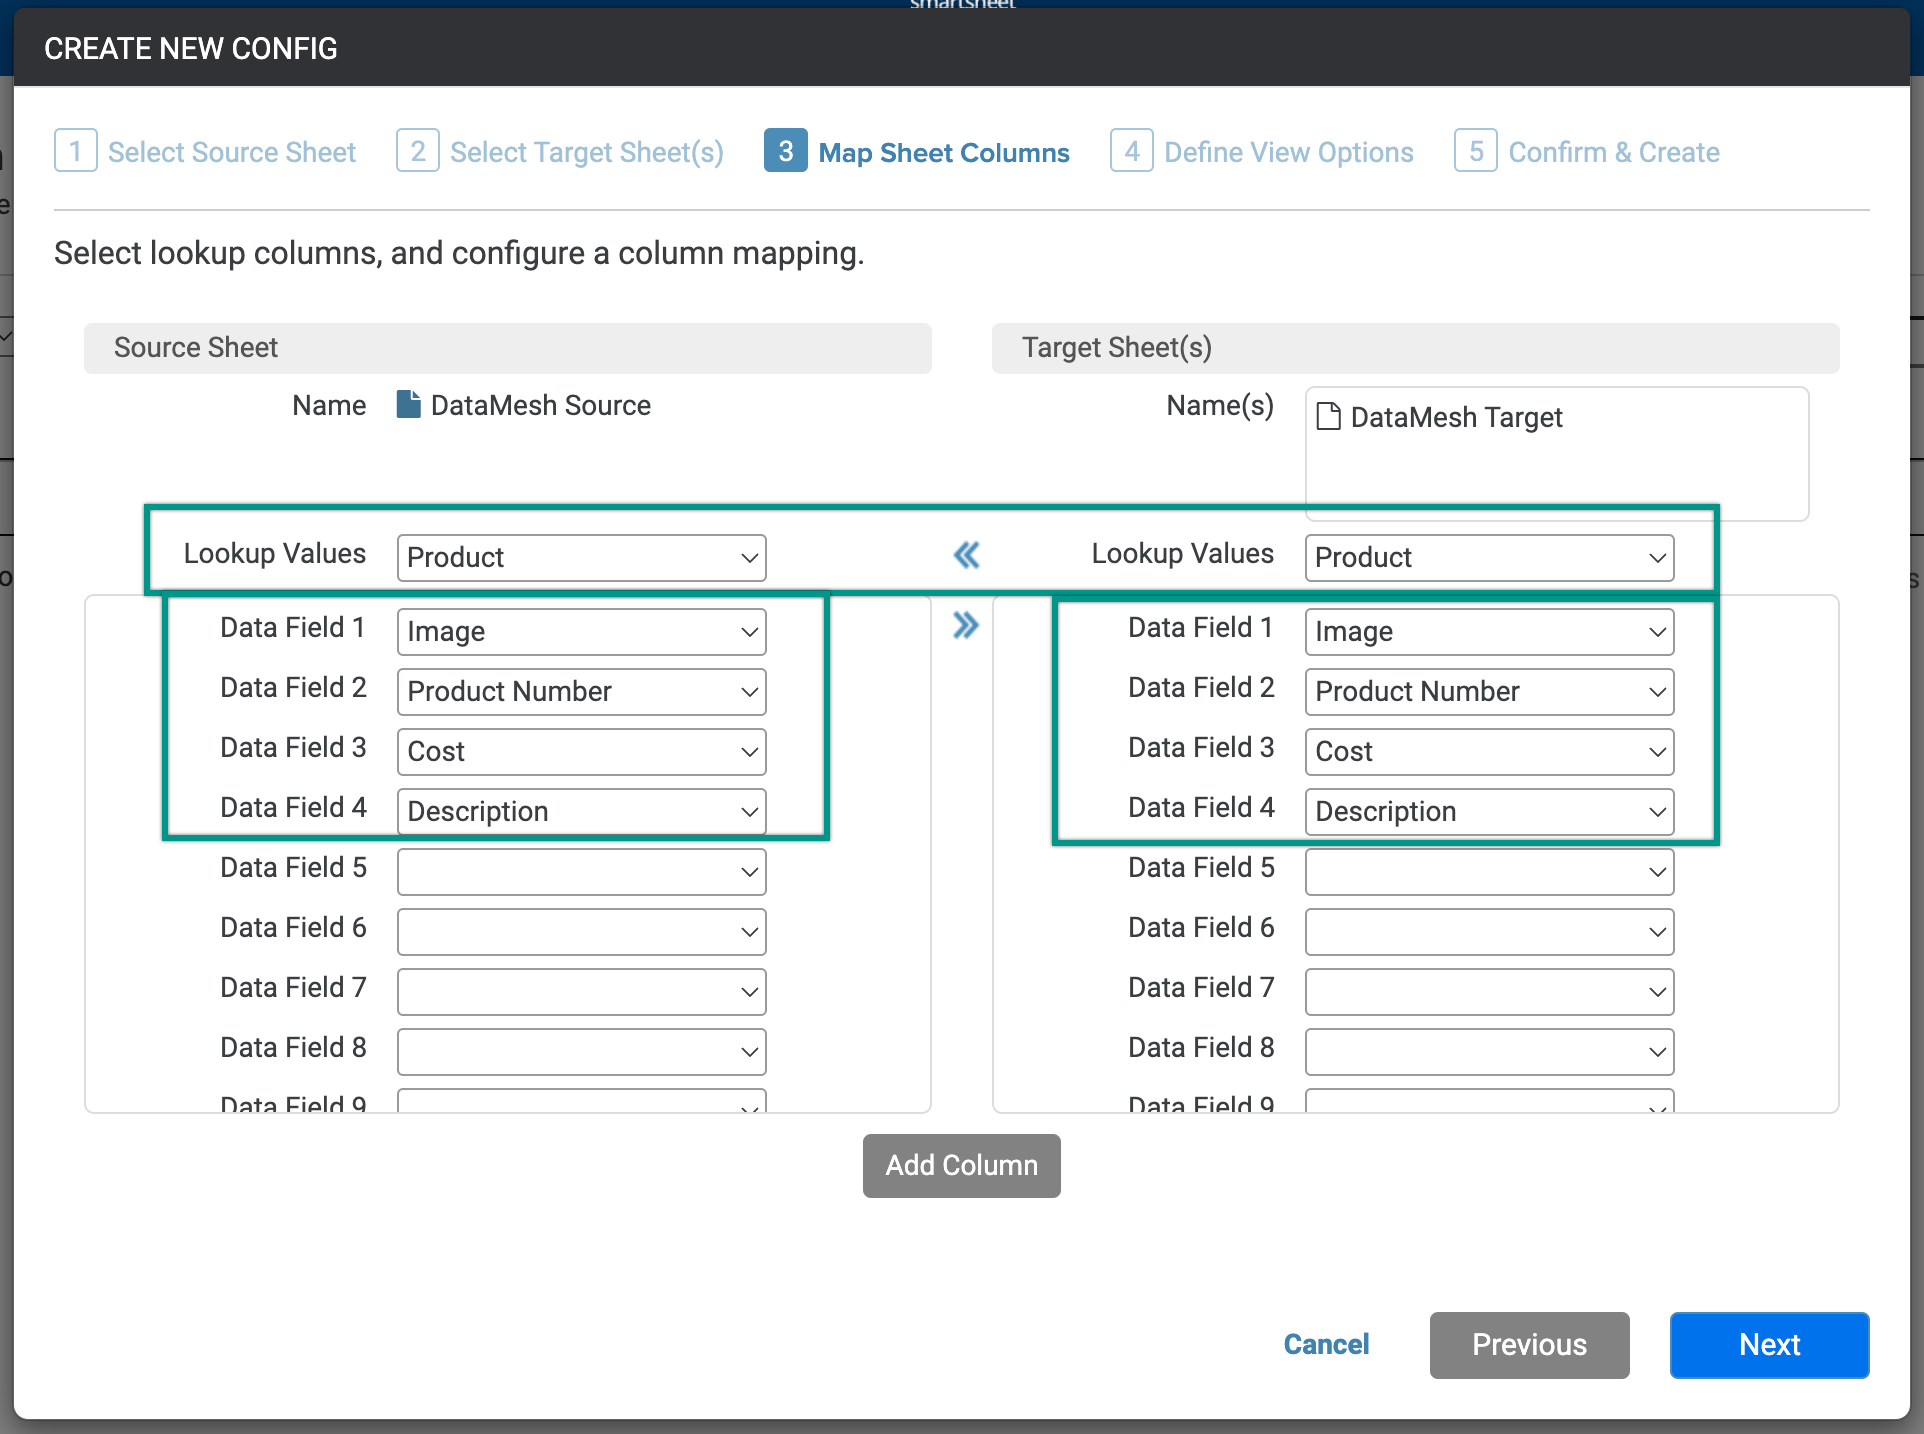
- Under the Source Sheet and Target Sheet(s) sections, select the fields to be mapped.
If the lookup value matches between the source and target sheets, the data you specify in the Data Field boxes (or column names) is copied to the target sheet.
The column names you map don’t need to match. You have an easier time if you stick to a standard naming convention for similar data across sheets.
- Select Next.
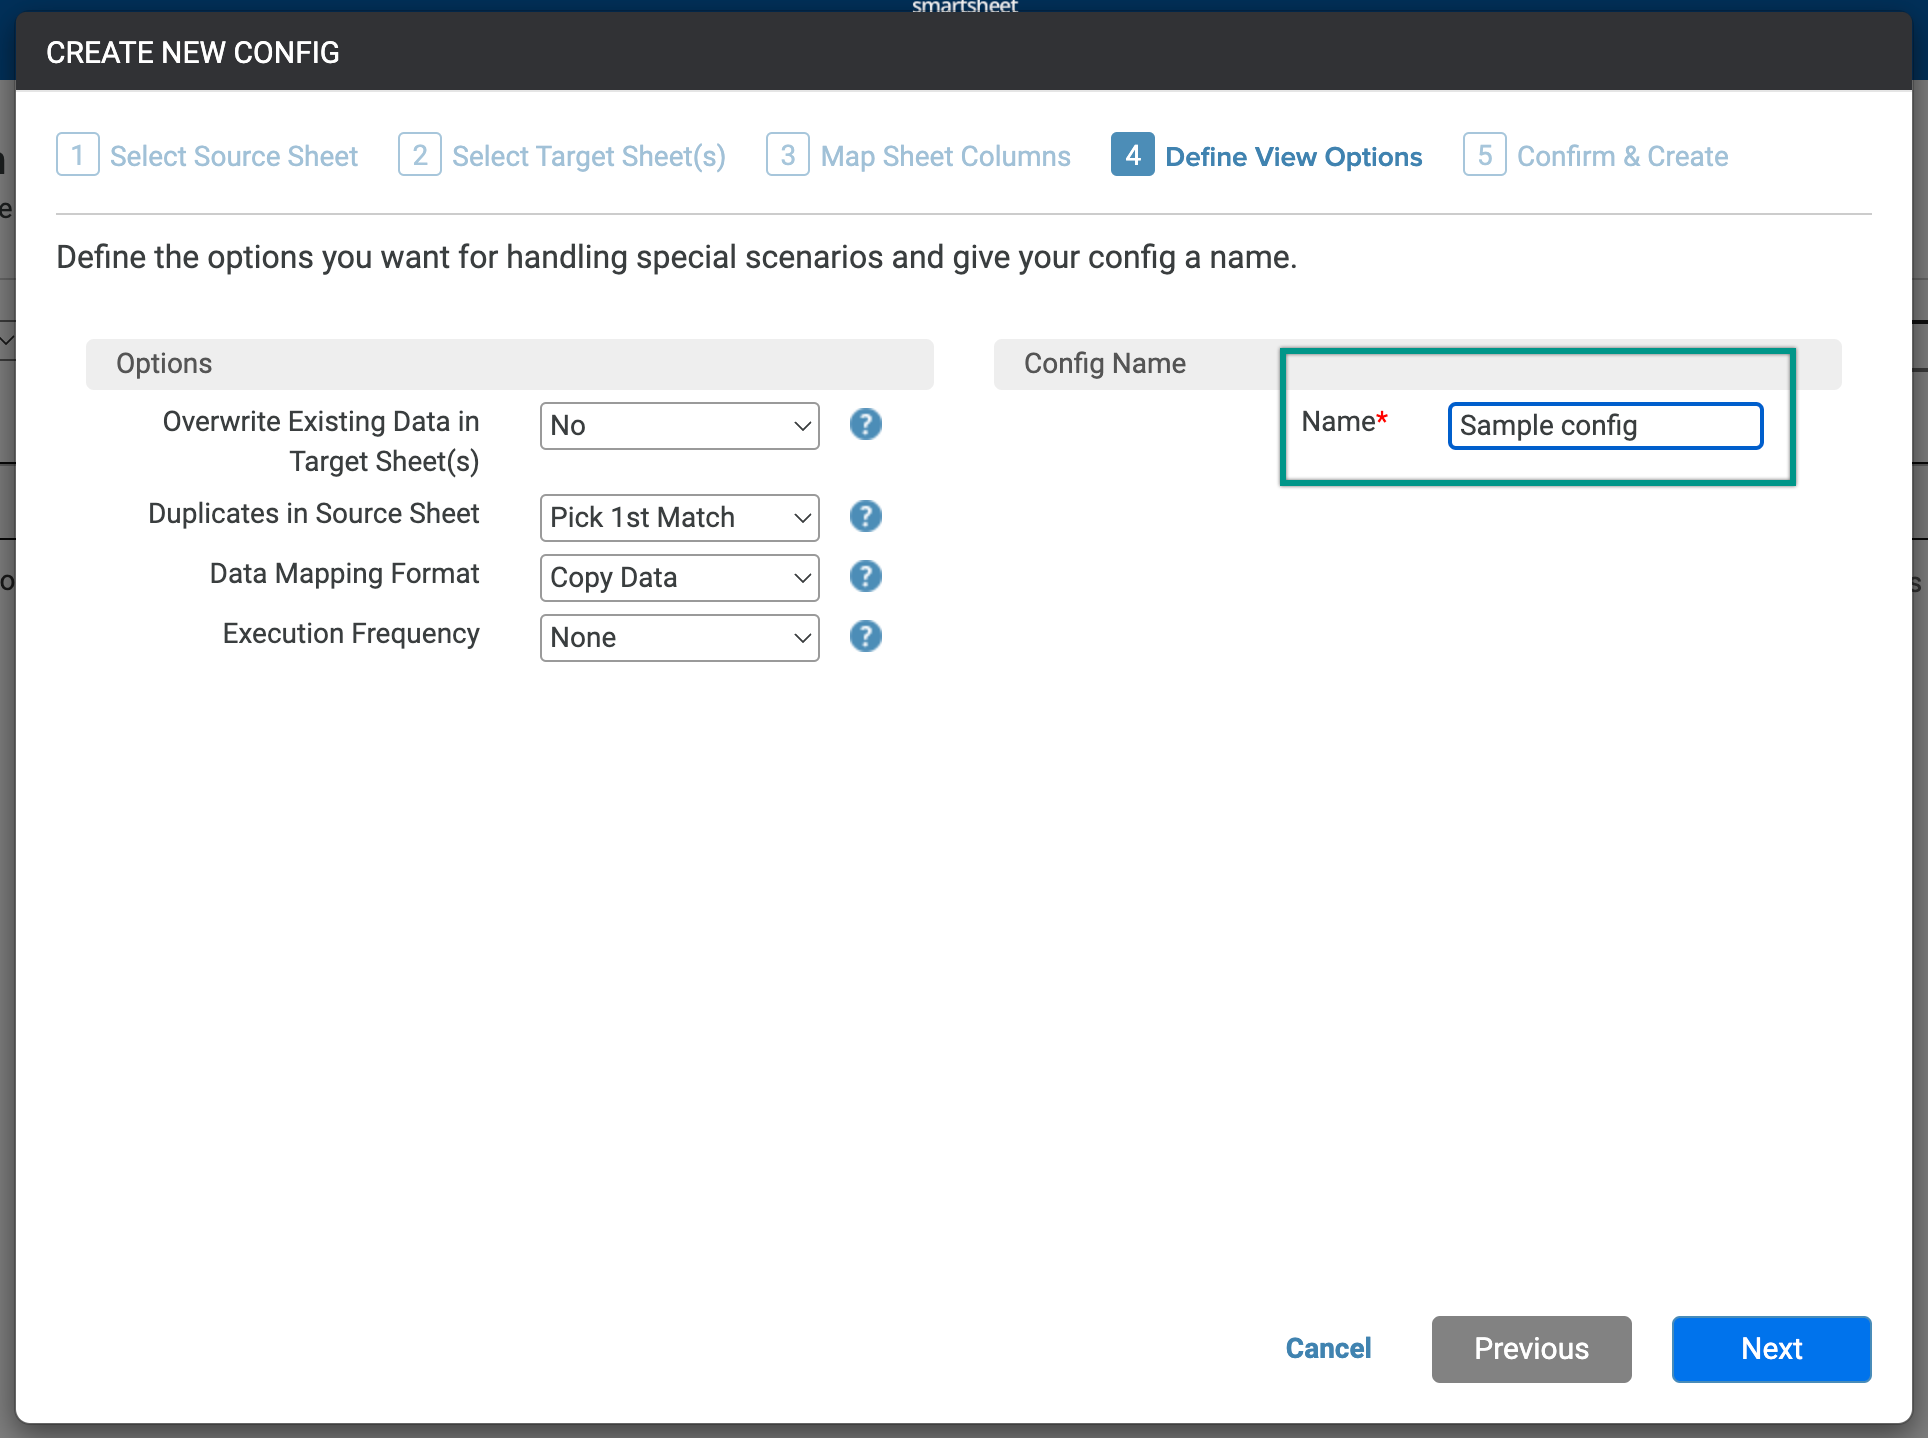
Step 5: Define view options
- Select Options to specify how (and how often) you want the data to be meshed.
- Overwrite Existing Data in Target Sheets: This controls whether cells with values can be overwritten with information from the source.
- No: Cells that already have data never update, even if there are changes to the source.
- Yes: The source updates the cells if the Lookup Value exists in both the source and target, or if there are mapped columns where the values in the target don’t match those of the source.
- Duplicates in Source Sheet: This controls how to handle duplicates.
- Pick 1st Match: Uses the first matching Lookup Value from the source.
- Ignore Entries: Skips entries with duplicate Lookup Values in the source entirely.
- Data Mapping Format: This controls how data is mapped from the source to the target.
- Copy Data: Copies data from the source to the target for Lookup Values found on the target.
Create Cell Links: This function creates cell links between the data on the source and target. Keep in mind that creating cell links counts against your sheet's cell link limits.
When you use the Create Cell Links mapping, any rich media, such as images or hyperlinks, uploaded inline to cells, are copied to the target sheet and displayed in their original format. However, if you choose Copy and Add Data mapping, the filename of the image is shown in the target sheet instead of the actual image.
- Copy and Add Data: This performs the Copy functionality while also adding all Lookup values found on the source (and values in mapped columns) to the target sheet. Use Copy and Add Data to add new entries found in a source report to a target sheet, effectively converting a report into a sheet.
- Overwrite Existing Data in Target Sheets: This controls whether cells with values can be overwritten with information from the source.
Execution Frequency: Scheduled execution frequency to update DataMesh values.
Update immediately isn't supported when using a report as your source.
- Name your DataMesh config in the Name field under Config Name.
- Brandfolder Image
- Select Next.
Step 6: Confirm & update
Confirm that you have mapped the data fields correctly, that you're happy with the specified options, and that the Config Name makes sense. If everything is in order, select Update.