The Schedule shows project timelines and assignments across your organization. Use the Schedule to understand your team’s capacity, see current project staffing, and adjust assignments as projects change.
When you change the Schedule, information on Project pages and timesheets update in real-time.
Use the schedule
On the schedule you can:
- Review project assignments.
- See and update the project status.
- View the Schedule by day, week, or month.
- Adjust project allocation as needed, watching for under-utilized or overcommitted team members.
- Find team members, skills, or roles for new projects.
- Assign people to projects.
- Sort people by role or availability.
- View the schedule by People (team member, default) or Project.
- Use the filter menu in the upper-left corner of the Schedule to switch between views.
- Use Day, Week, or Month view in the upper-left corner to zoom in or out.
- Use the arrow keys on your keyboard to scroll through the Schedule by month.
People view
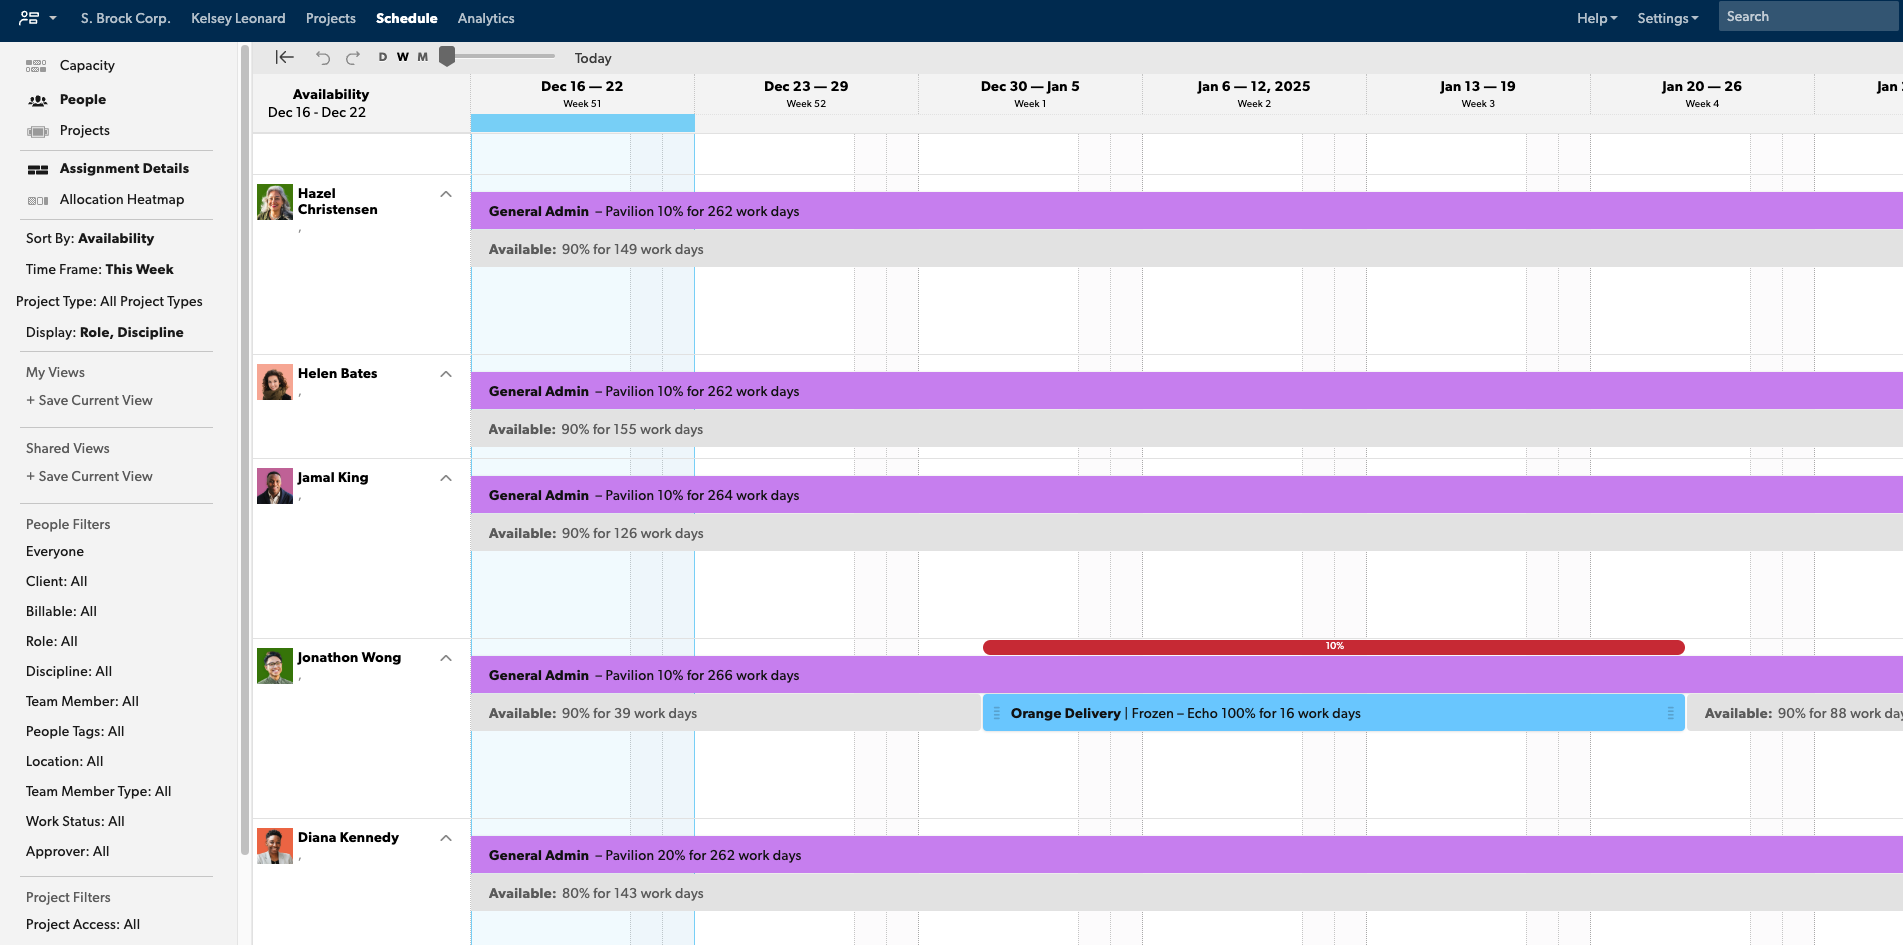
People view shows team members in the left column, with projects assigned to team members across the timeline.
Availability shows as a light gray block. If the person is overbooked, red warnings appear in the schedule. Gray vertical bars indicate weekends and holidays. Use the Allocation Heatmap to identify who’s overcommitted.
Assignments appear on timesheets for each person. When you change an assignment on the Schedule, the change also appears on relevant timesheets.
Projects view

In Projects view, Projects appear in the left column, and project duration displays on the timeline.
Hover over the project to get a quick look. Select the project and then click Show Details or Hide Details.
Capacity view
In Capacity view, your selected grouping (discipline or role) appears in the left column, with group capacity and utilization across the monthly timeline.
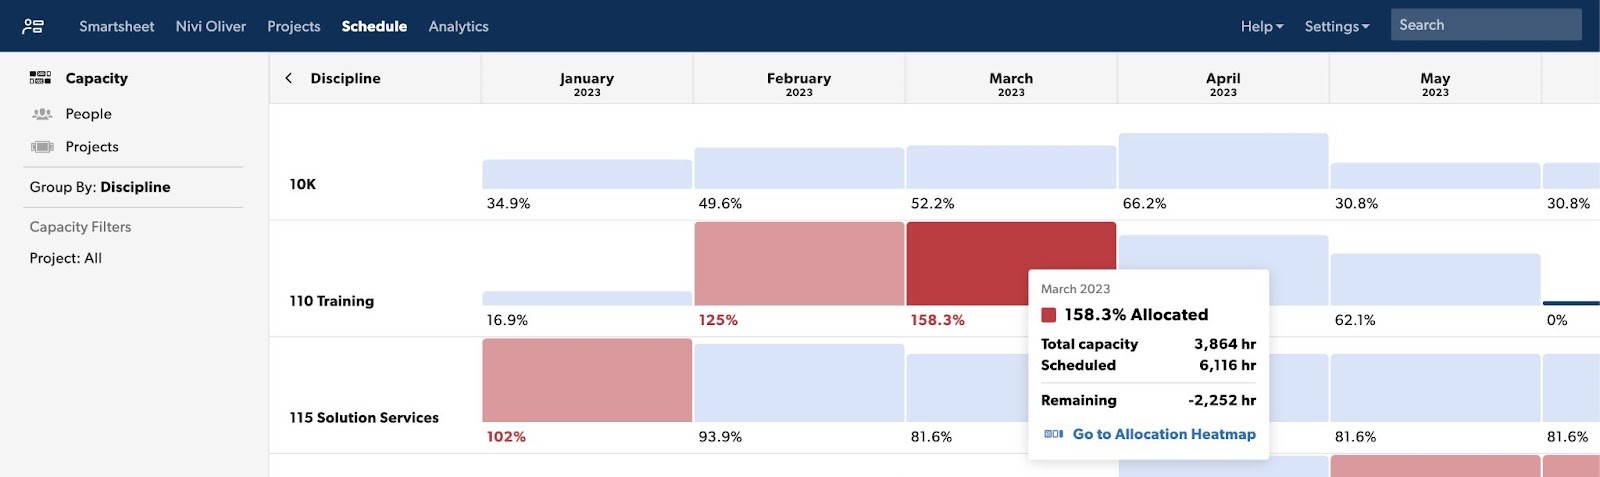
- Blue cells display the team is either at capacity or can take on new work.
- Red cells provide insights into over-utilized groups.
- Light red indicates the group is >100% and <150% utilized.
- Dark red indicates that the group is >150% utilized. Click any cell to drill down to the Allocation Heatmap and update assignments.
Learn more about capacity view.
Undo or redo an action
Undo or redo changes made to the Schedule during an active browser session. You can undo or redo up to 100 common scheduling changes, such as creating, removing, or modifying assignments.
Refreshing the page, filtering the content, or changing between People and Project views will clear your undo history.
You can't undo the following actions:
- Remove overlapping assignments.
- Split assignment.
- Repeat assignment.
- Shift project or phase.
- Change project type.
To undo or redo a change on the Schedule:
- Select Undo/Redo on the timeline bar. You can select Undo/Redo to undo or redo multiple actions.
- On your keyboard, select Ctrl + Z (PC) or Command + Z (Mac) to undo, and Ctrl + Y (PC) or Command + Y (Mac) to redo.