Organize tasks, work items, or ideas into actionable with card view.
What you can do in card view depends on the sharing permission level in the sheet. Review this table for details about specific actions you can take in card view.
Board view is an improved card view experience. It has an all-new, modern look and feel and includes key new features and functionality to make working on a board faster, easier, and more collaborative than ever. Learn more about using board view to visualize your project.
The Card View can be adapted to several project management methodologies (including agile); it functions similarly to scrum or kanban.
Card View works in any sheet that includes at least one Dropdown (Single Select) or Contact List column.
Work in card view
- On the toolbar, select the View list.
- Select Card View.
- Optional: In the right area of the toolbar, select:
- Compact View - Only displays the card title.
- Full View - Displays the selected fields in each card.
In Card View, you work with lanes, cards and fields:
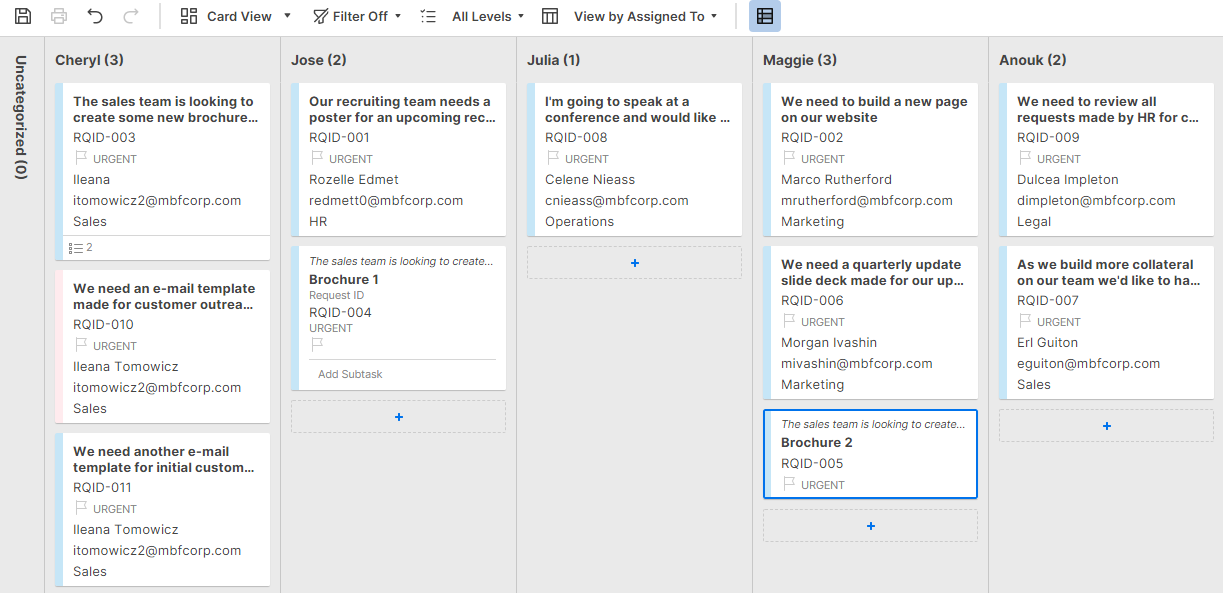
- Lanes: The values specified for the column in the Grid View, become the lanes. They are at the top of the Card View window. Card View displays a maximum of 64 lanes.
- Cards: The tasks or work items that appear within the lanes. In Grid View, each card appears as a separate row
- Fields: The items that appear on the cards. To see the field name associated with a value, hover over the value in the card.
Work with Card View lanes
A lane is equivalent to a value in a dropdown, contact list, or symbol column in Grid View. When you switch to Card View, a value in a column becomes the heading of the card view lane.
You can change what appears in your card view, so you can organize cards the way you want. However, you can't view these column types as lanes in card view:
- Dropdown (Multi Select)
- Contact list columns that allow for multiple contacts
Edit lanes
- On the toolbar, select the View by list. This list is filled with the dropdown column types in your Grid View.
- Choose the grouping you want to switch to.
For example, to arrange the lanes according to the task owner, select View by Assigned To.
Brandfolder Image

The View by setting is unique to you. Others who view the sheet aren't affected if you select a different View by option. Anyone with access to the sheet can choose a different View by setting.
Fix cards in the Uncategorized lane
Smartsheet adds cards to the Uncategorized lane if it detects any of these behaviors:
| User behavior | Resolution |
|---|---|
| User behavior You switched lanes for which some cards do not have field entries | Resolution, Resolution Drag them to the appropriate lanes, or if it does not make sense to sort them, leave them in the Uncategorized lane |
| User behavior The number of lanes is more than the 64-entry display limit | |
| User behavior In the contact column of your sheet, you edited the existing value with a different contact | Resolution
|
Show or hide a lane
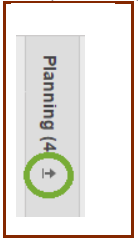
- Collapse or expand lanes in card view to focus on select groups of cards. In the heading of the lane you want to hide, select the Collapse Lane icon.
To expand collapsed lanes, in the lane you want to expand, select the Expand Lane icon.
Brandfolder Image

Reorder lanes
Drag lanes into the order you want. When you drag a lane, you also change the order of the values in the dropdown column that it is associated with.
You must be an Owner or an Admin of a sheet to edit or reorder lanes. If you don't have the right permissions, you can't drag lanes.
Add a lane
- In the rightmost lane, select Add Lane.
- Type a name for the lane.
- Press Enter, or select any portion of the screen.
Depending on your View by setting, you can name a new lane with a dropdown, or a contact list column:
- Dropdown column: When you add a lane while viewing by a dropdown column, Smartsheet adds the name of the new lane as a value to the dropdown list.
- For example, if you add a lane while View by is set to Status, the new lane name is added as an item in the dropdown list for the Status column in grid view and Gantt View.
- Contact List column: When you add a lane while viewing by a contact column (e.g., Assigned To), type your contact’s name as the new lane’s name. A dropdown list will appear once you type a contact name. From there, you can choose the user you want to add in the contact list column.
Change the name of a lane
- Double-click the lane name.
- Type the new name.
- Select Enter.
You can't rename or reorder symbol lanes.
Merge contact lanes
When you select a contact list column in View by, you may have multiple lanes with cards assigned to one person. For example, you may have multiple lanes named Sally Smart (if Sally is assigned to cards with more than one email address), or you may have a lane named Sally and another lane named Sally Smart. You will have more than one lane because both the name and the email address of a contact need to match, otherwise they are treated as separate people with their own lanes.
To merge lanes and match contacts
- Change the name of the lane you want to merge with another lane.
- In the dialog that appears, select Merge to combine the lanes.
- To undo the change and keep the lanes separate, select Cancel.
View resource overallocation
If you enable resource management, you see the overallocation of your resources.
To reassign cards to someone else
- In card view, view the cards by a Contact List column.
- Drag overallocated cards to different lanes/contacts.
To identify overallocated resources, look for a red silhouette icon in the lower-left corner of a card.
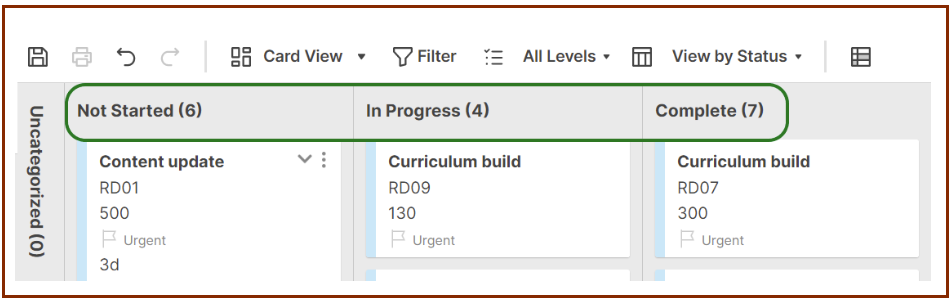
Visualize task status with symbol lanes
You can view lanes by symbols to see and easily move cards into desired symbol categories. For example, you can move cards from the Red lane to the Yellow lane to make changes to the task status.
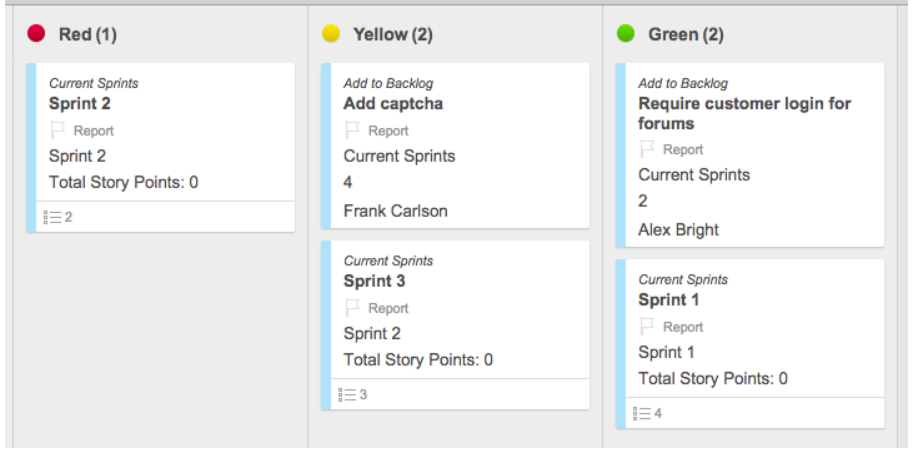
Keep the following in mind when viewing lanes by symbols:
- The text label is displayed to the right of the visual symbol.
- You can't view flag and star symbols as lanes.
- The symbol lanes follow the order of the symbol column options you see in grid view. If Red option is the first option of the symbol list in grid view, it appears as the first lane in card view.
Move cards
To move a card, drag it to a lane or across lanes.
Moving a card up or down within a lane will not affect its content. In contrast, when you move a card from one lane to another, the value for the field will be updated to reflect the value of the lane where you moved the card.
For example, if you moved a card from the Client Summary lane to the Pending Sale lane. The field value for State changes from Client Summary to Pending Sale. You can see this change if you open the card to edit it or if you switch to Grid View.
Keep cards organized with subtasks
Define relationships between tasks, and organize subtasks with a parent task. You can add subtasks both in the Grid View and Card View:
- Grid View: Indent rows under a parent to create a hierarchical relationship
- Card View: Directly add subtasks to another card
- Hover over the card where you want to add a subtask.
- Select the Expander icon > Add Subtask. Another way to add a subtask is to select Menu > Add Subtask.
- Type the task.
Subtasks created this way are displayed as child rows to the task in Grid View.
Filter subtasks by levels
Quickly view subtask cards by their relationship with other cards with the level at the top of the Smartsheet window.
The default filtered view for new sheets is All Levels.
Publish from Card View
Owners and Admins can use Smartsheet's Publish feature to share that sheet with others via a unique URL.
Here is how you can specify Card View as the default view for a published sheet:
- On the feature bar, select Publish
 .
. - To create a shareable link, turn either of these sliders on:
- Read Only - Full
- Edit by Anyone
- To open the Publish Links form and specify options for the link, select Get Link.
- In the Default View list of the Publish Links form, select Card.
In card view, you can print only individual cards.
Tips to get the most out of Card View
Here are some ways you can be more efficient when you use Card View.
Use keyboard shortcuts to navigate quickly
| Shortcut | Description |
|---|---|
| Shortcut Arrow keys | Description Select card |
| Shortcut Spacebar | Description Expand or collapse card |
| Shortcut Enter | Description Open the edit row form |
| Shortcut Shift + Enter | Description Add card (enter a title and press Enter again to add the card). You can also use this keyboard shortcut to add a subtask to a card. |
Create a checklist of subtasks
You can create a checklist in a parent card from subtasks that you can mark as Complete or Incomplete. A ratio of completed subtasks is displayed at the bottom of the parent card.
To turn add a checkbox or designate a checkbox column for your subtasks
- In the right side of the toolbar, select Settings
 .
. - In the Subtask Checklist Field list, select an existing checkbox column as your Subtask Checklist field.
If you don't have an existing checkbox column, follow these steps:
- Select Add Field.
- Type a name for your new checkbox column.
- Select Checkbox.
- Select OK.
- In the Subtask Checklist Field, select the field you recently added.

