Возможности загрузки и выгрузки данных Data Shuttle позволяют создавать динамические раскрывающиеся списки в таблицах и формах Smartsheet.
USM Content
Обзор
При изменении исходного списка содержимое такого списка в другом месте будет обновляться автоматически.
Используя Data Shuttle, можно загрузить список элементов для обновления пунктов раскрывающегося списка в этой же или в другой таблице, в файле .csv или .xlsx.
Подключение к Data Shuttle можно установить с помощью интуитивно понятного меню Соединители на верхней панели навигации в приложении Smartsheet. Нажмите Соединители и выберите нужное действие.
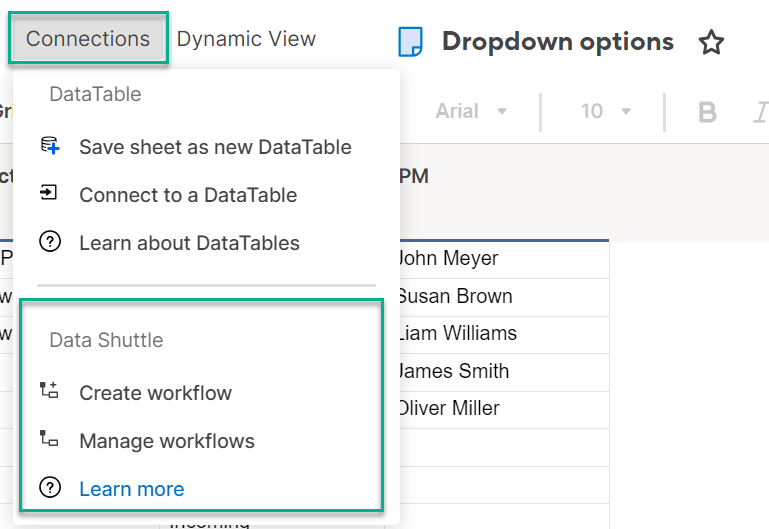
Эта функция значительно повышает видимость Data Shuttle в приложении, обеспечивая удобное управление рабочими процессами.
Предварительные условия
Для использования Data Shuttle вы должны:
- иметь разрешения на работу с целевой таблицей уровня Владелец, Администратор или Редактор;
- получить от системного администратора Smartsheet разрешения на работу с премиум-приложением Data Shuttle в разделе Управление пользователями.
Создание динамических раскрывающихся списков
To create dynamic dropdowns using Data Shuttle, prepare the following:
- Your source list. This can be a sheet within Smartsheet or an external file containing the dropdown options.
- Целевая таблица: This is where you will update your dropdown options, according to changes in your source sheet.
Этот процесс предполагает, что вы будете выгружать список из объекта Smartsheet.
Создание рабочего процесса выгрузки данных в Data Shuttle
- Go to Create a workflow > Offload Data.
Откройте исходную таблицу. Затем выберите значок .
Brandfolder Image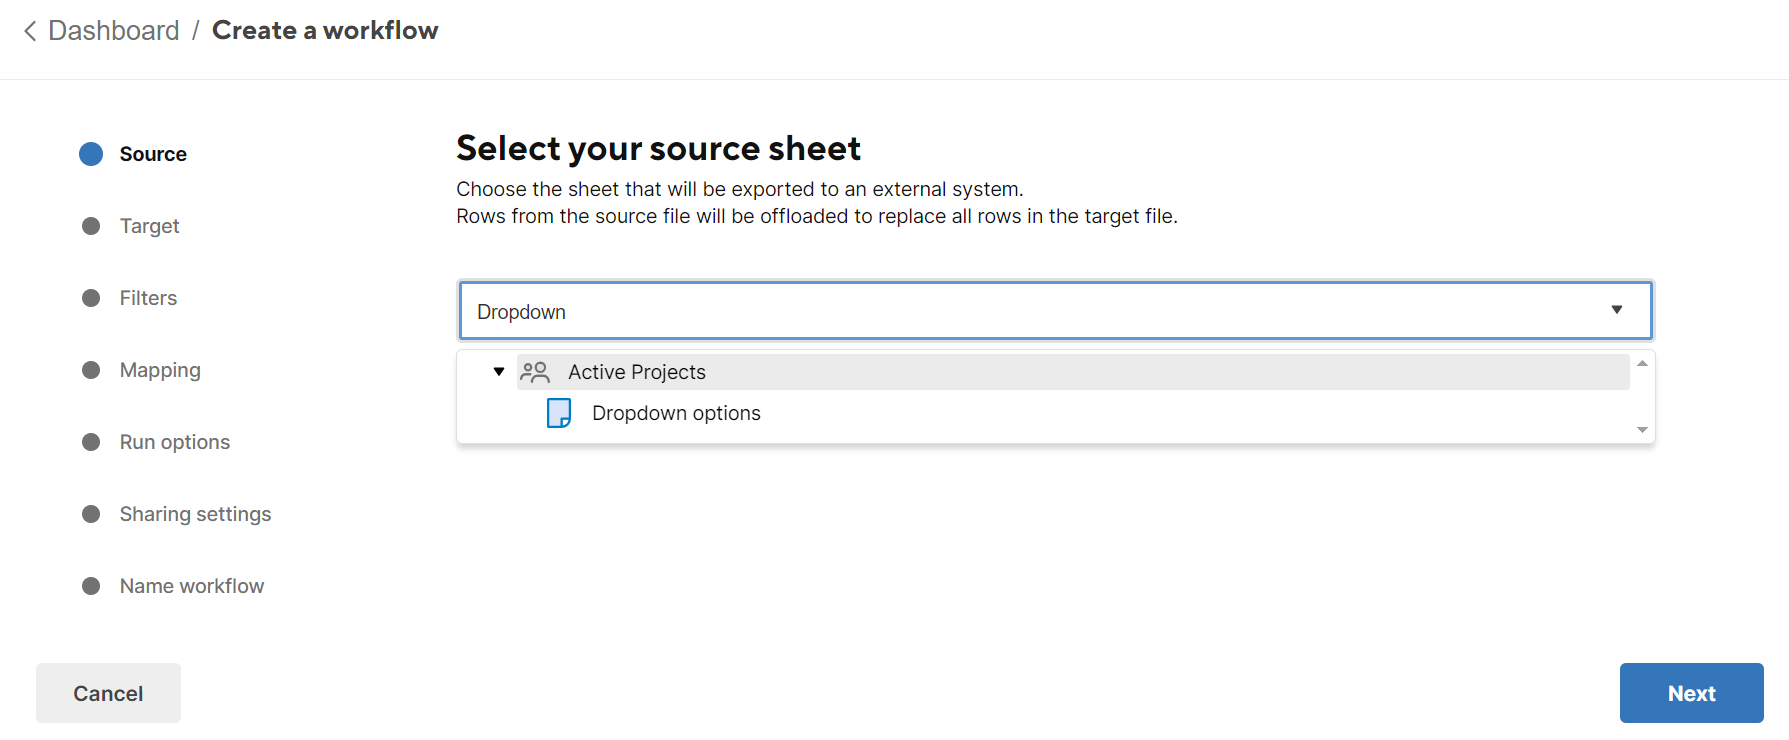
Set the Target Location:
- Smartsheet Attachment (Вложение Smartsheet). Выберите объект Smartsheet, к которому необходимо прикрепить файл.
- OneDrive & Sharepoint: You must sign in to your external account.
- GoogleDrive: You must sign in to your external account.
Box: You must sign in to your external account.
In Smartsheet Gov plans, the drive for Microsoft's GCC High offering is also available. However, since most drives aren't accessible by default, you must contact Support to activate access.
Brandfolder Image
- Name your exported file and select the desired exported file type.
- Select whether you want to add headers to the destination file. Затем выберите значок .
- (Optional) Add a filter to export only data that meets specific criteria.
- Нажмите Next (Далее).
- Map columns between your selected source and target. Нажмите Next (Далее).
- Toggle Run on schedule if you want to set a schedule. Нажмите Next (Далее).
- Name your workflow and select Save.
- Hover over the workflow you just created and select Run.
You'll see a message confirming your workflow was executed.
Шаг 1. Создание рабочего процесса загрузки данных
- Go to Create a workflow > Upload Data.
- Select your source location:
- Smartsheet Attachment: You must select the sheet where the attachment is.
- OneDrive & Sharepoint: You must sign in to your external account.
- GoogleDrive: You must sign in to your external account.
- Box: You must sign in to your external account.
- Select the sheet where the attachment is located.
- Select how Data Shuttle chooses the attachment:
- Name: You must enter the attachment name (include the attachment format).
- Most recent: The most recent attachment is selected
- Check the box if your attachment has column headers.
Select the First row and the character separator. Затем выберите значок .
Brandfolder Image
- Select your target sheet. This is where the dropdown options will appear.
Настройте обновление значений в раскрывающихся списках для выбранных столбцов. Затем выберите значок .
Brandfolder Image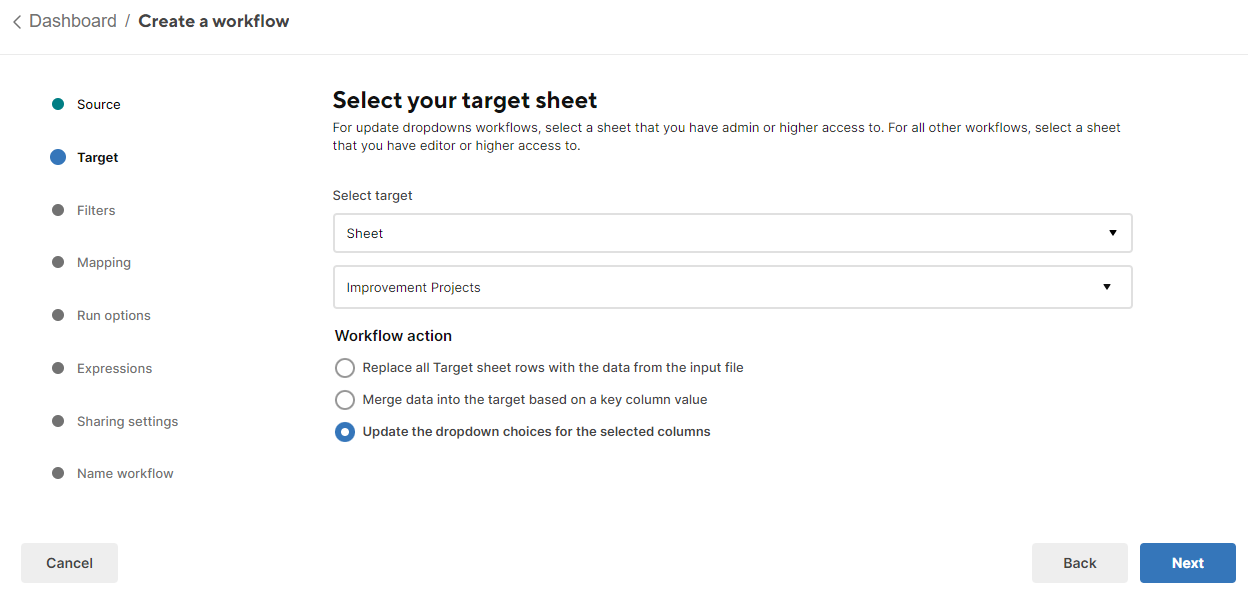
- (Optional) Add a filter to import only data that meets specific criteria.
- Нажмите Next (Далее).
- Map columns between your selected source and target. Нажмите Next (Далее).
- Toggle Run on schedule if you want to set a schedule, or toggle Run on attachment if you want the workflow to run when the attachment is uploaded. Нажмите Next (Далее).
- (Optional) Add expressions to include a new function field to your target sheet.
- Нажмите Next (Далее).
- Name your workflow and select Save.
- Запрос на подтверждение Нажмите Готово.
You can manually select Run to test your workflows.
Если вы зададите расписание запуска рабочих процессов для выгрузки и загрузки, они будут выполняться автоматически, и варианты в раскрывающемся списке будут синхронизированы с исходным списком.