USM Content
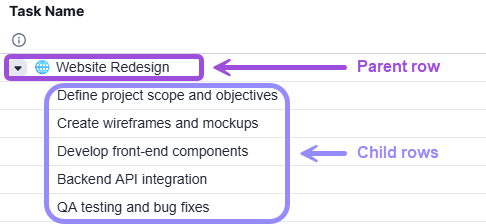
Hierarchy lets you organize rows into groups by nesting related rows beneath a parent row. The rows nested underneath become child rows. This is useful when you want to break down a project into phases and tasks, group related items, or summarize data across multiple rows.
Create a hierarchy
You can't indent or outdent the first row in a sheet. It's always at the top of the hierarchy.
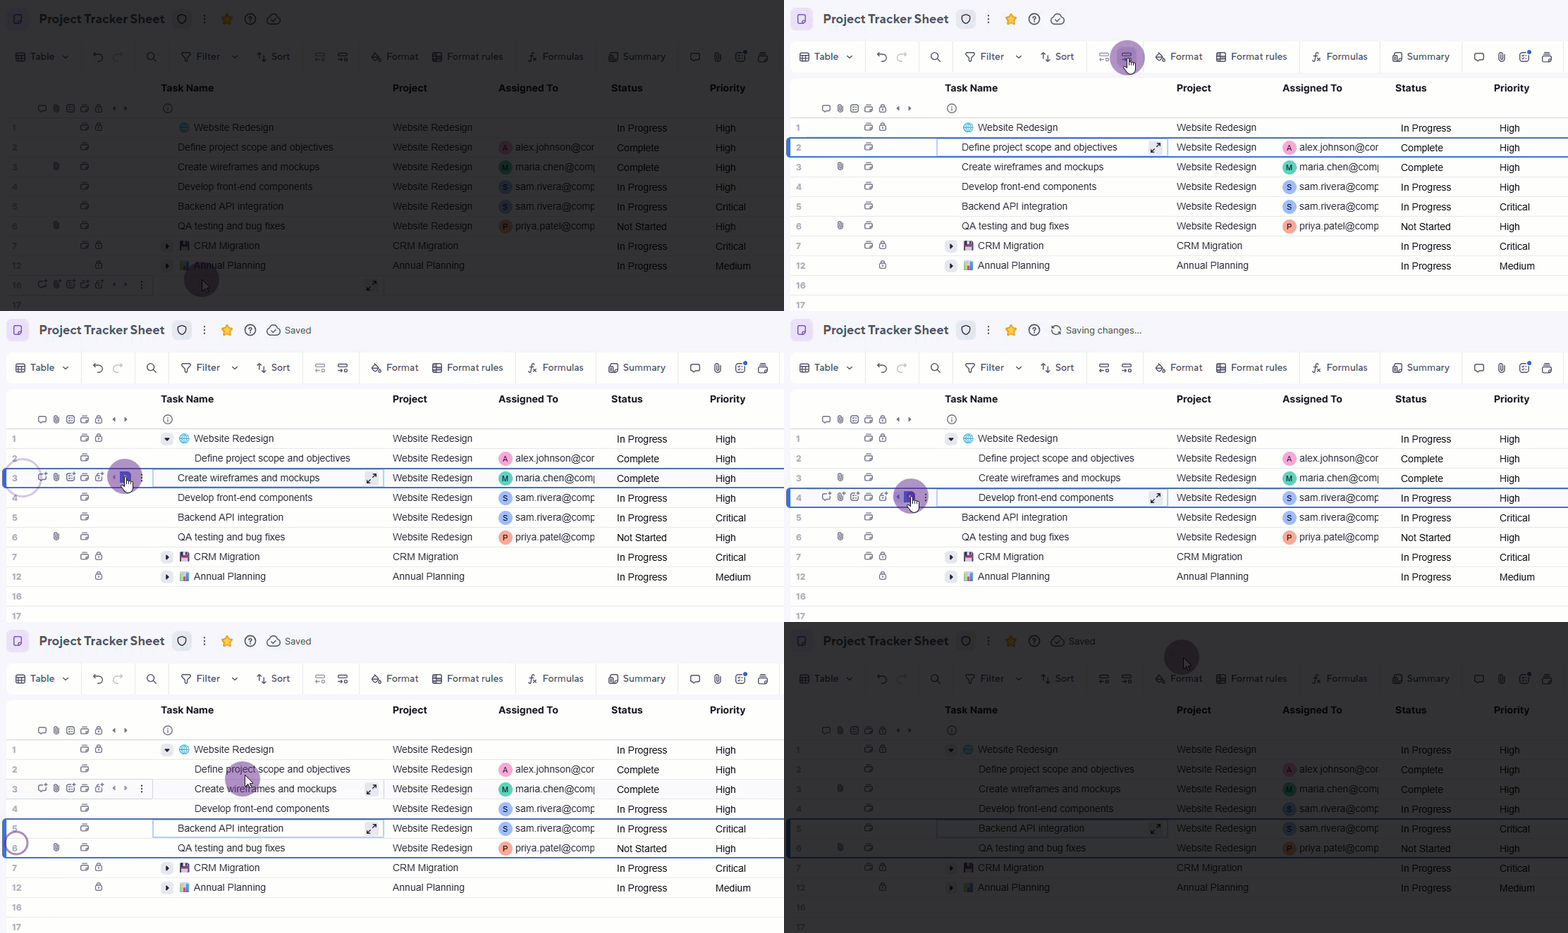
You create a hierarchy by indenting a row. Before indenting, make sure both the row you want to indent and the row above it contain data. Hierarchy requires content in both the parent and child rows.
- Select the row(s) you want to indent. These are the rows that become child rows.
- Select the indent button in the toolbar
 , or Indent row
 on the left side of the row.
To indent a row, you can also use the keyboard shortcut Ctrl + ] or Command + ] on a Mac.
The row above automatically becomes the parent row.
Note when creating hierarchies:
- Hierarchy creates relationships between rows; it doesn't change how rows are formatted or styled.
- Indents are displayed only in the sheet's Primary Column, but the relationship is applied to the entire row.
- There is no fixed level of indenting; you can indent rows on your sheet to create multiple levels of hierarchy.
- If your sheet has dependencies enabled, parent rows automatically reflect a roll-up summary of the Start Date, End Date, Duration, and % Complete values from their child rows.
Remove a hierarchy
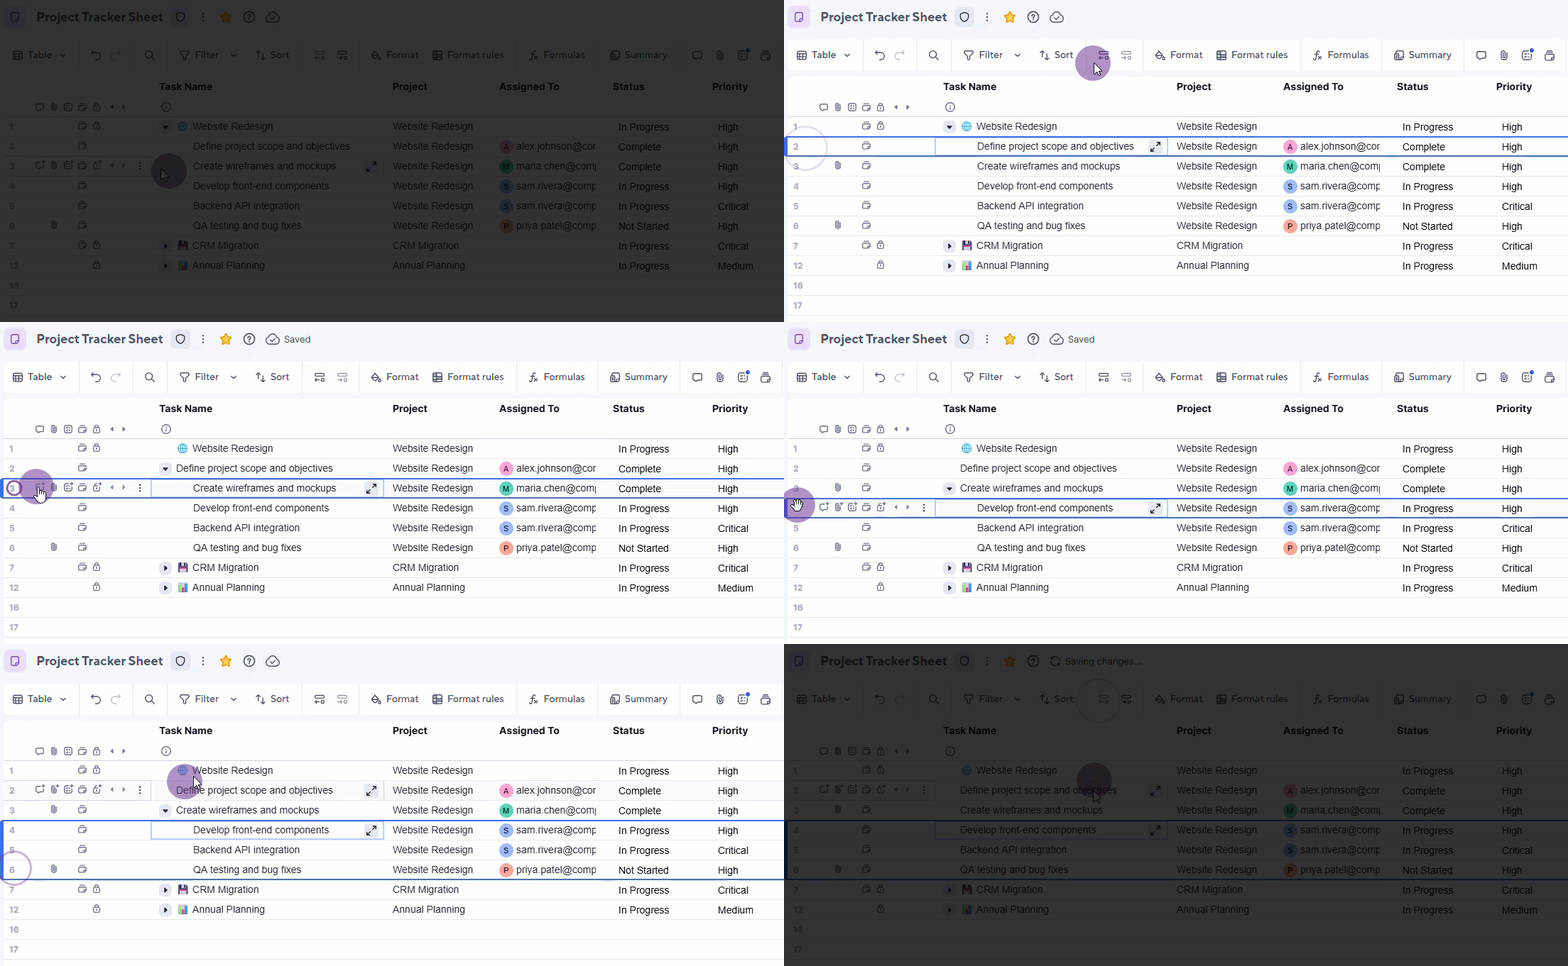
Outdenting a row removes its parent-child relationship, moving it one level up in the hierarchy. The row's data isn’t affected.
To remove a parent-child relationship:
- Select any cell in the child row you want to level up in the hierarchy.
- Select the outdent button in the toolbar
 , or Outdent row
 on the left side of the row.
To outdent a row, you can also use the keyboard shortcut Ctrl + [ or Command + [ on a Mac.
The row moves one level up. If it was the only child, the row above it is no longer a parent.
If you delete a parent row, all its child rows are deleted too. To delete a parent row without deleting the child rows, remove the parent-child relationship first.
Move hierarchy rows
When you move a parent row, all its child rows move with it. You can move rows via drag-and-drop or by copying and pasting.
Learn more about copy-and-paste basics in Copy and paste cells, rows, formulas, or hierarchy.
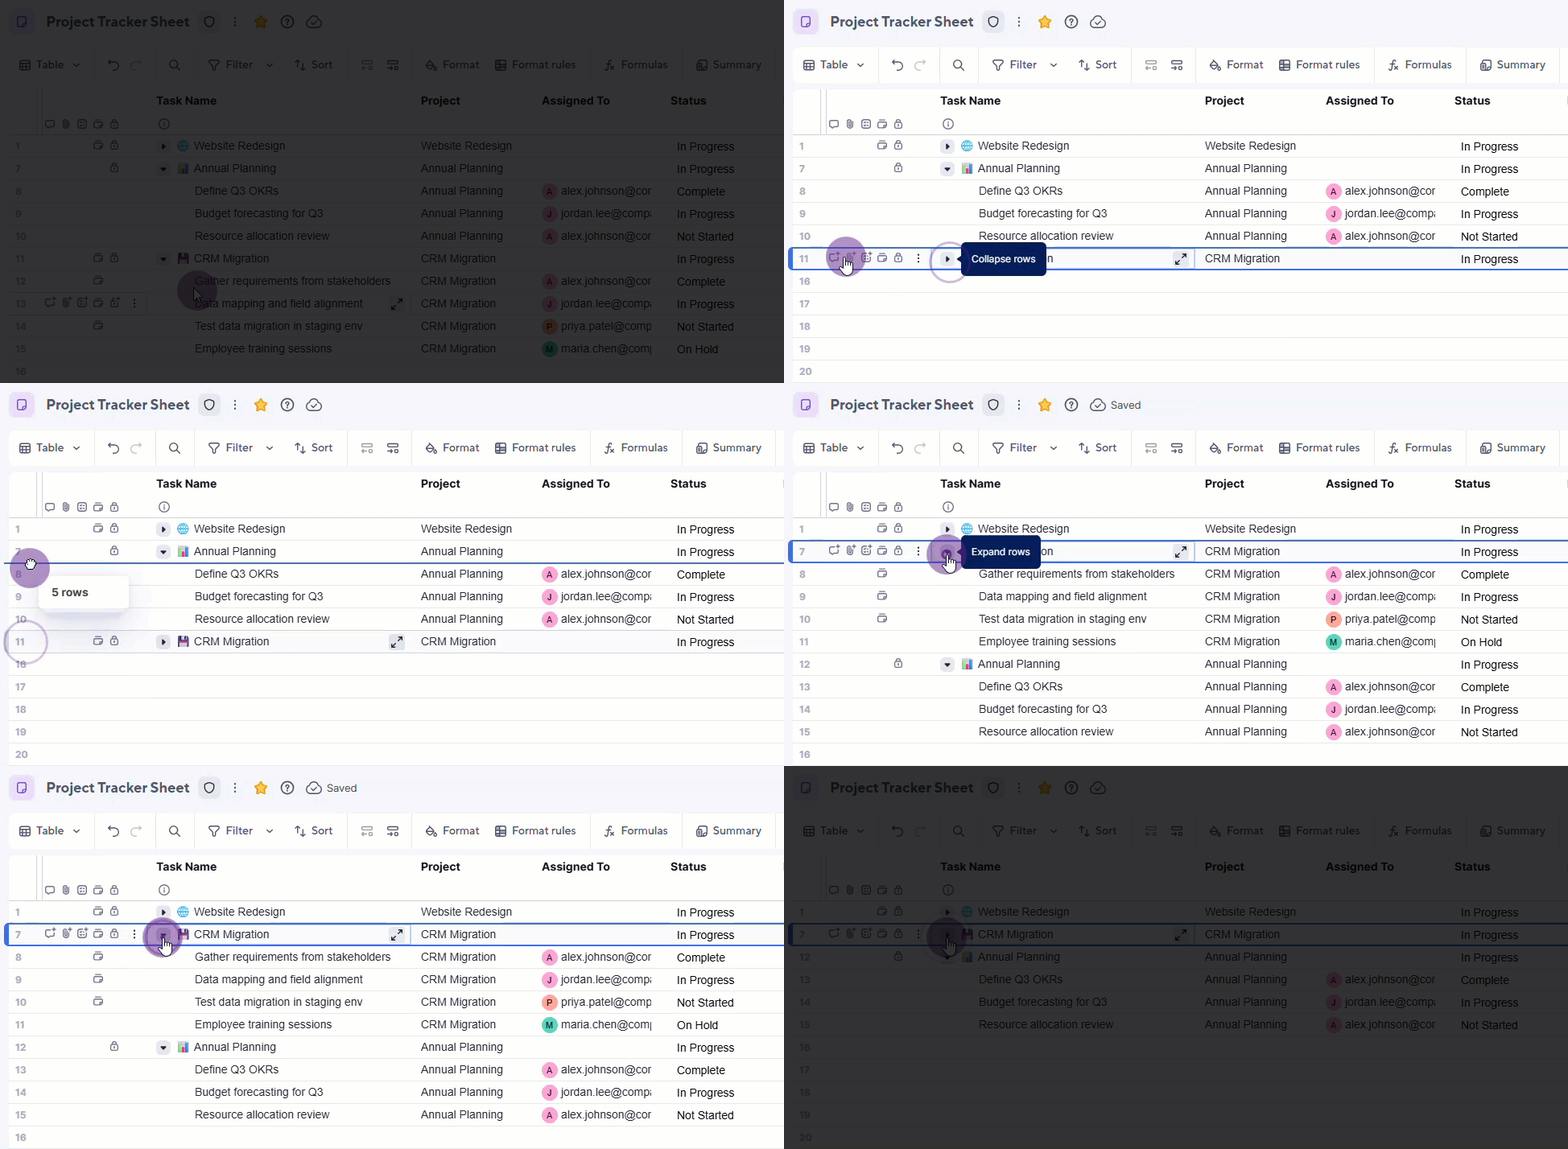
Expand or collapse child rows
Collapsing a parent row hides its child rows from view. The data is still there, just out of sight. Expanding it brings them back. This is useful for focusing on high-level project status without the details of every individual task.
Expand or collapse a single parent row
Select the arrow icon (▶ / ▼) next to the parent row's name in the Primary Column. The arrow points right when collapsed and down when expanded.
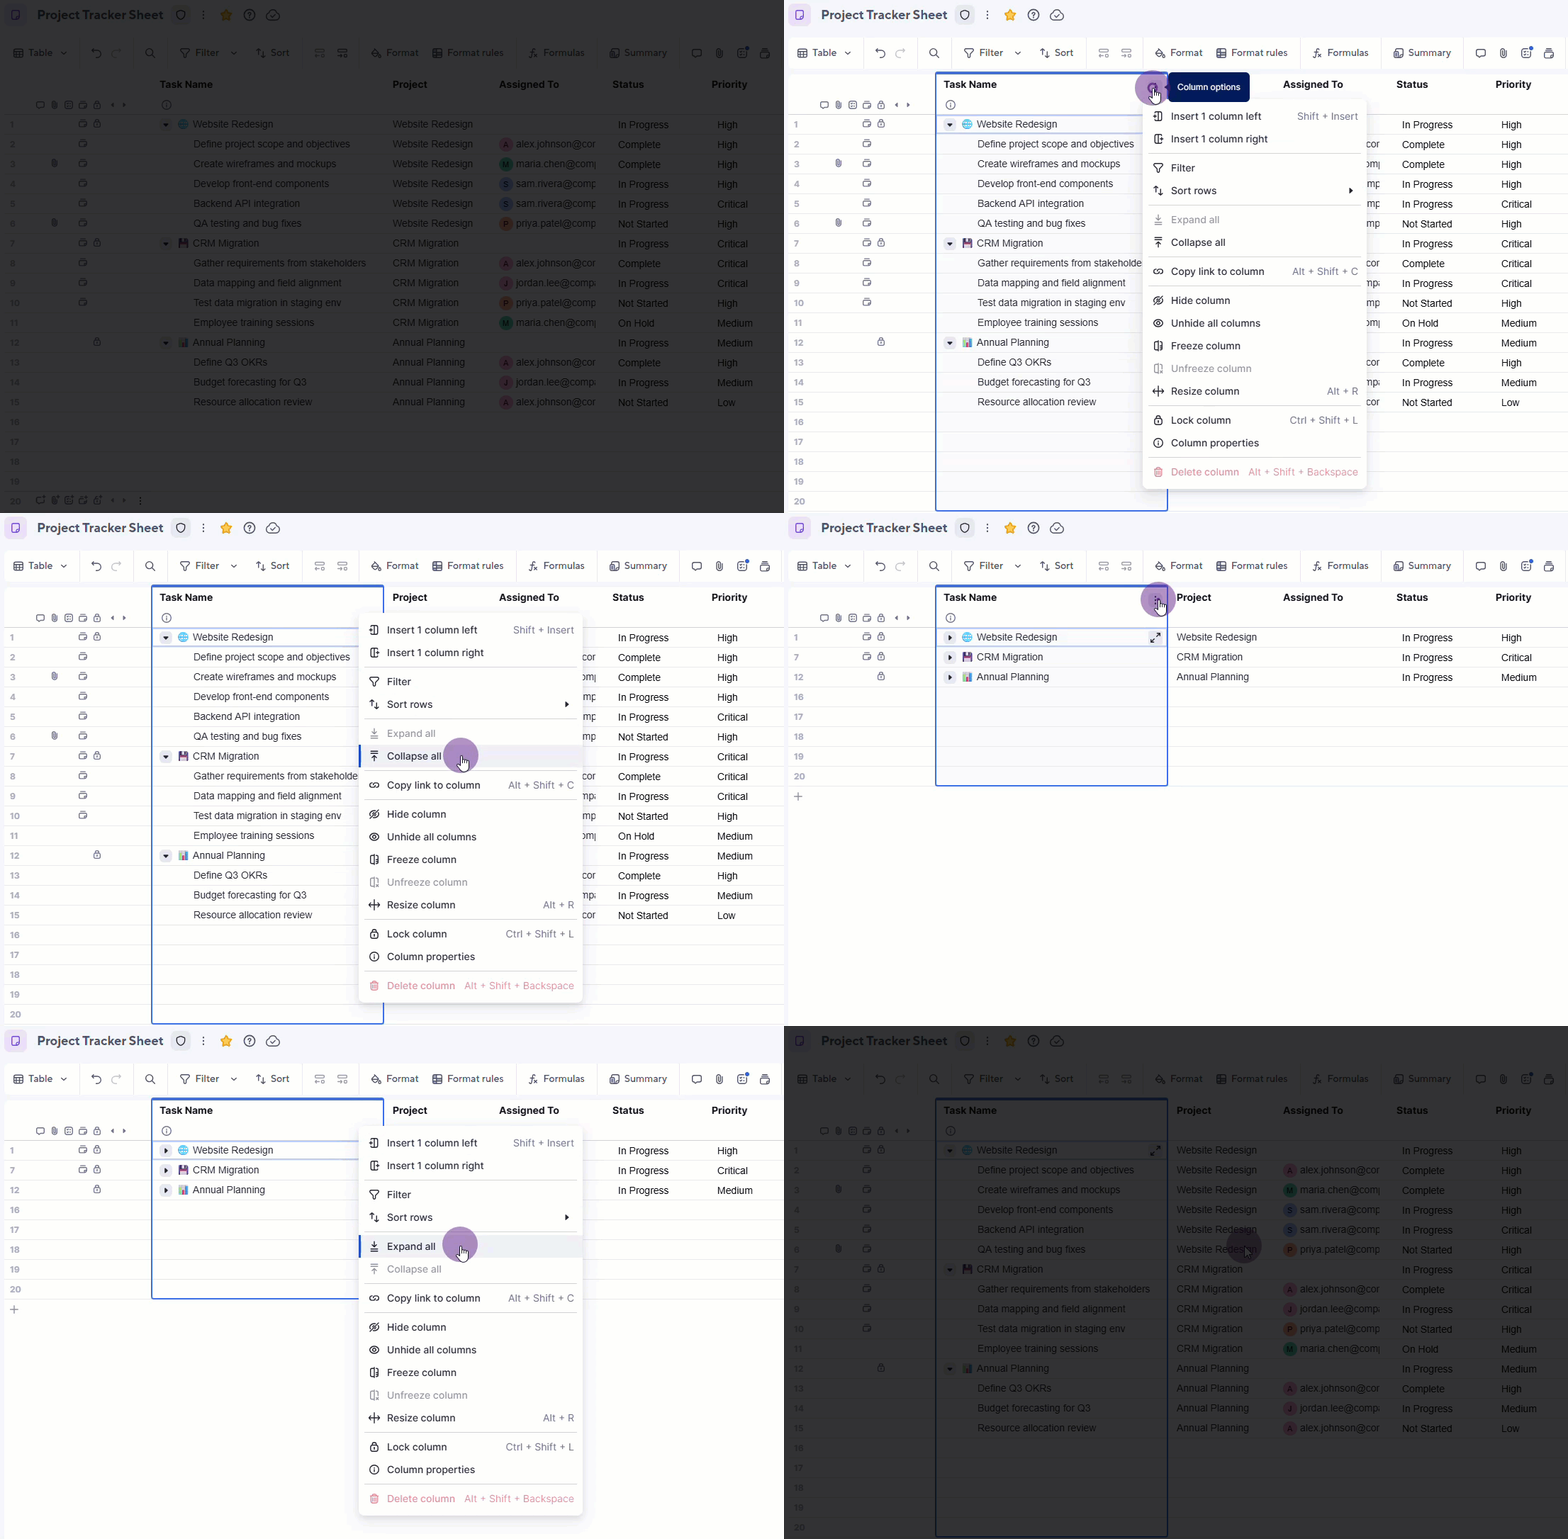
Expand or collapse all parent rows
To expand or collapse every parent row on the sheet:
- Right-click the Primary Column header to open the column options menu.
- Select Expand All or Collapse All.
Hide hierarchy controls
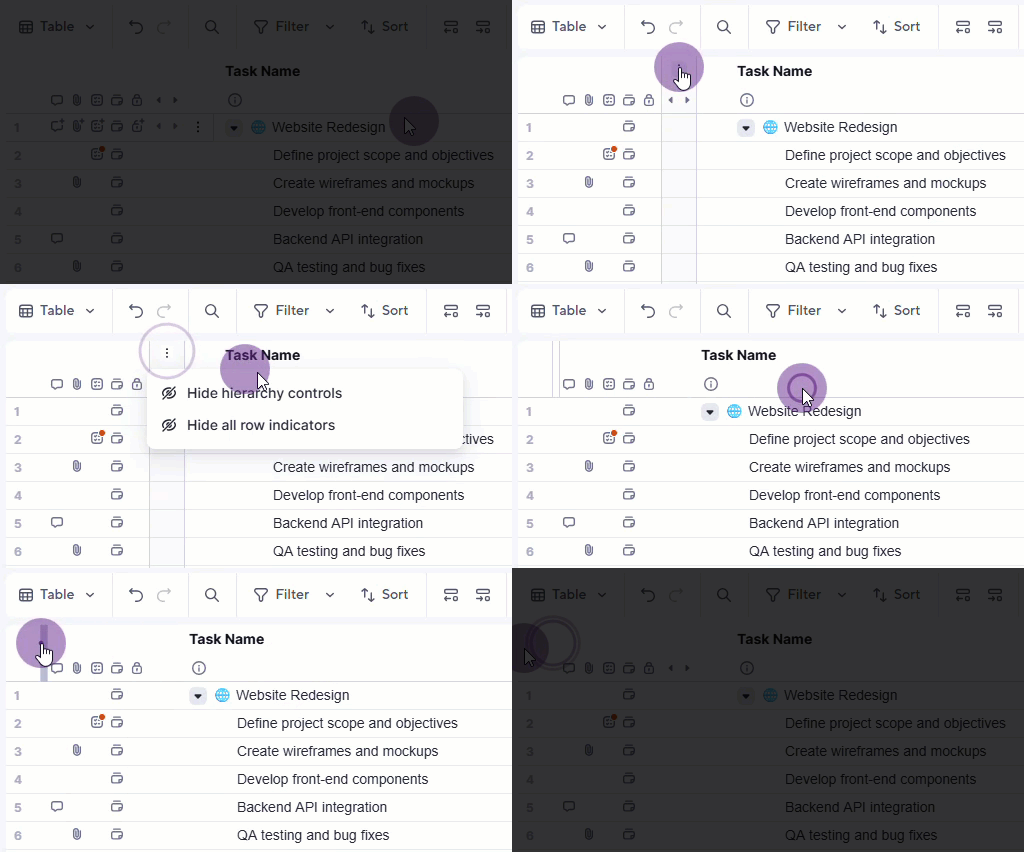
You can hide the indent/outdent controls from the left-side column:
- Hover over the controls at the top.
- Open the options menu
 .
. - Select Hide hierarchy controls.
To bring back the controls, you can double-click or right-click on the space to the left.