With Data Shuttle offload workflows, you can easily offload sheets from Smartsheet to other Smartsheet attachments or external storage drives.
Prerequisites
- To use Data Shuttle, you must:
- Hold Owner, Admin, Editor, or Viewer permissions on the source sheet
- Have Data Shuttle Premium Application permissions enabled in Admin Center by your Smartsheet System Admin
- To offload data from Smartsheet, you must be at least a Viewer on a sheet.
To contact your sales representative and learn more, visit the Data Shuttle Marketplace.
If you can access Smartsheet University, you can find this information with interactive instructions in the Data Shuttle Upload Workflows course.
The basics of Data Shuttle offload workflows
When you use an offload workflow, it pulls data from a Smartsheet sheet, converts it into an Excel or CSV file, and then pushes it to:
- A Smartsheet sheet
- OneDrive
- SharePoint
- Google Drive
- Box
In Smartsheet Gov plans, the drive for Microsoft's GCC High offering is also available. However, since most drives aren't accessible by default, you must contact Support to activate access.
Step 1: Create a new offload workflow
- Navigate to datashuttle.smartsheet.com and log in with your Smartsheet credentials.
- In Data Shuttle, select + in the left-hand bar.
Select Offload Data.
Brandfolder Image
Pro tip: Copy from an existing workflow
Instead of creating a new one from scratch, you can save time by copying and editing an existing workflow.
- Navigate to the existing offload workflow.
- Select
Brandfolder Image
 on the right-hand side.
 - Select Create a copy.
Once you've created a copy of the workflow, you can edit it. Learn how.

Step 2: Select a source sheet
- On the Source tab, select your source sheet. Keep in mind that your source sheet can't be a report.
Select Next.
Brandfolder Image
Step 3: Select a target
Your target is where your data is going. If you use Smartsheet attachments as a target, you can use the same or a different sheet than the source. If you offload to an external storage drive, you’ll be prompted to log in if you haven’t already done so.
On the Target tab, select the target location:
- Smartsheet Attachment: Select the Smartsheet item where you want to attach the file.
- Third-party storage drive: If you choose any of these options, you may need to sign in and select the folder where you want the offloaded data to go.
- OneDrive & Sharepoint
- Google Drive
- Box
Brandfolder Image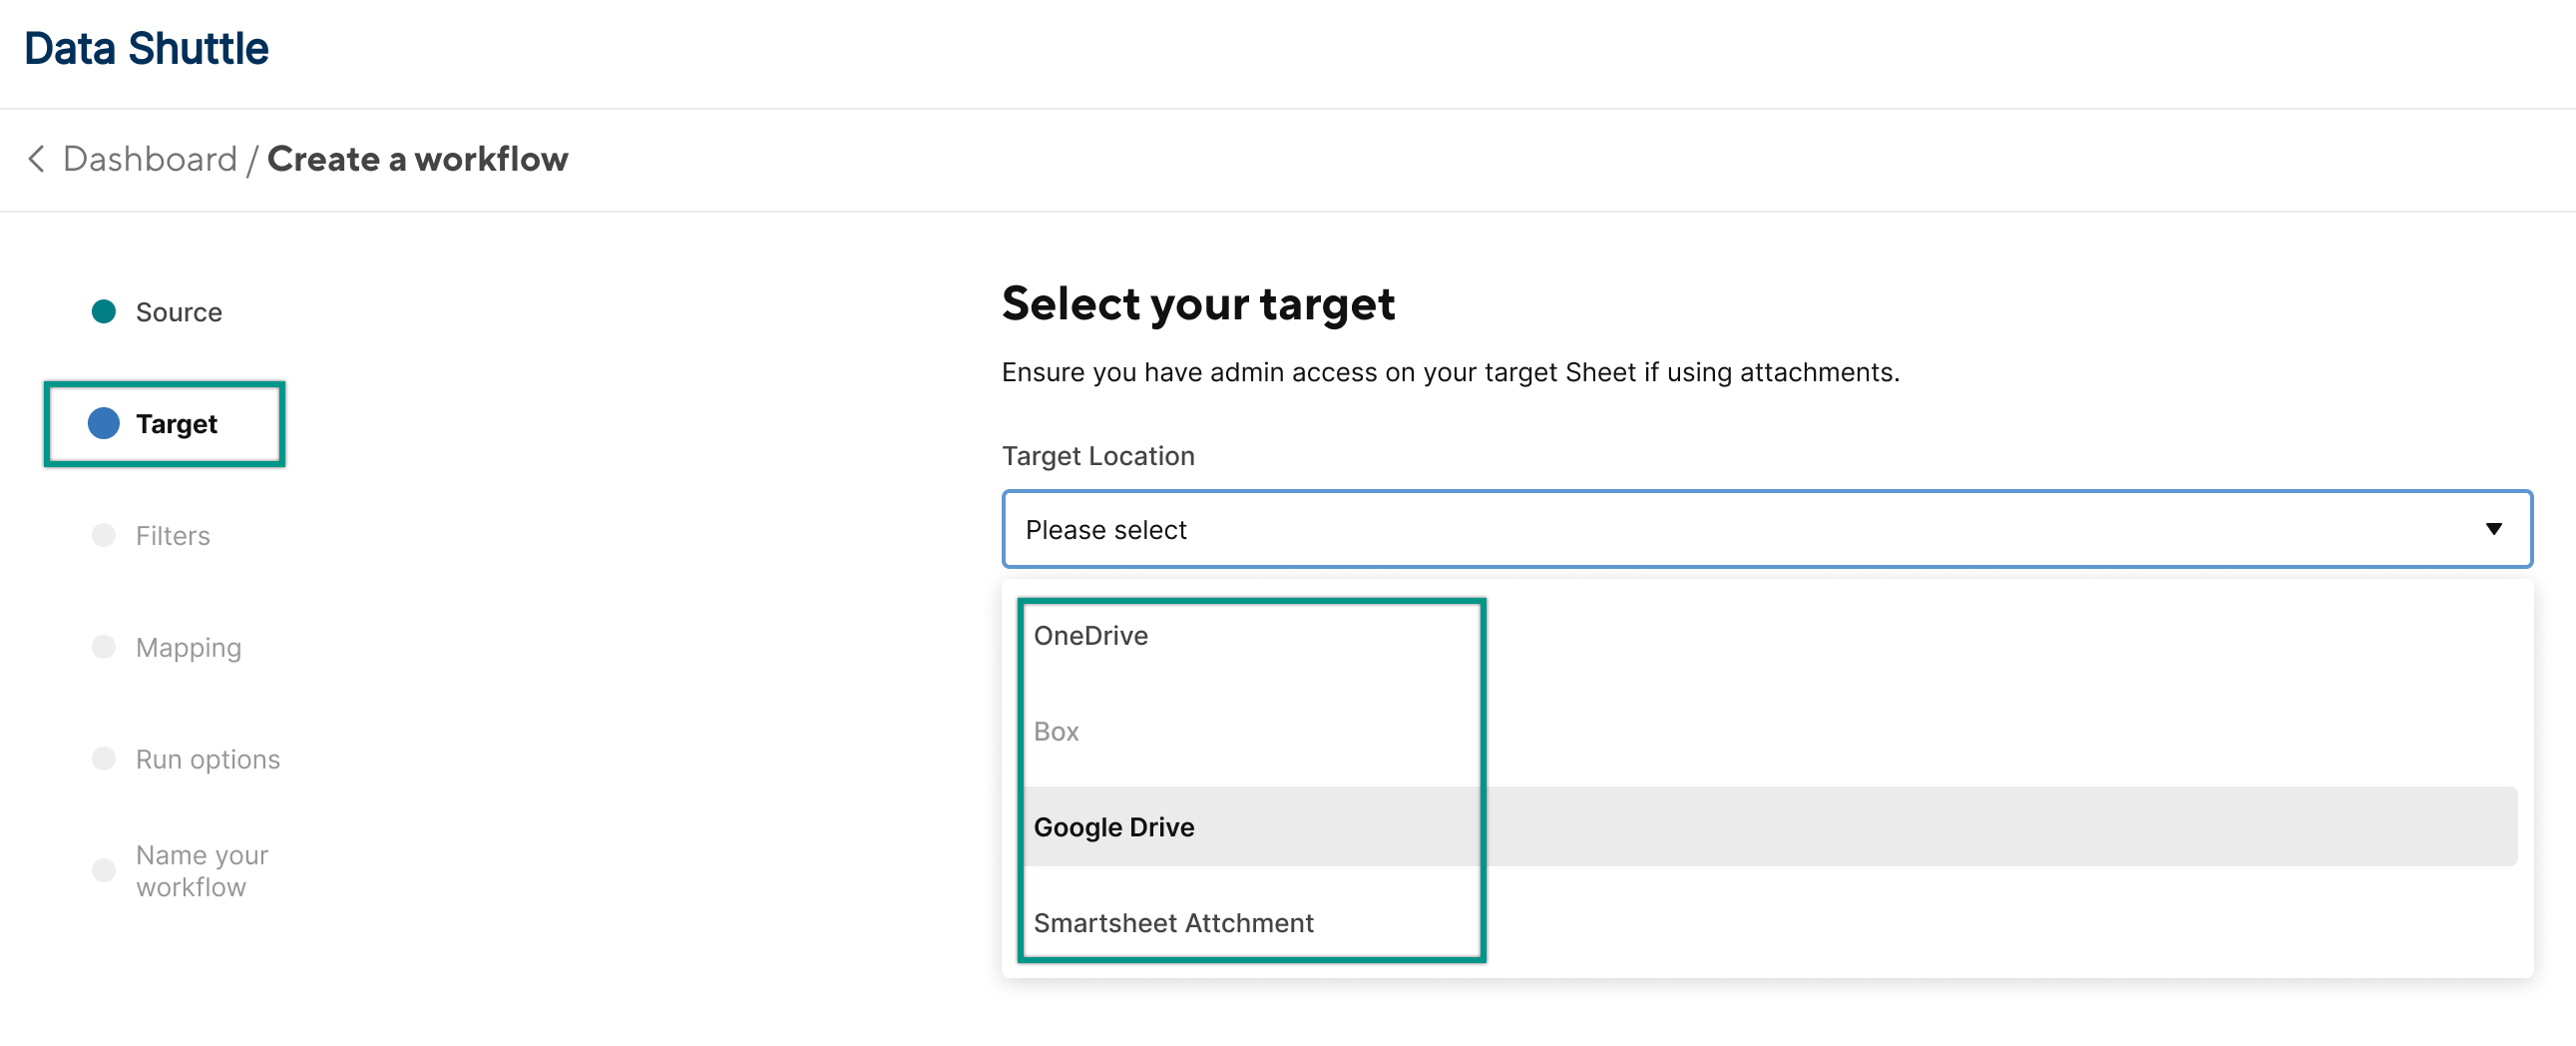
Fill in the following fields:
- Exported file name: Assign a name for your offload file.
- Exported file type: Choose CSV or EXCEL.
Brandfolder Image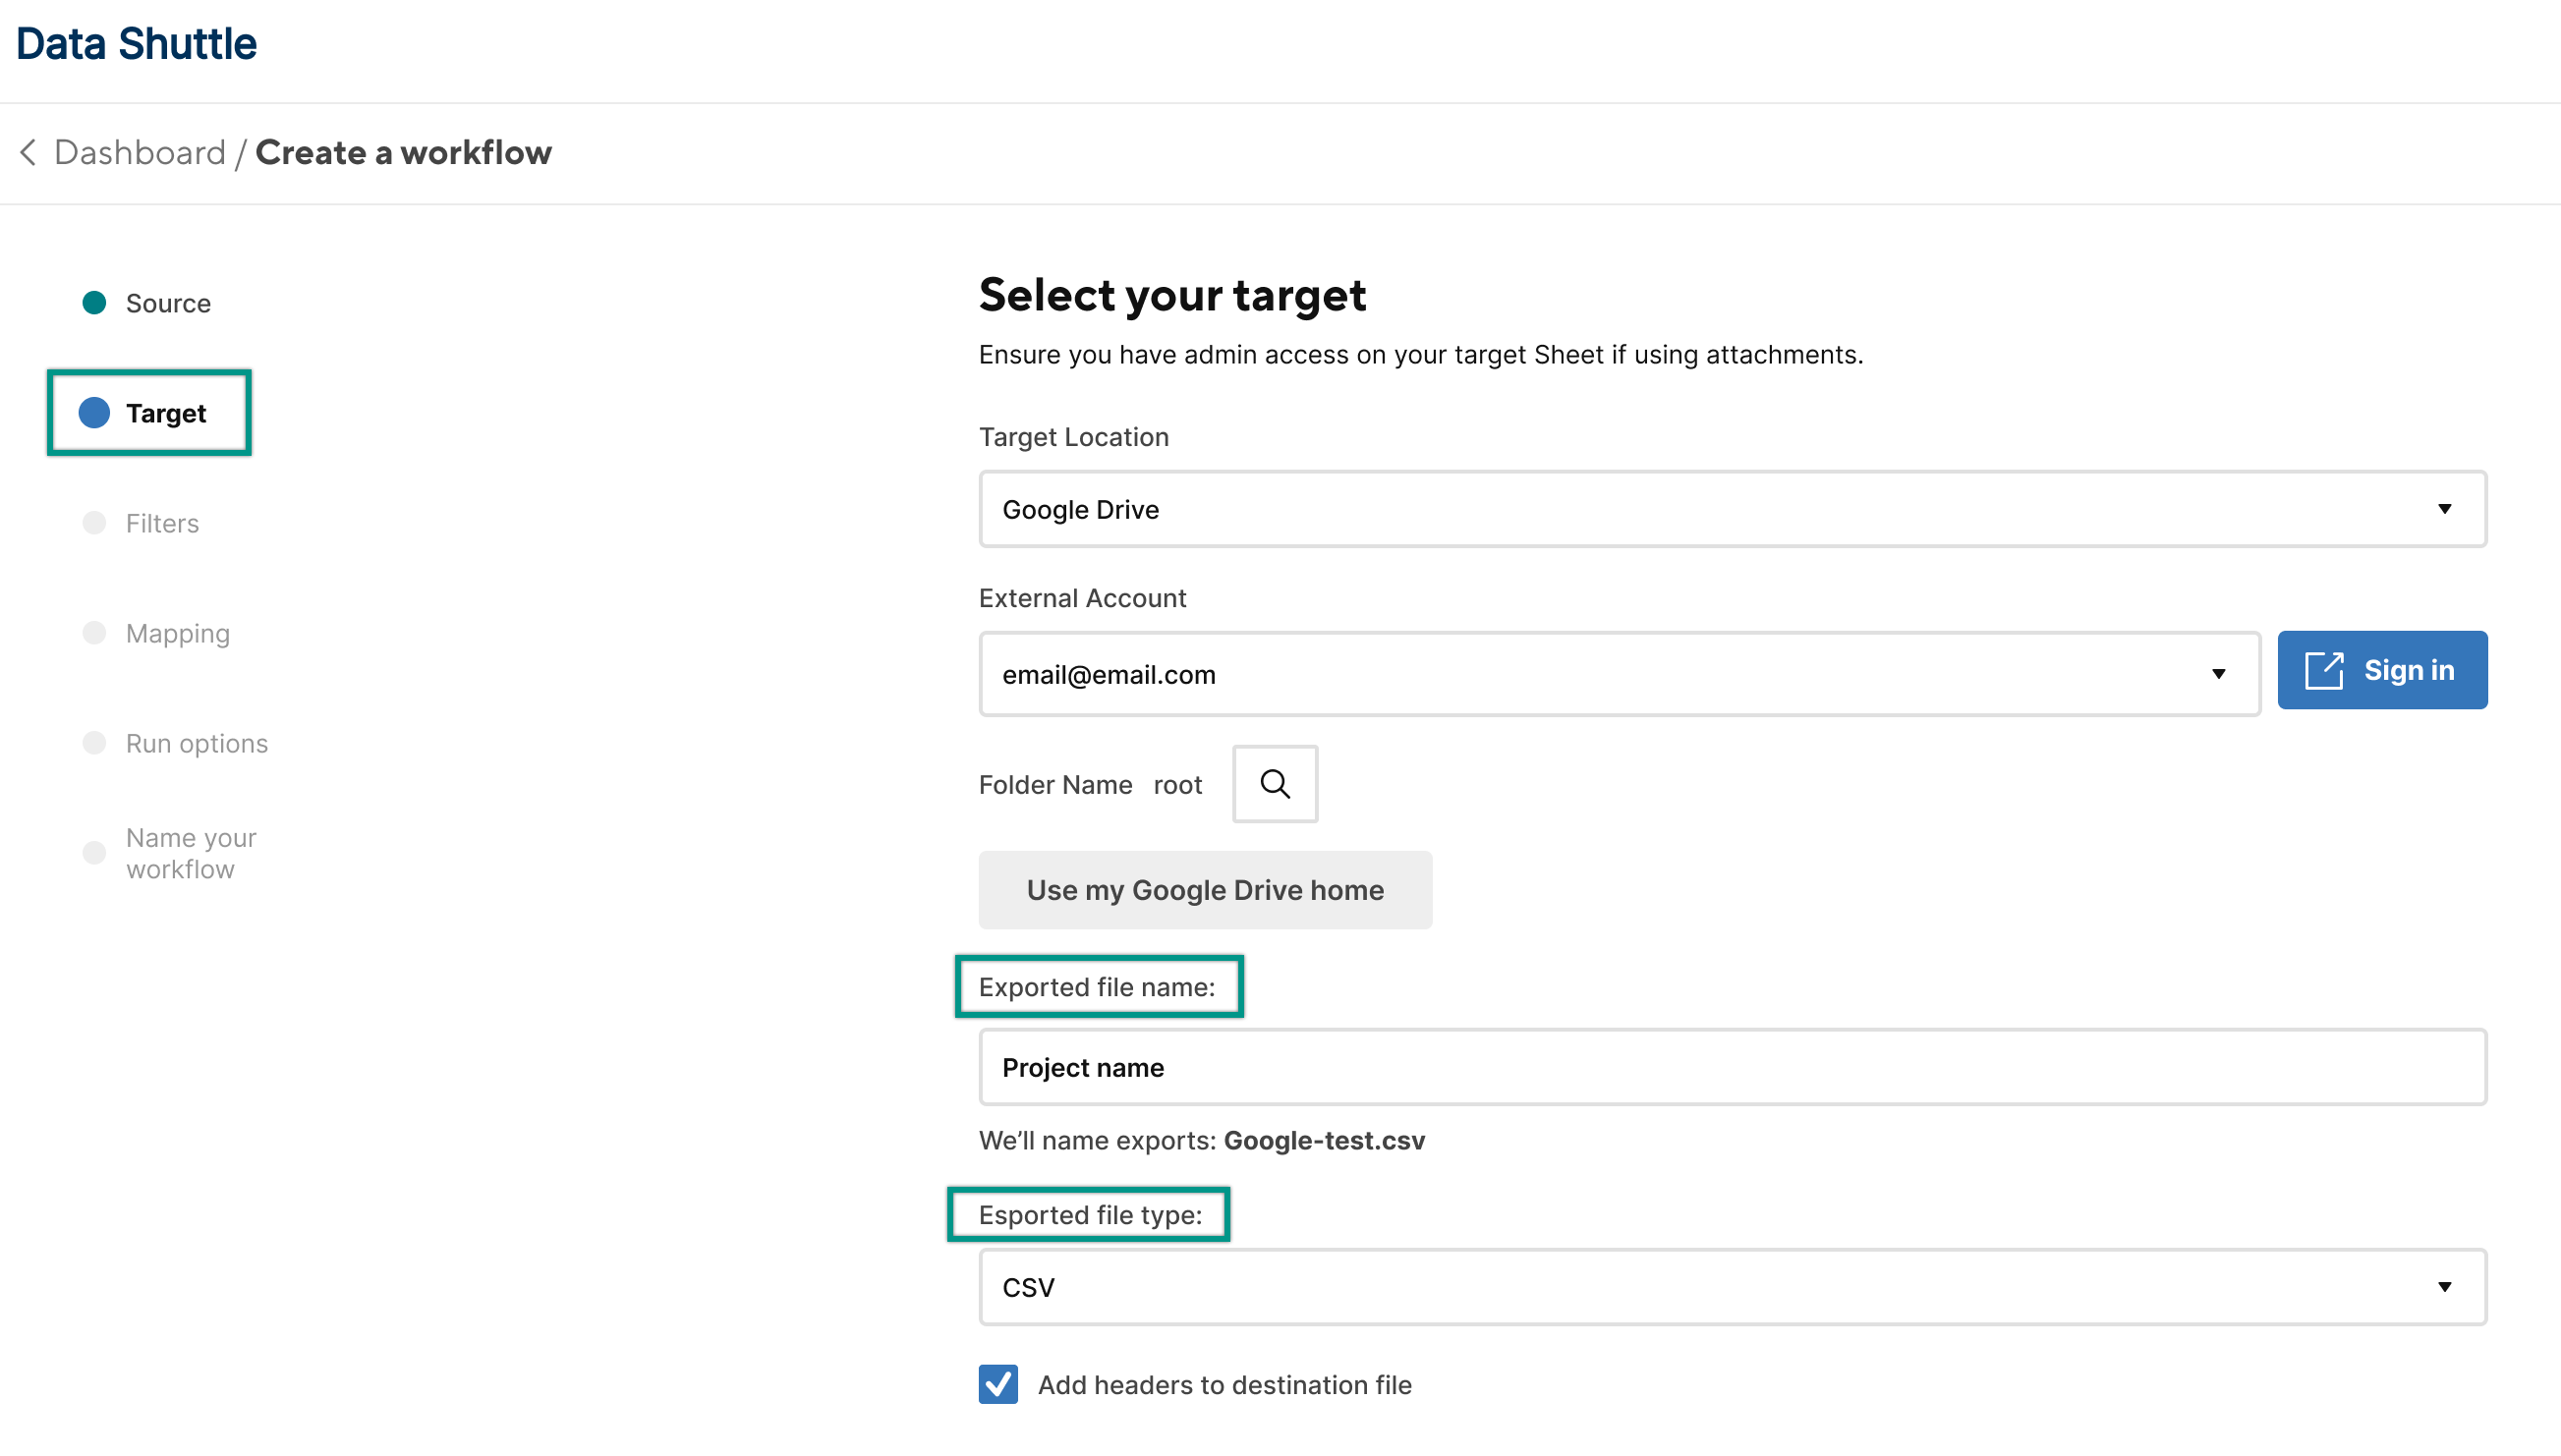
- Select Next.
Step 4: Set filters
Use filters to define which fields you want to be offloaded from Smartsheet to your external drive. For example, you can create a filter to offload rows with In Progress as the value in the Status column. You can also use filters when working with large data sets where you only need to share a subset of your data.
Filters are case-sensitive. Make sure they're the same as the information in your file.
On the Filter tab, select Add another filter.
Brandfolder Image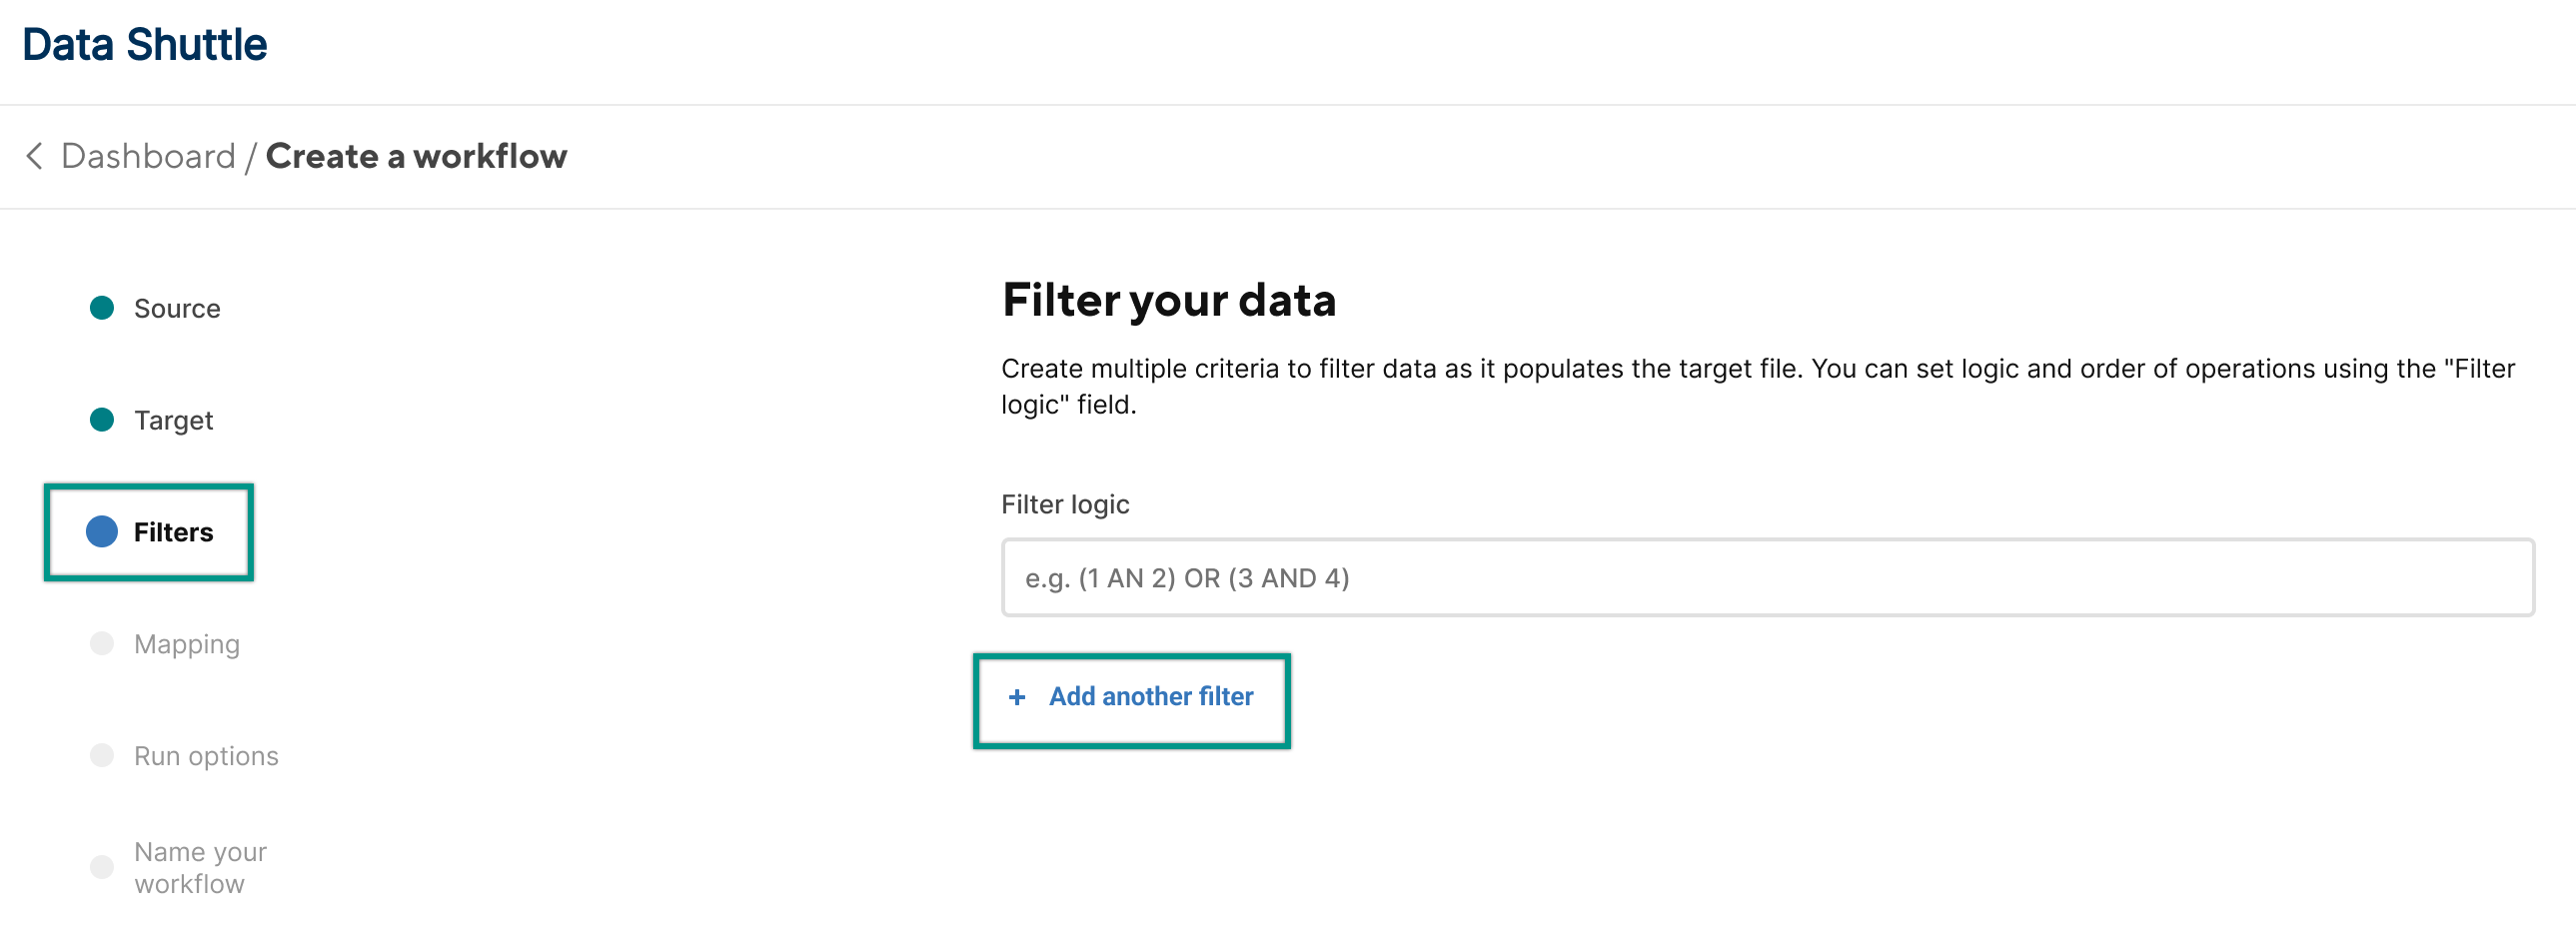
In the filter setup, select an input column, a comparison operator (for example, equals or contains), and the value.
Brandfolder Image
Select Next.
At least one row in the source sheet must meet the filter criteria. Otherwise, Data Shuttle doesn't generate a CSV file.
Define more complex filter logic
You can define more complex filter logic with parentheses and the AND or OR operator.
For example:
(1 AND 2) OR 3 combines logic to include all data where the (Department = “Services” AND Widget Size = “Large”) OR the Department = “Marketing.”
In this example, only large widgets for the services department would be included in your offload, but all marketing widgets would be offloaded.
Step 5: Map columns between the two systems
Smartsheet columns are pre-populated. You select the offload file columns to match your fields between source and target.
- In the Source field section, choose the sheet columns you want to match with the offload file columns.
- (Optional) To arrange the columns, use the arrow buttons. If you don’t want to map all fields, select
Brandfolder Image
 .
. Once you're done mapping the fields, select Next. You can add or remove columns in this step. However, changes might affect dependent automation.
Brandfolder Image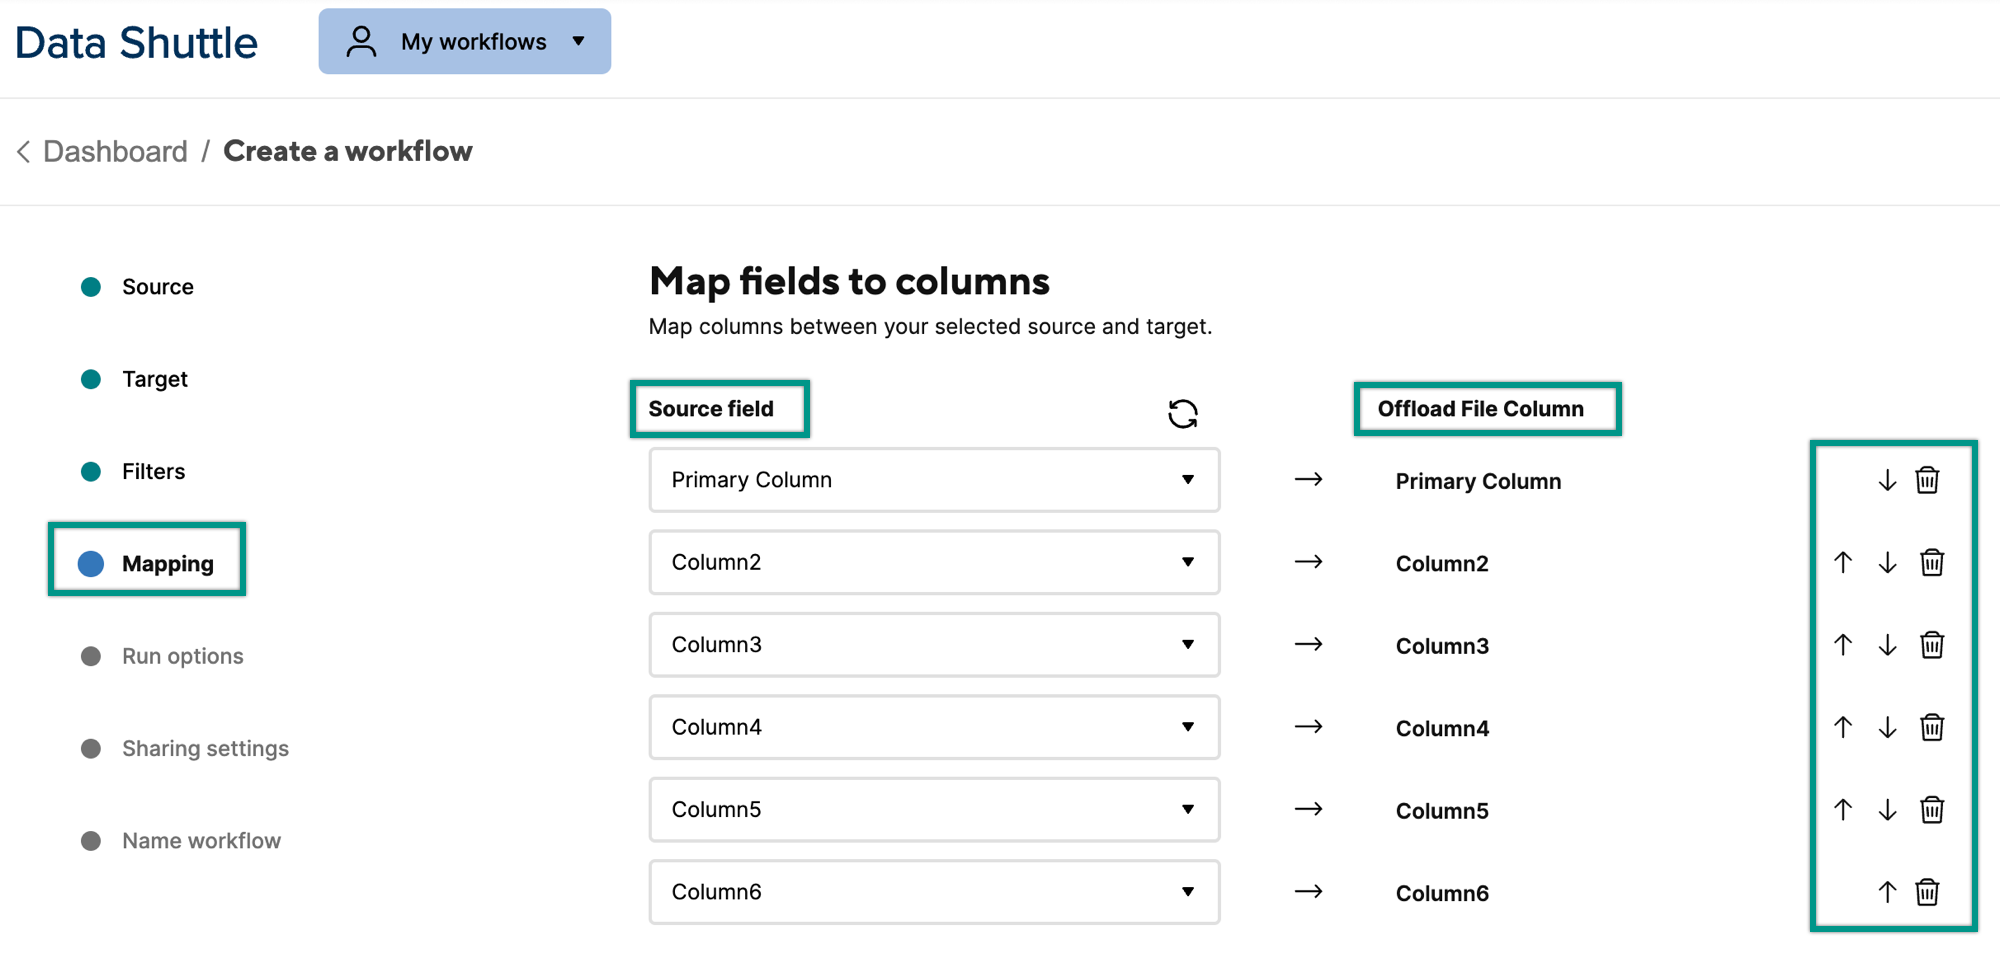
If alterations have been made to the original sheet, use the Refresh button to update the mapping. However, this overrides your manual changes, so verify your columns are correctly mapped.
Step 6: Schedule your workflow
Schedule your workflow to run automatically, or run the workflow manually.
Data Shuttle uses UTC. It doesn't follow your time zone preferences from the Smartsheet app.
Run the workflow on a schedule
- On the Run options tab, turn on the Run on schedule toggle.
- To set up the schedule, fill in the following fields:
- Days of the week: Days you want to run the workflow
- Start time: What time you want the workflow to start running
- Execute every: The frequency of the workflow schedule (every 15 minutes, for example)
- End time (UTC): What time you want the workflow to stop running
Once you're done setting up the schedule, select Next.
Brandfolder Image
Run manually
If you don't set up a schedule for the workflow, you can run your workflow at any time.
To run the workflow manually:
- Go to where the workflow is located and select Run.
Step 7: Share your workflow
You can share your workflows with other users in your Smartsheet plan. When you share a workflow, those users become Workflow Managers. As Workflow Managers, they can edit, run, archive, and share the workflow as long as they have at least Editor permissions on both the source and target files. Admins can also add or remove Workflow Managers for any workflow in their plan.
- In the Sharing settings tab, type the name of the user you want to share the workflow to in the text field provided.
Select Next.
Brandfolder Image
Step 8: Save your new workflow
Enter a name for your workflow, and then select Save. You can now access your workflow anytime you want to run, edit, or remove it via the dashboard.