You can use the offload and upload capabilities of Data Shuttle to create dynamic drop-downs in Smartsheet sheets and forms.
Overview
Dynamic drop-downs can automatically update a drop-down list in one location when that list has changed in another location.
Use Data Shuttle to upload a list of items to update drop-down selections from a list in the same sheet, a different sheet, or a CSV or XLSX file.
You can establish Data Shuttle connections via the intuitive Connections menu on the top navigation bar of the Smartsheet application. Select Connections and choose the desired action.
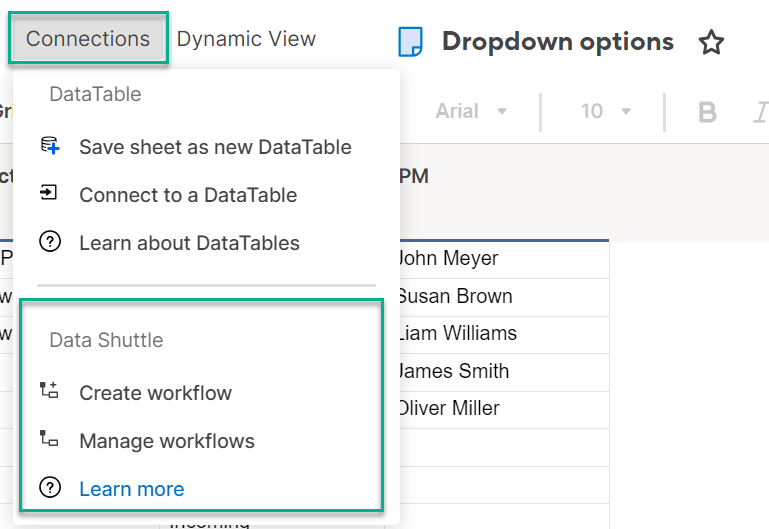
This feature significantly enhances Data Shuttle's discoverability within the app, ensuring seamless workflow management.
Prerequisites
To use Data Shuttle, you must:
- Hold Editor, Admin, or Owner permissions on the target sheet.
- Have Data Shuttle Premium Application permissions enabled in Admin Center by your Smartsheet System Admin.
Create dynamic drop-downs
To create dynamic dropdowns using Data Shuttle, prepare the following:
- Your source list. This can be a sheet within Smartsheet or an external file containing the dropdown options.
- Your target sheet. This is where you will update your dropdown options, according to changes in your source sheet.
This process assumes you'll offload the list from a Smartsheet location.
Create an offload workflow
- Go to Create a workflow > Offload Data.
Select your source sheet. Then, select Next.
Brandfolder Image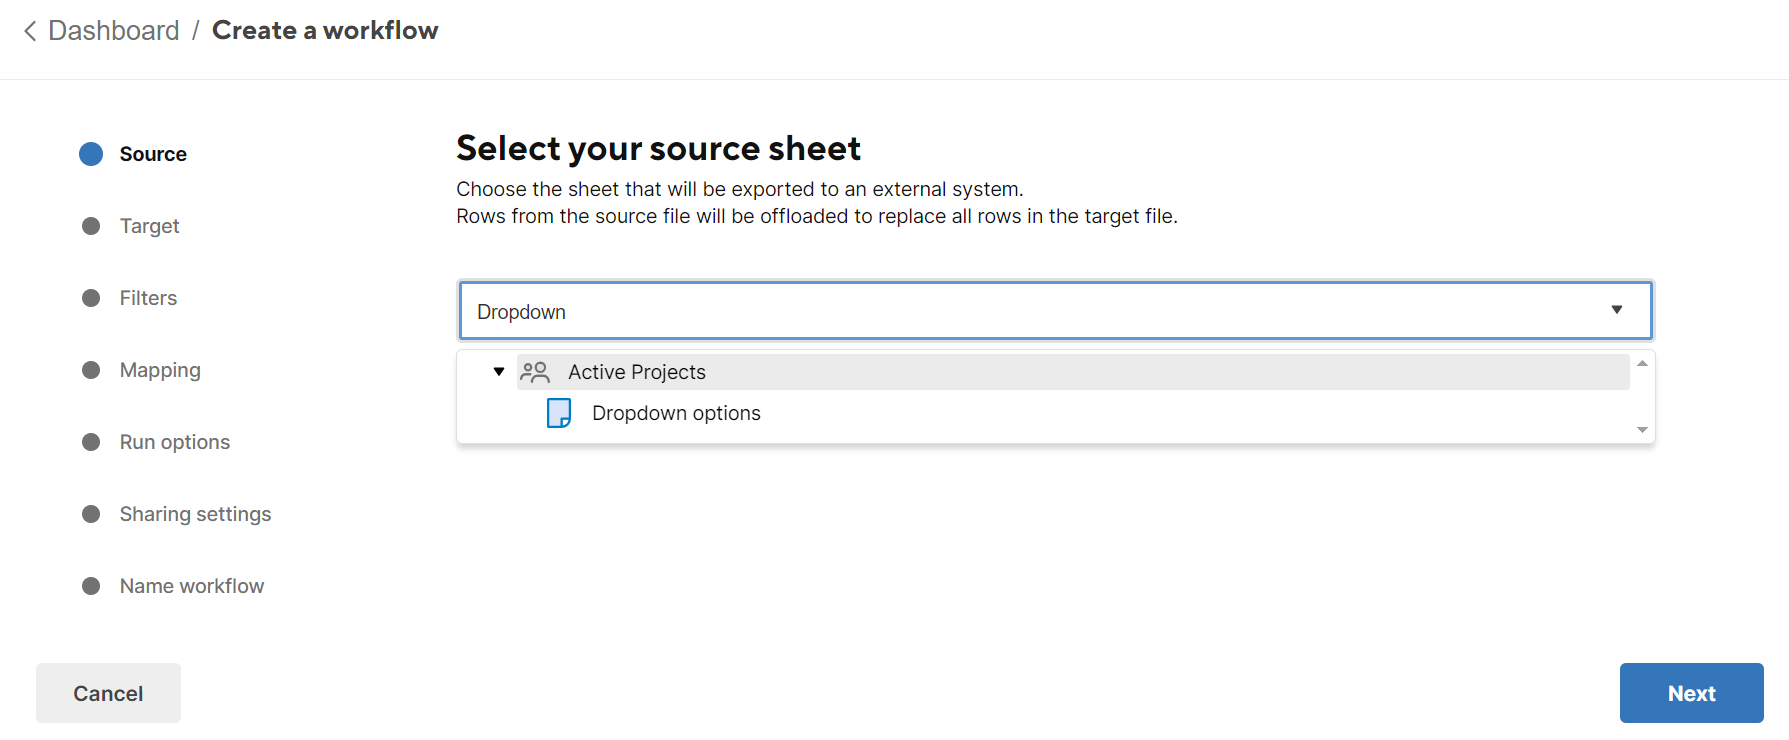
Set the Target Location:
- Smartsheet Attachment: You must select the sheet where you want the attachment.
- OneDrive & Sharepoint: You must sign in to your external account.
- GoogleDrive: You must sign in to your external account.
Box: You must sign in to your external account.
In Smartsheet Gov plans, the drive for Microsoft's GCC High offering is also available. However, since most drives aren't accessible by default, you must contact Support to activate access.
Brandfolder Image
- Name your exported file and select the desired exported file type.
- Select whether you want to add headers to the destination file. Then, select Next.
- (Optional) Add a filter to export only data that meets specific criteria.
- Select Next.
- Map columns between your selected source and target. Select Next.
- Toggle Run on schedule if you want to set a schedule. Select Next.
- Name your workflow and select Save.
- Hover over the workflow you just created and select Run.
You'll see a message confirming your workflow was executed.
Create an upload workflow
- Go to Create a workflow > Upload Data.
- Select your source location:
- Smartsheet Attachment: You must select the sheet where the attachment is.
- OneDrive & Sharepoint: You must sign in to your external account.
- GoogleDrive: You must sign in to your external account.
- Box: You must sign in to your external account.
- Select the sheet where the attachment is located.
- Select how Data Shuttle chooses the attachment:
- Name: You must enter the attachment name (include the attachment format).
- Most recent: The most recent attachment is selected
- Check the box if your attachment has column headers.
Select the First row and the character separator. Then, select Next.
Brandfolder Image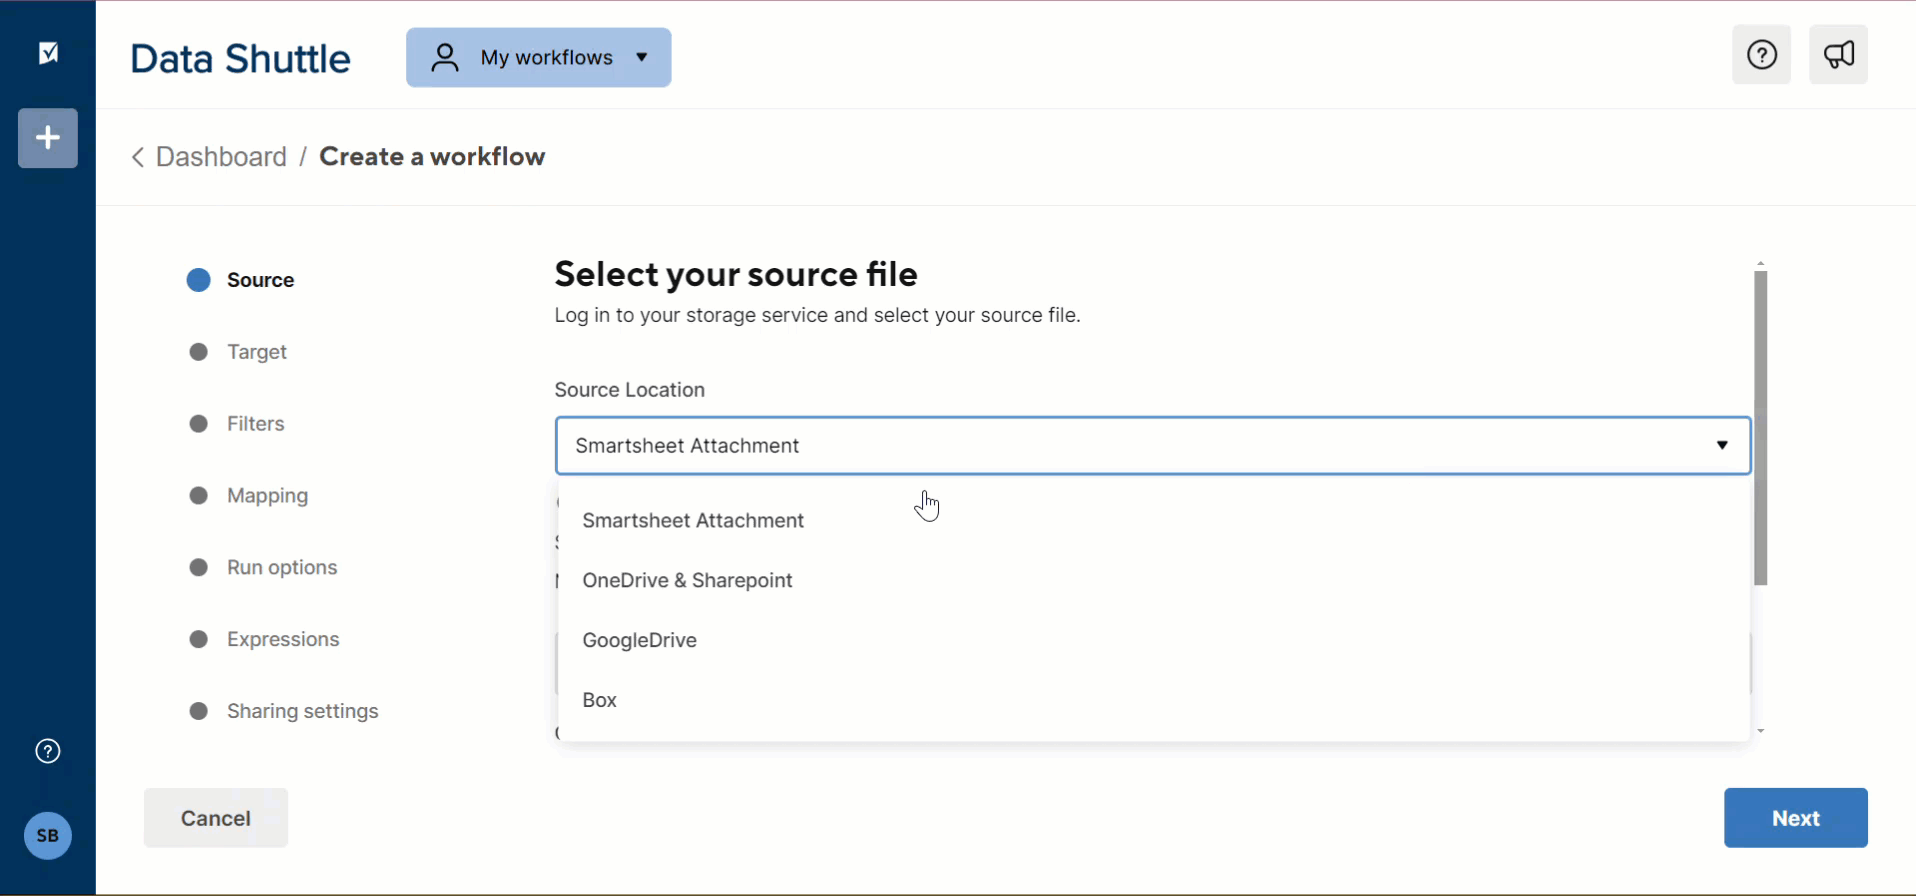
- Select your target sheet. This is where the dropdown options will appear.
Select Update the dropdown choices for the selected columns action. Then, select Next.
Brandfolder Image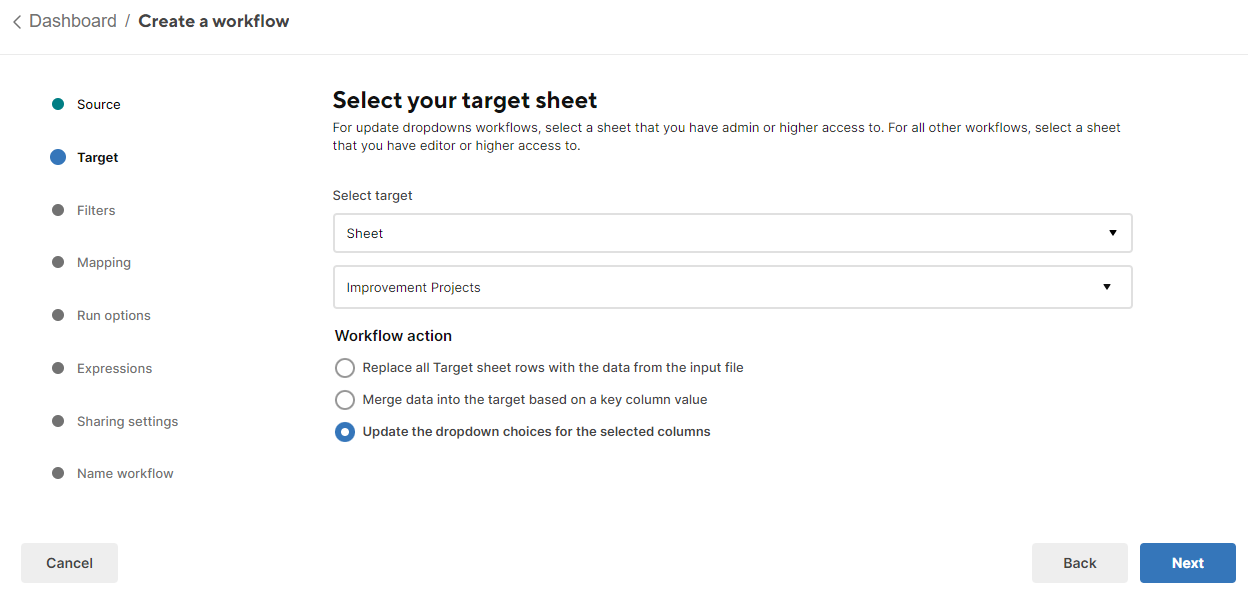
- (Optional) Add a filter to import only data that meets specific criteria.
- Select Next.
- Map columns between your selected source and target. Select Next.
- Toggle Run on schedule if you want to set a schedule, or toggle Run on attachment if you want the workflow to run when the attachment is uploaded. Select Next.
- (Optional) Add expressions to include a new function field to your target sheet.
- Select Next.
- Name your workflow and select Save.
- You'll see a confirmation message. Select Done.
You can manually select Run to test your workflows.
If you set a scheduled cadence for the offload and upload workflows, your workflows will automatically run and keep your drop-down options in sync with your source list.