This help article walks you through setting up SAML configuration at the plan level, accessible only to users within your plan. For a SAML setup that applies to all Smartsheet users within your domain, refer to the domain-level SAML configuration guide.
System Admins with an IT Administrator can set up SAML for SSO with Smartsheet.
As a heads-up
Starting February 5th, 2024, you can’t create new plan-level SAML configurations. However, for existing plan-level SAML configurations, you retain the ability to create, update, delete, or read plan-level SAML setups. Additionally, you now have the option to configure SAML at the domain level.
These are the steps you must complete
- Set up your organization’s Identity Provider (IdP) to communicate with Smartsheet.
Add a record to your organization’s public Domain Name System (DNS). You may need to loop in an internal technical resource for assistance with setup and maintenance of this feature.
To successfully set up SAML SSO with Smartsheet for the US government, there are some requirements and settings you must apply.
Keep these things in mind
- Smartsheet supports Service-Provider-initiated SSO. If you’re configuring an IdP-initiated SSO, work with your IdP.
- You can use more than one SSO IdP at the same time.
- If the System Admin of an Enterprise plan validates your domain and sets up a SAML configuration at the domain level, the domain-level SAML setup overrides any plan-level SAML configurations for users within that domain.
Prerequisites
- US customers, use this Smartsheet metadata: www.smartsheet.com/sites/default/files/smartsheet-saml2-sp-metadata.xml
- EU customers, use this Smartsheet metadata: www.smartsheet.com/sites/default/files/smartsheet-saml2-sp-metadata-eu.xml
Using the metadata provided, configure a Relying Party within your IdP. The process for configuring a Relying Party may vary for every IdP. Consult your IdP’s documentation for more information.
Due to its security vulnerabilities, the SHA1 certificate algorithm has been deprecated. You must ensure you’re not using an SSL certificate which is signed using SHA1.
SAML exchange process
Smartsheet requires the following attributes in the SAML exchange process:
- Persistent ID: urn:oasis:names:tc:SAML:2.0:nameid-format:persistent
- Email address: http://schemas.xmlsoap.org/ws/2005/05/identity/claims/emailaddress
The following attributes are recommended but optional:
Given Name: http://schemas.xmlsoap.org/ws/2005/05/identity/claims/givenname
This represents the user's first name.
Surname: http://schemas.xmlsoap.org/ws/2005/05/identity/claims/surname
This represents the user's last name.
Some SAML services may ask for additional information when you configure them with Smartsheet:
- Assertion Consumer Service (ACS) URL: https://sso.smartsheet.com/Shibboleth.sso/SAML2/POST
- On EU plans, use https://sso.smartsheet.eu/Shibboleth.sso/SAML2/POST
- Audience Restriction: https://sso.smartsheet.com/saml
- On EU plans, use https://sso.smartsheet.eu/saml
Notes on the exchange process
- Enter email addresses in lowercase. Capital letters can prevent matching of emails between your SAML provider and Smartsheet.
- The first assertion must have a Persistent ID that’s the same for each person whenever they sign in. Your email address can be a Persistent ID, but the Email address claim still needs to be passed in the assertion process. Email claims must be all lower case. For a sample assertion and a complete list of Smartsheet’s supported claim formats, see the SAML Assertion: Supported Claims Examples in Smartsheet article.
- The Persistent ID can be defined in the NameID (subject) element of the assertion.
- If the assertion doesn't have a NameID (subject) element, you can use one of the attributes defined in the Supported Claims article.
- Ensure you remove the attribute claim http://schemas.xmlsoap.org/ws/2005/05/identity/claims/Name from the prepopulated attributes in Azure.
Configure Smartsheet.com for use with your SAML IdP
You must meet the requirements before you continue with the SAML configuration.
Open the SAML Administration form
To establish a connection between your IdP and Smartsheet:
- In Admin Center, select the Menu icon at the upper-left.
- Navigate to Settings > Authentication.
Select Manage federated SSO Options.
The Authentication form displays.
Select not configured. After doing these steps, the SAML Administration form displays.
Brandfolder Image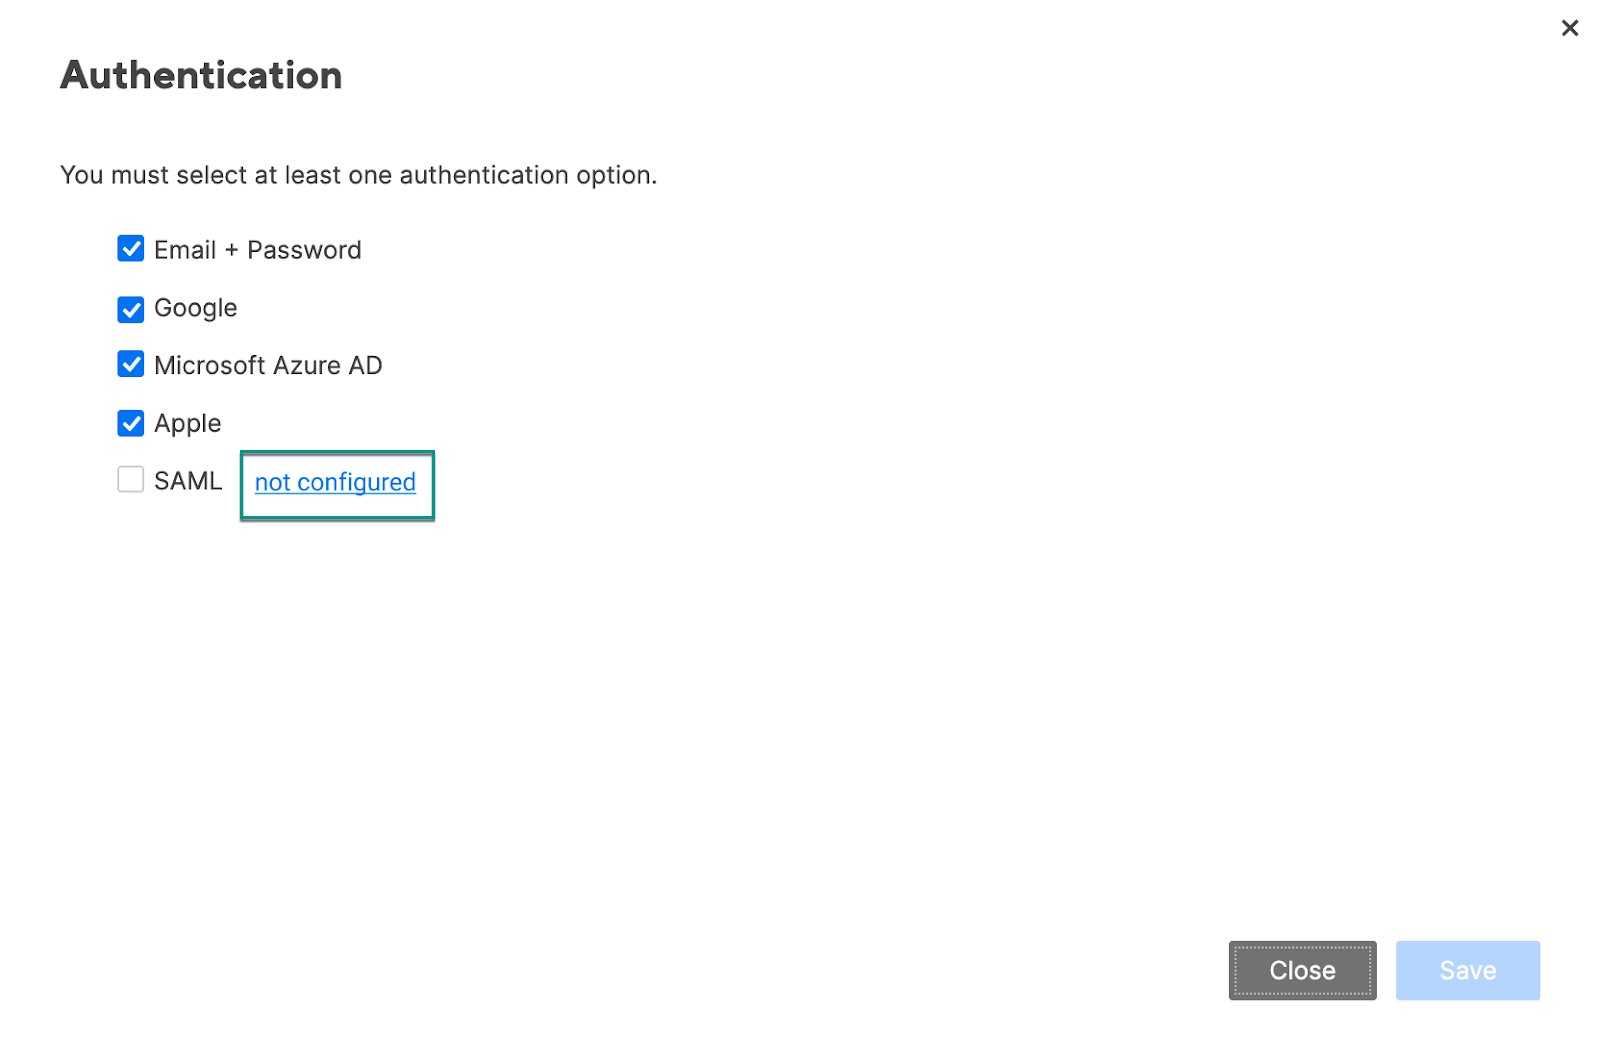
If this is the first time you're setting up the SAML configuration in Smartsheet, the not configured button will take you to the domain-level SAML configuration page. If you still need to define plan-level SAML configuration, contact Smartsheet support.
Configure SSO with your IdP
Follow these steps to configure SAML with one or more IdPs:
Select Add IdP.
Brandfolder Image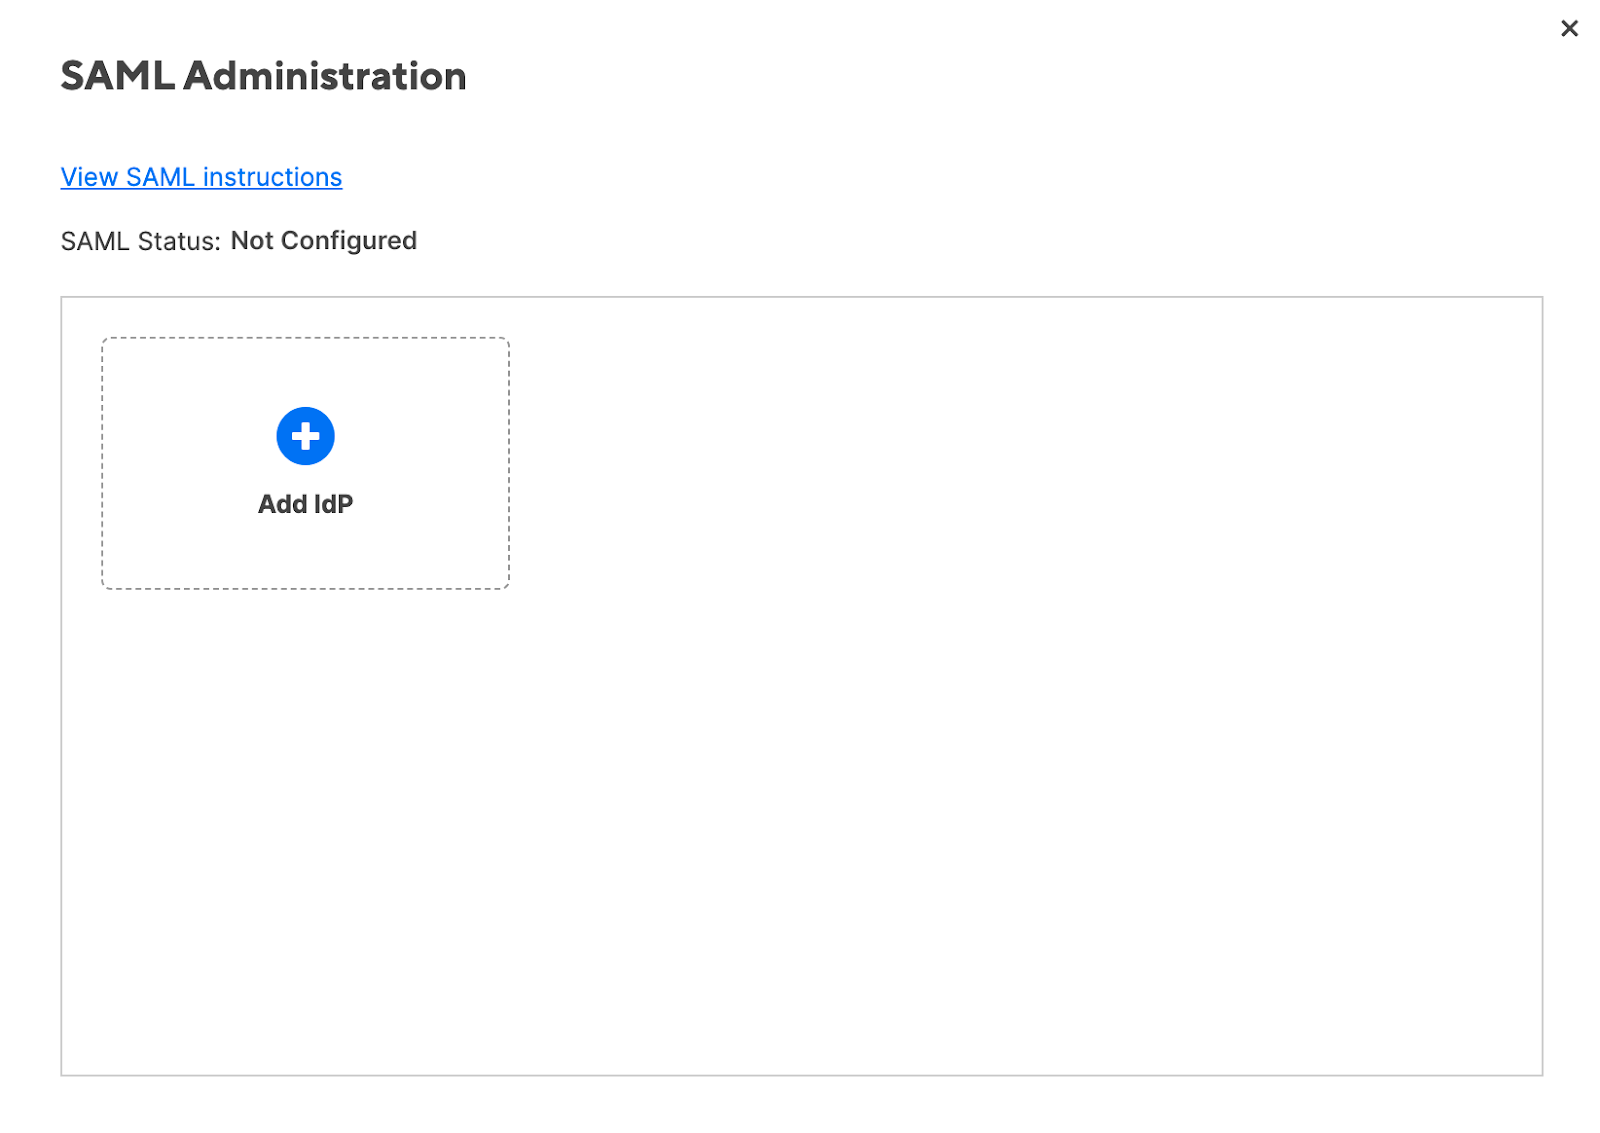
Enter a nickname for your IdP.
Consult your IdP's documentation to determine how to obtain the IdP metadata.
- Obtain the IdP metadata and copy it.
In the IdP Metadata textbox, paste the IdP metadata.
Brandfolder Image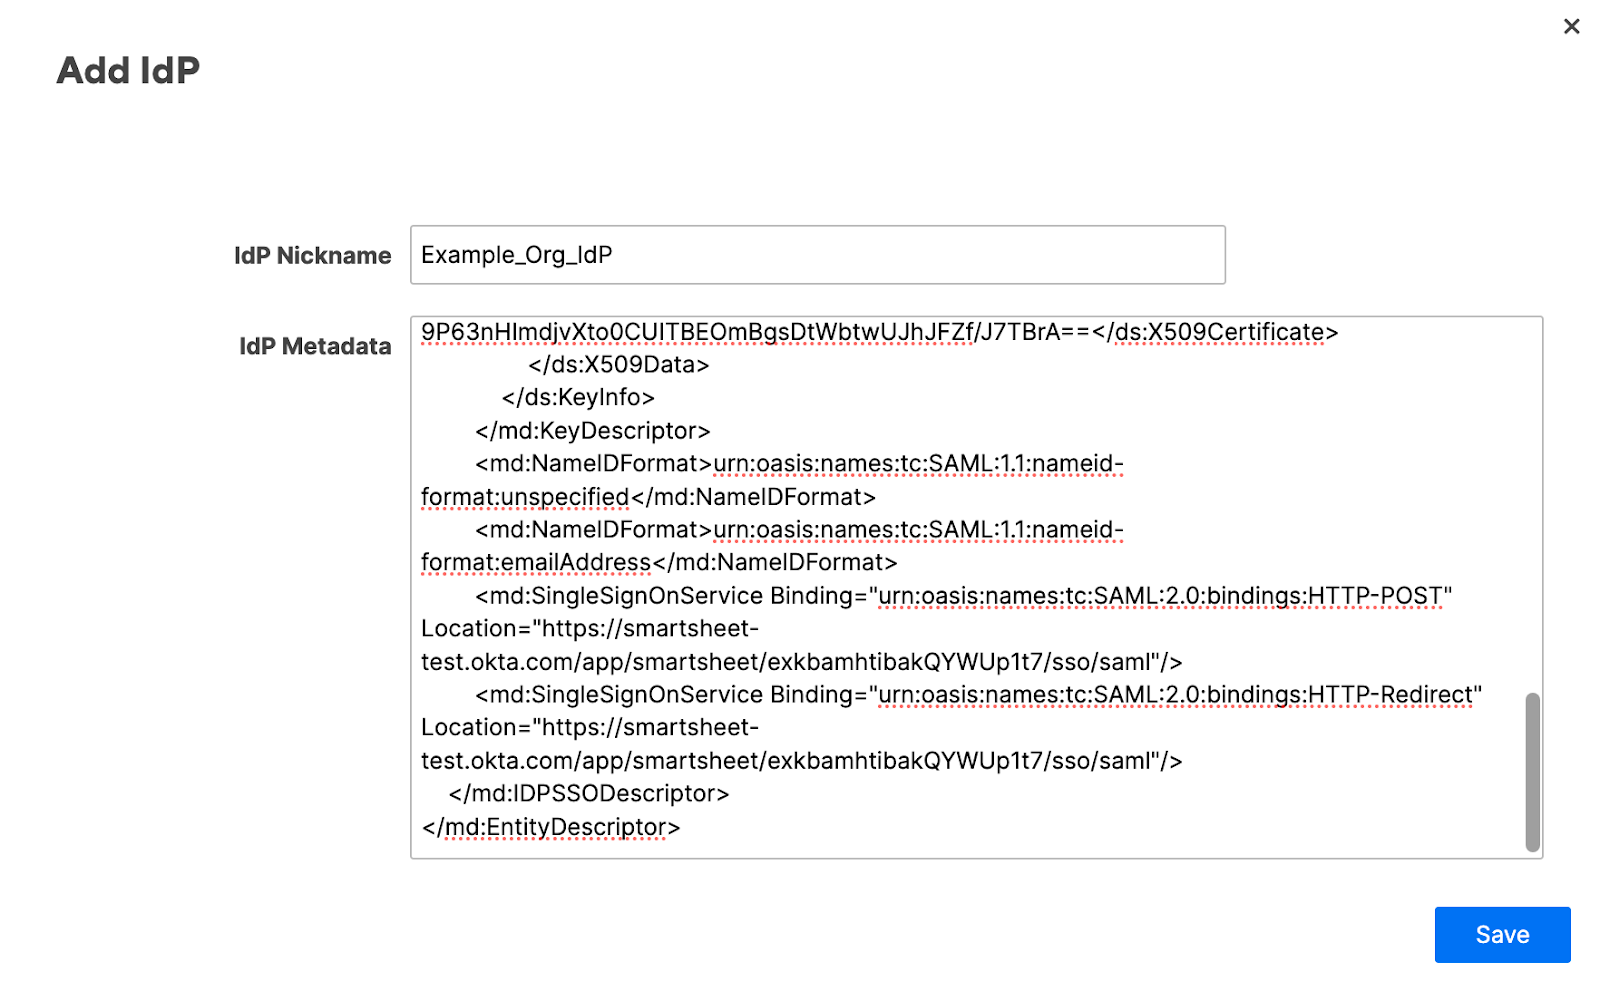
- Copy the SSO URL and paste it in your IdP.
- Select Save. After saving the changes you made, Smartsheet validates the metadata.
- If the validation is successful, the Edit IdP form displays.
- If you receive an error, check out our SAML FAQs and common errors article.
- You can add a CNAME that’ll direct people to a friendly URL when they sign in. See the Direct people to sign in at a friendly CNAME URL section below for more information.
To enable the IdP for use with Smartsheet, select Activate. The IdP status changes from Inactive to Active, Default.
Brandfolder Image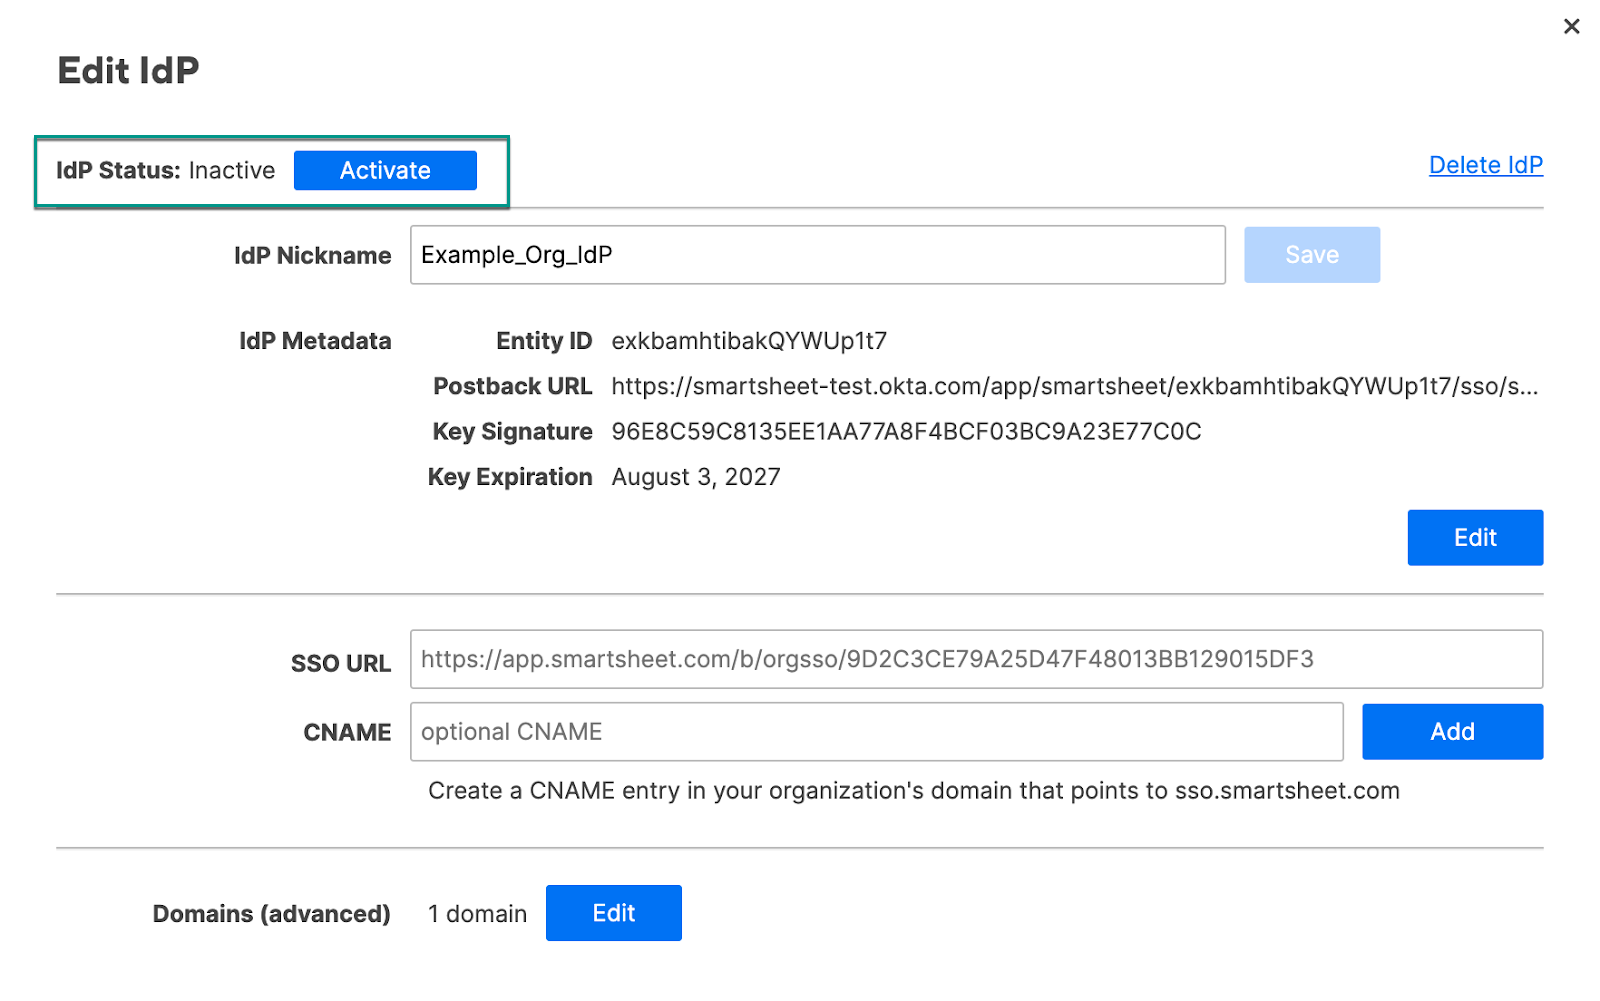
To enable SAML for your plan, in the Authentication form, select SAML.
There must be at least one active IdP before enabling SAML.
Select Save.
That’s it! Now people in your plan can use their company credentials to sign in to Smartsheet.
Configure additional IdPs
- While most organizations only need a single active IdP, there’s no limit to the number of IdPs you can add.
- To edit or add additional IdPs, next to the SAML checkbox, select edit configuration. The SAML Administration form appears for you to add additional IdPs or edit existing ones you’ve already set up.
If you have more than one active IdP, people signing in via SAML will authenticate against the default IdP. To make an IdP the default, in the Edit IdP form, select Make Default.
Brandfolder Image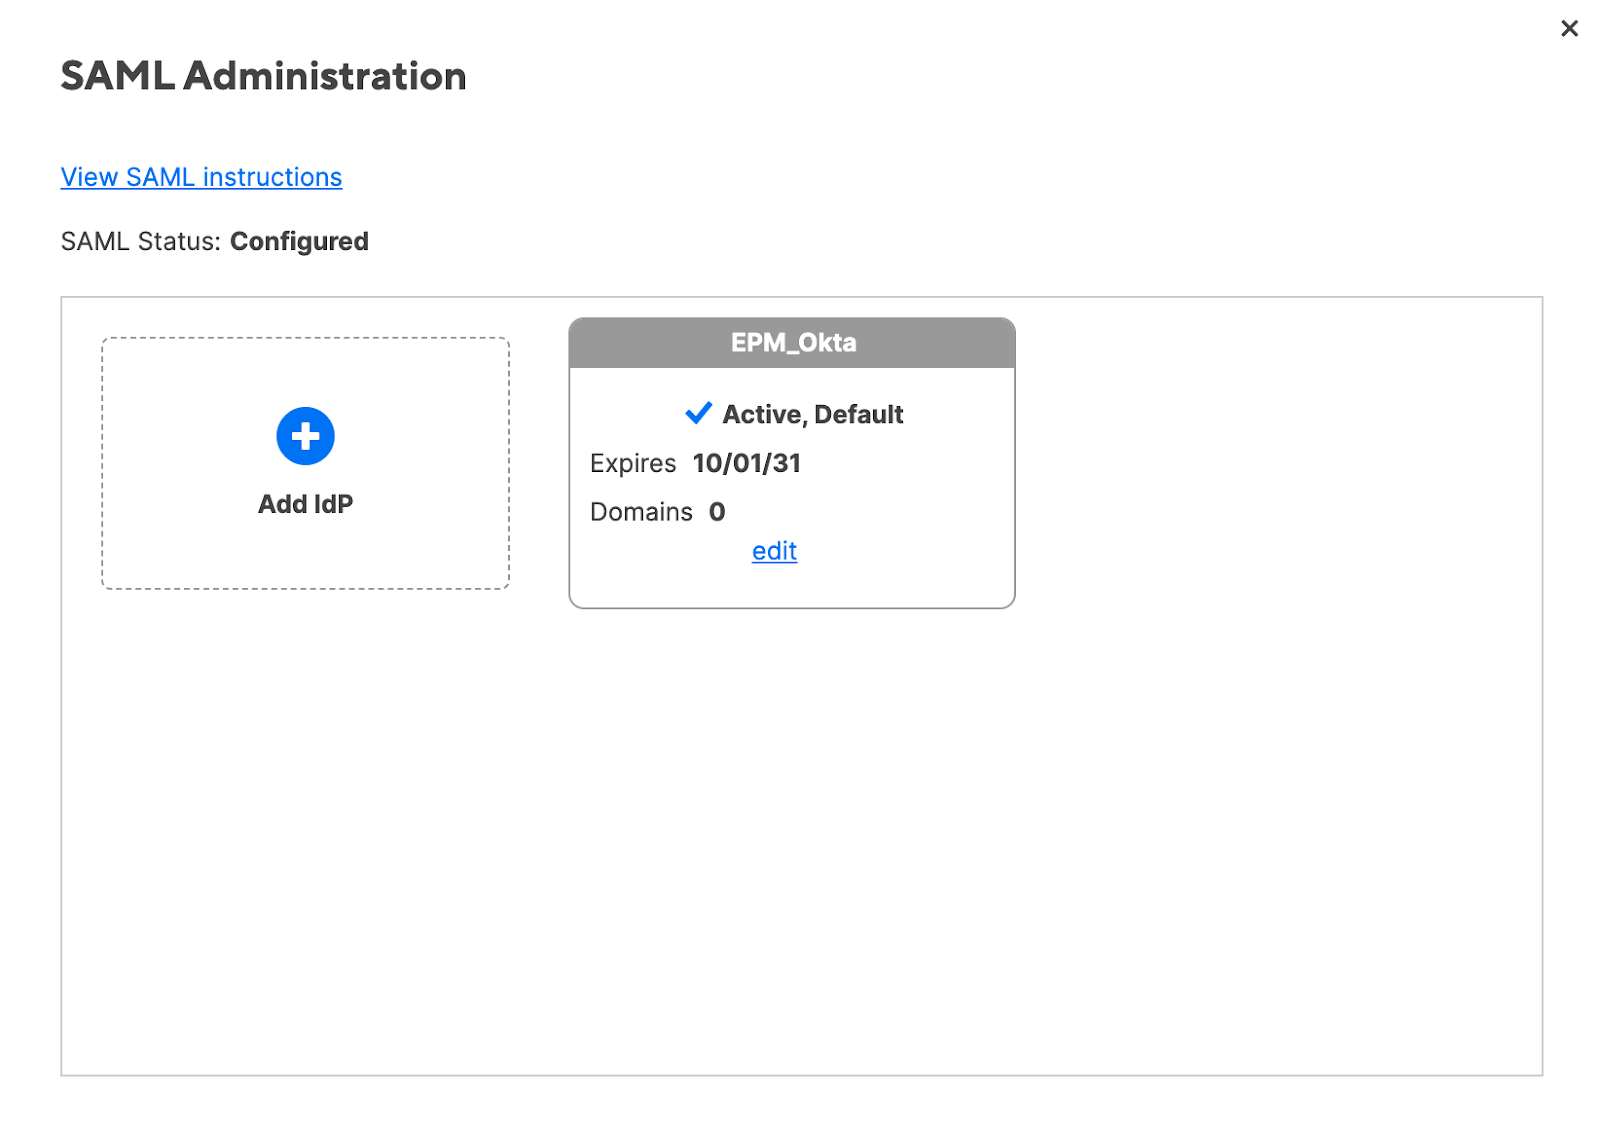
Direct people to sign in at a friendly CNAME URL
Smartsheet provides the default SSO URL for your organization, which is a one-step link to sign in to Smartsheet. You might want to add a CNAME with a friendly, more company-specific URL instead.
Don't type sso.smartsheet.com in the CNAME field of the Edit IdP form as that may cause login issues. Instead, use a CNAME created by your company and have it point to sso.smartsheet.com.
- In your domain, create a CNAME DNS record and point it at sso.smartsheet.com. For example, smartsheet.example.org IN CNAME sso.smartsheet.com.
- In the Edit IdP form, enter the CNAME.
Select Add.
Brandfolder Image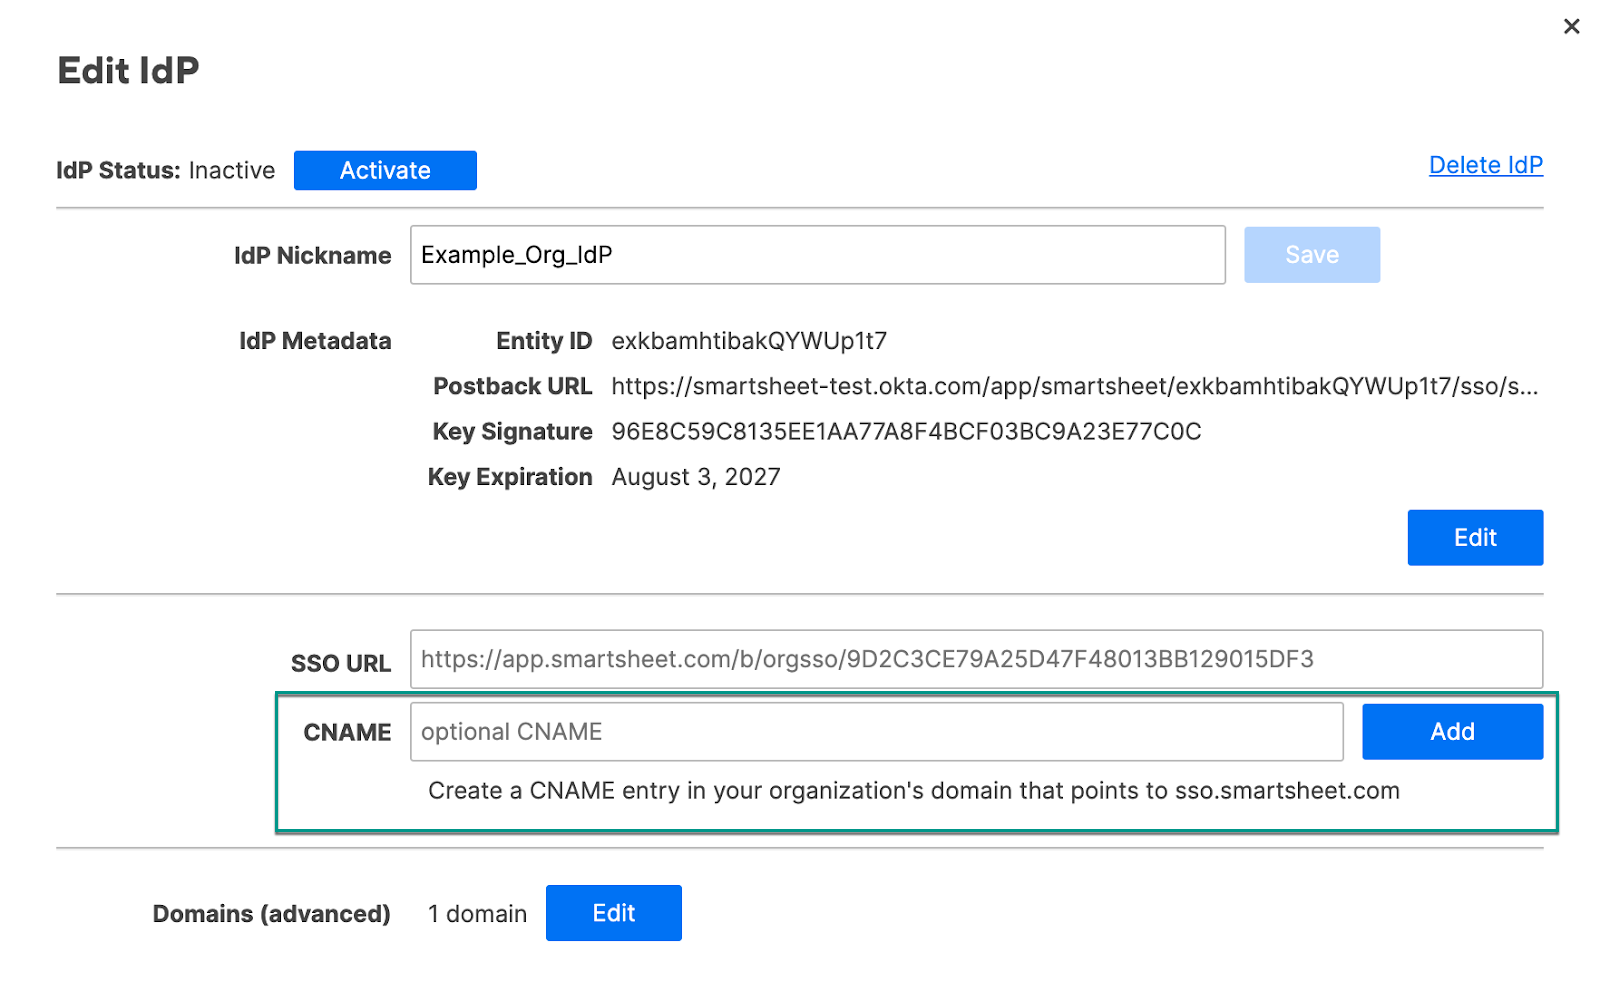
Reminders
- It may take up to one hour for your CNAME address to authenticate.
- You can't use HTTPS for your CNAME URL. Only HTTP is supported.
- Removing a user’s SSO access alone isn’t enough to prevent them from accessing Smartsheet. To fully prevent a user from accessing Smartsheet, you must completely delete that user from your organization’s Smartsheet plan.
SAML configuration states
SAML will be in one of the following states:
- Not configured: There are no active IdPs.
- Disabled: There’s at least one active IdP. Also, in the Authentication form, the SAML checkbox isn’t selected.
- Enabled: There’s at least one active IdP. Also, in the Authentication form, the SAML checkbox is selected. Your IdP will be in one of three states:
- Not configured: Security certificate is expired
- Inactive: Valid metadata, valid security certificate
- Active: Valid metadata, valid security certificate, not sharing entity ID with another active IdP on your plan, and activated