Smartsheet triggers
After you've set up the Smartsheet integration, you can choose events on a sheet to trigger a Bridge workflow. The supported events that'll trigger the workflow are:
- When Rows Are Created
- When Rows Are Changed
- When Rows Are Deleted
- When Column Are Added
- When Columns Are Deleted
When Column Properties Are Changed
This refers to the column name.
- When Column Values Are Changed
- When Comments Are Added
- When Attachments Are Added
You must create a trigger from applications on the Integrations page in Bridge, for them to appear in the Designer when working in your workflows.
There are a few concepts you should know to work with these modules:
Sheet ID
The ID or name of the sheet where events should trigger the workflow. If you type in the sheet name, it'll be replaced with the ID when you save the configuration. You can find the sheet ID by selecting File > Properties.
To use the sheet name instead of the sheet ID, the sheet name must be unique.
Column name or ID
The name or the ID of the column that should trigger the workflow. If you specify the column name, it'll be replaced with the ID when you save the configuration.
Workflow runtime data
When a trigger is saved, it is a webhook registered with Smartsheet. Each workspace registers one webhook, and within a workspace any incoming events are filtered based on the various triggers defined.
Incoming Smartsheet webhook events are passed to the workflow runtime. You can reference it in workflows by typing {{runtime}}. The event object contains the sheet ID of the modified sheet (if the update was due to the Smartsheet integration) and the event details that triggered the workflow.
Example runtime
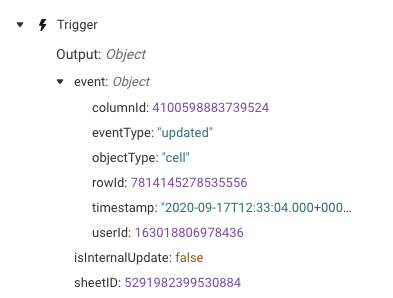
The event differs for each webhook event type:
- The ID field refers to the object type (in the example above, that objectType is a cell)
- eventType is created or updated
- objectType can be row, column, comment, attachment, and cell
You can see more detailed information on the possible event data types in the Smartsheet API documentation.
Add Column
Use this module to add a column to a sheet.
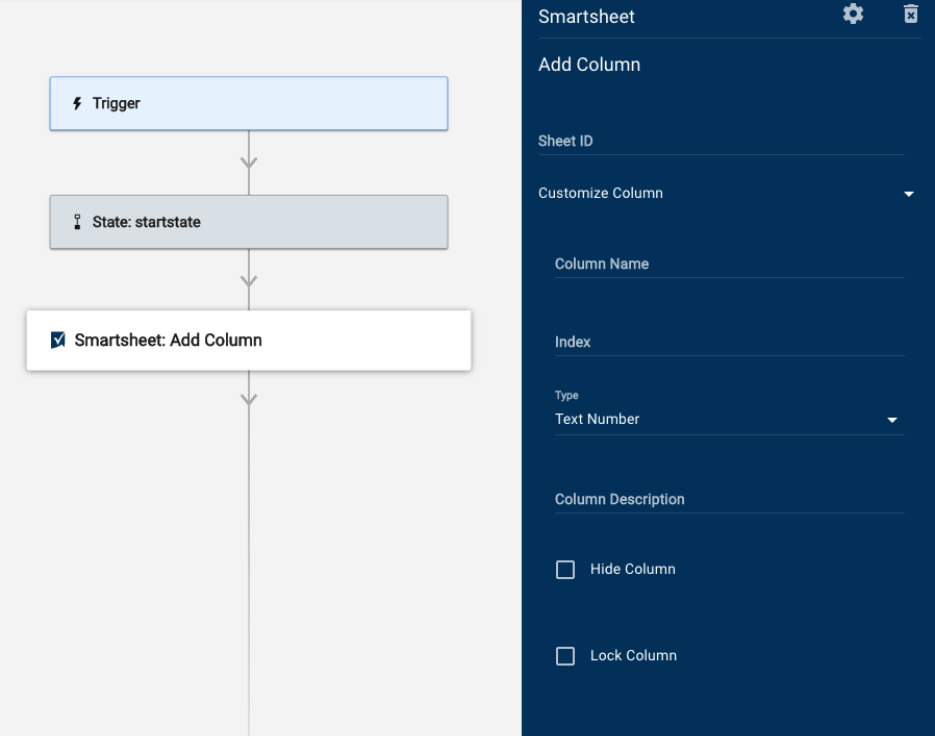
This module requires you to enter the fields below, in which you can use data references.
- Sheet ID: The name or ID of the sheet where you want to add a column.
- Column Name: The heading for the column.
- Column Position: The value that refers to a column's position in a sheet.
The first column in a sheet is 0.
- Type: Select the column type (e.g. Date, Contact List, Text/Number, etc.).
- For Contact List columns provide the values as an object array or a reference to an object array. The format is inside square brackets, with each key/value pair contained in braces [{"name": "John Smith", "email":"john.smith@smartsheet.com"}, {"name": "Joe Bloggs", "email":"joe.bloggs@smartsheet.com"}]
- For Dropdown columns you can add the values as an array. To do this, type the values and press the Enter key to separate them. You can also format them as [1, 2 “value” , “value string”]. Alternatively, you can provide a reference to an array.
- Column Description: The text description of the column
- Hide Column: Select this to show hidden columns.
- Lock Column: Select this to show locked columns.
Once Bridge executes the Add a Column module, this information will be available in the runlog section:
- Data: Array
- Object
- ColumnID: String
- Index
- Column index or position
- This number is zero-based
- Primary: Returned only if the column is the Primary Column (Value = True)
- Title: Text name of column heading
- Type: The selected option from these column types:
- ABSTRACT_DATETIME
- CHECKBOX
- CONTACT_LIST
- DATE
- DATETIME
- DURATION
- MULTI_CONTACT_LIST
- MULTI_PICKLIST
- PICKLIST
- PREDECESSOR
- TEXT_NUMBER
- Validation: Indicates whether validation has been enabled for the column
- Width: Display width of the column in pixels
- Version
- Read-only
- The level of the column type
- Each element in the array is set to one of the following values:
- 0: TEXT_NUMBER, CONTACT_LIST, or PICKLIST
- 1: MULTI_CONTACT_LIST
- 2: MULTI_PICKLIST
- Object
Add Comment To Row
This module either adds a comment or replies to an existing comment on a row in a sheet. This module requires you to enter the fields below.
- Sheet: The ID or unique name of the sheet to be modified
- Row ID: The unique ID of the row that the comment will be added to
- Reply To: The ID of another comment that the new comment will be a reply to
This parameter is optional and is ignored when left blank.
- Message: The message text to be added as the new comment or reply

Once Bridge executes the Add a Column module, this information will be available in the runlog section:
- Created At
- Created By
- Name
- ID (of comment)
- Modified At
Add Row
Use this module to add a new row to a sheet.
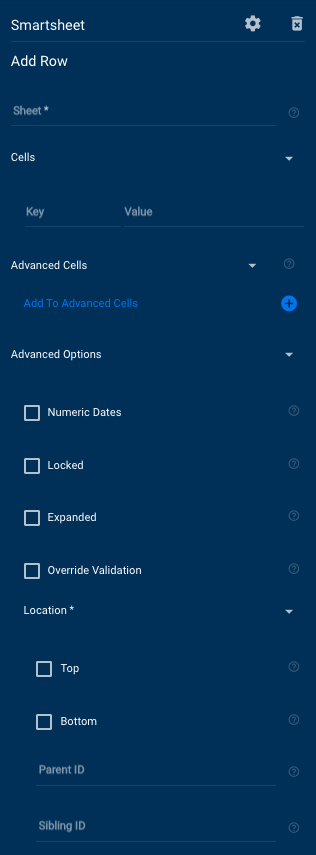
This module requires you to enter the fields below, in which you can use data references.
- Sheet: The ID or unique name of the sheet that is to be modified.
- Cells: Use this section to map data added to the row to columns on the sheet.
- Key: The column name or ID
- Value: The data you want to add in the column, on the row.
- Advanced Cells: Use this section for more advanced cell updates
- Column: The column name or ID
- Type: The type of cell data; value, formula or hyperlink
- Value: The cell value. This field is only used if Type is Value.
- Formula: The formula to be set for the cell. This field is only used if Type is Formula.
- Hyperlink: The hyperlink to be set on the cell. You can link to a URL, a sheet, or a report. This field is only used if Type is Hyperlink.
- Override Validation: This states whether the cell overrides any validation that has been set on the column when setting the value. You can select Default to use the value set in Advanced Options (see below).
- Advanced Options
- Numeric Dates: Select if date values should be treated as Unix timestamps. This is to set date values and a date format in the response. When this is not set, dates are returned in the UTC zone in ISO-8601 format (e.g., YYYY-MM-DDTHH:MM:SS)
- Locked: State if the row should be locked.
- Expanded: State if the row should be expanded or collapsed.
- Override Validation: Set if you want to ignore validation for all cells in the row by default. You can also set it for each cell individually.
- Location: State where the row will be added to the sheet:
- Top: Add the row to the top of the sheet
- Bottom: Add the row to the bottom of the sheet
- Parent ID: Add the row as a child row to the specified row. By default, it is added as the first child of the parent. If Bottom is checked, it is added as the last child
- Sibling ID: Add the row next to the specified row. By default, it is added after the sibling. If Top is checked, it is added above the sibling.
This module returns the following data:
- Cells: All columns include:
- Column ID
- Display Value
- Value
- Created At
- Expanded
- ID (of new row)
- Locked
- Locked for User
- Modified At
- Row Number
- Sheet ID
Copy Rows
This module requires you to enter the fields below, in which you can use data references.
- Source Sheet ID: The ID for the sheet to copy rows from.
- Filter: A Smartsheet filter on the source sheet to match.
- Target Sheet ID: The ID for the sheet to copy rows to.
Once Bridge executes the Copy Rows module, this information will be available in the runlog section:
- Data:
- destinationSheetId: This is the ID of the sheet you are copying your row to.
- rowMappings: This is a breakdown of the references for moved data.
- State: This group provides details about the success or failure of the execution
- Code: This is the success/error code returned from Smartsheet.
- Message: This is a message, if any, that is returned from Smartsheet. E.g. if an assignable couldn’t be found the message might be ‘not found’.
- Status: This is the status returned from Smartsheet. E.g. if an assignable was found successfully the status is ‘SUCCEEDED’, if an assignable couldn’t be found the error might be ‘FAILED’.
Deactivate Smartsheet User
This module enables automation to deactivate a user in an organization's plan.
It only runs successfully when set up by System Admins of Enterprise plans.
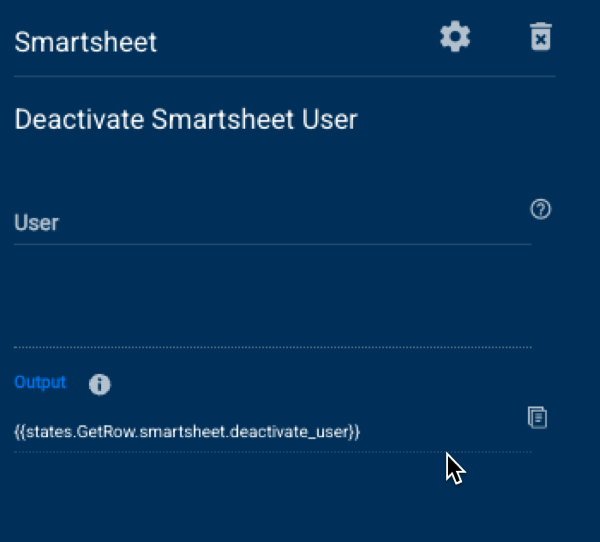
This module requires you to fill in the User field, in which you have to enter the email address or User ID of the user to deactivate.
This module returns the following data:
- Message: Success or error message
- Code: 0 is Success; 3 is Partial Success
Delete Row
Use this module to delete a row in a sheet.
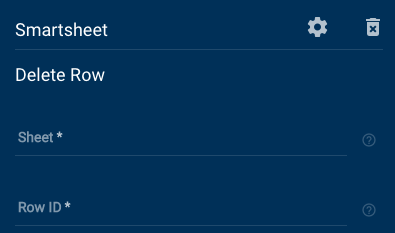
This module requires you to enter the fields below, in which you can use data references.
- Sheet: The ID unique name of the sheet that is to be modified
- Row ID: The unique ID of the row that will be deleted
The Delete Row module doesn't return any data.
Get Attachment
This module can get a specific attachment from a sheet.
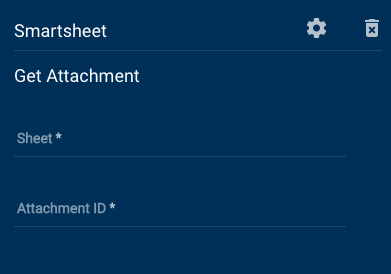
This module requires you to enter the fields below, in which you can use data references.
- Sheet: The ID unique name of the sheet that is to be modified
- Attachment ID: The unique ID of the attachment on the sheet
This module returns the following data:
- Attachment Type
- Created At
- Created By
- Name
- ID (of attachment)
- Mime type
- Name
- Parent ID
- Parent Type
- Size in Kb
- URL
- URL Expires in Milliseconds
Get Column
Before you add the Get Column module, make sure you’ve applied the List Columns module to the workflow. To build in pass/fail logic, add a new State to one of the branches.
Brandfolder Image

This module requires you to enter the fields below, in which you can use data references.
- Name: Enter the name of the State for the branch logic group.
- Sheet ID: Enter the name or ID of the sheet where the column you want to pull exists.
- Position: Enter the value that refers to a column’s position in a sheet.
The first column in a sheet is 0.
- Column ID: Enter the column ID recorded in the runlog section of the List Column module.
Once Bridge executes the Get Column module, this information will be available in the runlog section:
- Data: Array
- Object
- ColumnID: String
- Index
- Column index or position
- This number is zero-based
- Primary: Returned only if the column is the Primary Column (Value = True)
- Title: Text name of column heading
- Type: The selected option from these column types:
- ABSTRACT_DATETIME
- CHECKBOX
- CONTACT_LIST
- DATE
- DATETIME
- DURATION
- MULTI_CONTACT_LIST
- MULTI_PICKLIST
- PICKLIST
- PREDECESSOR
- TEXT_NUMBER
- Validation: Indicates whether validation has been enabled for the column
- Width: Display column width in pixels
- Version
- Read-only
- The level of the column type
- Each element in the array is set to one of the following values:
- 0: TEXT_NUMBER, CONTACT_LIST, or PICKLIST
- 1: MULTI_CONTACT_LIST
- 2: MULTI_PICKLIST
- Object
Get Comment
Get a specific comment or discussion using its ID.
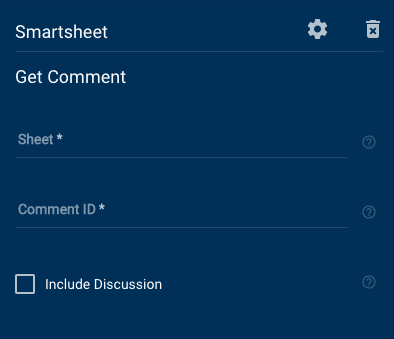
This module requires you to enter the fields below, in which you can use data references.
- Sheet: The ID or unique name of the sheet that is to be modified
- Comment ID: The unique ID of the comment on the sheet. You can also specify a discussion ID, in which case the first comment of the discussion will be returned.
- Include Discussion: State if you want the discussion to be included in the response. If you give a discussion ID, this will happen automatically.
This module returns the following data:
Comment
- Created At
- Created By
- Name
- ID
- Modified At
- Text
Discussion
- Access level
- Comment Count
- Comments
- Created At
- Created By
- Name
- ID
- Modified At
- Text
- Created By
- Name
- ID
- Last Commented At
- Last Commented User
- Name
- Parent ID
- Parent Type
- Title
Get Report
This module can get details from a report in Smartsheet.
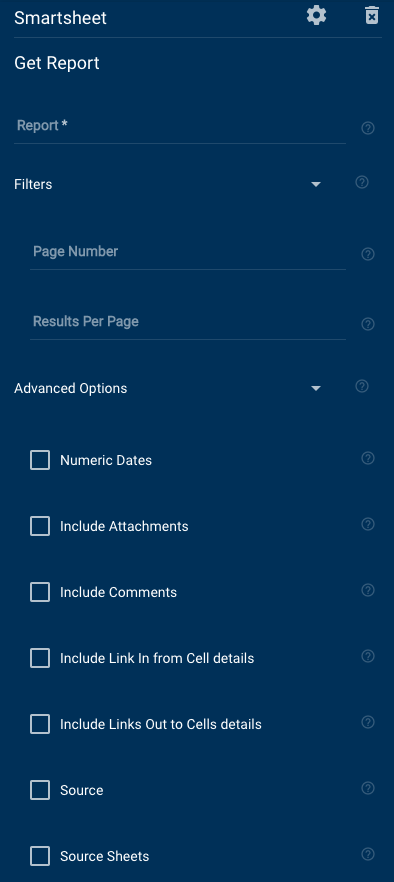
This module requires you to enter the fields below, in which you can use data references.
- Report: The ID or unique name of the report that is to be modified.
- Filters: Options to filter the columns and rows that will be returned.
- Page Number: Used to get results in page batches. Specify a page number from 1 to the number of pages available (a number greater than possible will return the last page) to get a subsection of the results. This will default to 1 if it is not set.
- Results Per Page: The number of results that will be returned at one time. This will default to 100 if not set.
- Advanced Options:
- Numeric Date: State if you want date values to be returned in numeric format, milliseconds since the UNIX epoch (midnight on January 1, 1970, in UTC time).
- Include Attachments: Include any attachments on the sheet and row.
- Include Comments: Include any comments and discussions on the sheet and row.
- Include Link In from Cell details: Includes status, rowId, and columnId from the Cell Link In details.
- Include Links Out to Cells details: Includes status, rowId, and columnId from the Cell Link Out details.
- Source: Include information on the report source.
- Source Sheets: Include information on the source sheets.
This module returns the following data:
- Access Level
- Cell Image Upload Enabled
- Columns (all columns included)
- Index
- Sheet Name Column
- Title
- Type
- Validation
- Version
- Virtual ID
- Width
- Created At
- Effective Attachment Options (Evernote, Google Drive, File, Box.com, Dropbox, OneDrive, Egnyte, Link)
- Gantt Enabled
- ID
- Modified At
- Name
- Permalink
- Read Only
- Rows
- Access Level
- Cells (all cells included)
- Name
- Column ID
- Display Value
- Value
- Virtual Column ID
- Name
- Created At
- Expanded
- ID
- Modified At
- Row Number
- Sheet ID
- Sibling ID
- Access Level
- Cells
- Column ID
- Display Value
- Value
- Virtual Column ID
- Created At
- Expanded
- ID
- Modified At
- Row Number
- Sheet ID
- Sibling ID
- Total Row Count
Get Row
This module can get details from a row in a sheet.

This module requires you to enter the fields below.
- Sheet: The ID or unique name of the sheet.
- Row ID: The unique ID of the row.
- Advanced Options
- Numeric Date: State if you want date values to be returned in numeric format, milliseconds since the UNIX epoch (midnight on January 1, 1970, in UTC)
- Include Attachments: Include any attachments on the row
- Include Comments: Include any comments and discussions on the row
- Include Columns: Include information on all columns for the sheet.\
- Include Link In from Cell details: Includes status, rowId, and columnId from the Cell Link In details
- Include Links Out to Cells details: Includes status, rowId, and columnId from the Cell Link Out details
- Include Row Permanent Link: Includes a direct link to the row in the Smartsheet application
- Include Row Writer Information: Includes additional details about the rows creator and who last modified it
- Exclude Empty Cells: Excludes cells that have never contained any data
This module returns the following data:
- Row
- Cells
- Name
- Column ID
- Display Value
- Value
- Name
- Cells
- Created At
- Expanded
- ID
- Locked
- Locked for user
- Modified At
- Row Number
- Sheet ID
- Version
Get Sheet
This module can get information from an entire sheet in Smartsheet.
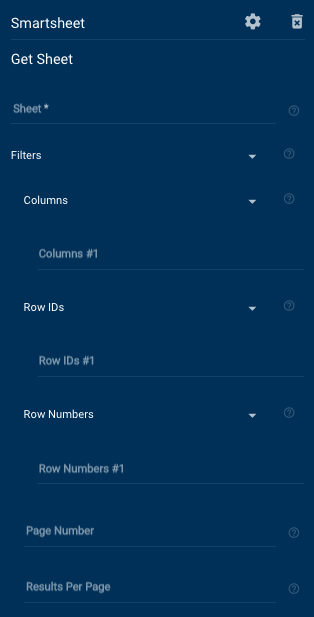
This module requires you to enter the fields below.
- Sheet: the ID or unique name of the sheet that is to be modified.
- Filters:
- Columns: The name or ID of the columns you want to include in the response. If this is not set, all columns are returned. The cell data returned only includes the selected columns.
- Row IDs: A list of IDs for the rows that are to be included in the request.
- Row Numbers: A list of row numbers for the rows that are to be included in the request. Non-existent row numbers are ignored.
- Page Number: Used to get results in page batches. Specify a page number from 1 to the number of pages available (a number greater than possible returns the last page) to get a subsection of the results. This defaults to 1 if it’s not set.
- Results Per Page: The number of results to be returned at one time. This defaults to 100 if not set.
- Advanced Options
- Numeric Date: Choose if you want date values to be returned in numeric format, milliseconds since the UNIX epoch (midnight on January 1, 1970, in UTC).
- Include Attachments: Include any attachments on the sheet and row.
- Include Comments: Include any comments and discussions on the sheet and row.
- Include Link In from Cell details: Includes status, rowId, and columnId from the Cell Link In details.
- Include Links Out to Cells details: Includes status, rowId, and columnId from the Cell Link Out details.
- Include Row Permanent Link: Includes a direct link to the row in the Smartsheet application
- Include Row Writer Information: Includes additional details about the rows creator and who last modified it.
- Exclude Empty Cells: Excludes cells that have never contained any data.
- Owner Info: Include information on the owner of the sheet.
- Source: Include information on the sheet source.
This module returns the following data:
- Access Level
- Cell Image Upload Enabled
- Columns
- ID
- Index
- Primary
- Title
- Type
- Validation
- Version
- Width
- Created At
- Dependencies Enabled
- Effective Attachment Options (File, Box.com, Evernote, Dropdox, Egnyte, OneDrive, Google Drive)
- Gantt Enabled
- Has Summary Fields
- ID
- Modified At
- Name
- Permalink
- Resource Management Enabled
- Rows
- Cells
- Column Name
- Column ID
- Display Value
- Value
- Created At
- Expanded
- ID
- Modified At
- Row Number
- Total Row Count
- User Permissions
- Summary Permissions
- User Settings
- Critical Path Enabled
- Display Summary Tasks
- Column Name
- Cells
- Version
Get Update Request
This module functions as a junction and has a forked path depending on the outcome. It has three potential outcomes:
- Update request found
- Update request
- No sheet found
Give this module a name when dragging it to a workflow.
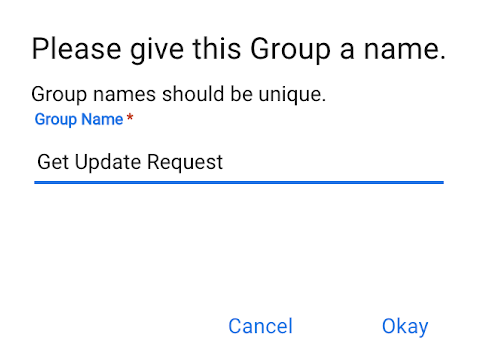
The best practice is to name it after the module.
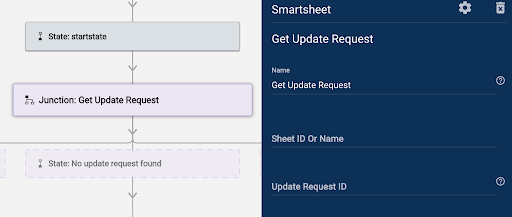
This module requires you to enter the fields below, in which you can use data references in these fields.
- Sheet ID or Name: In this field, enter the ID or name of the sheet.
- Update Request ID: In this field, enter the ID for the update request.
Once Bridge executes the Get Update Request module, this information will be available in the runlog section:
- Data:
- ccSender
- columnIds: This provides an array of the column IDs in the update request
- createdAt: When the update request was created
- id: The update request ID
- includeAttachments: Indicates whether attachments were included in update request
- includeComments: Indicates whether comments were included in update request
- message: The message text in the update request
- modifiedAt: When the update request was modified
- recipients: Users who received the update request
- rowIds: The IDs for rows included in the Update Request
- schedule: When the update request was sent
- sentBy: Reflects the Email and name of the sender, the user who authenticated the Smartsheet integration in Bridge
- subject: The subject line for the update request
- State: This is the status that the module returns from Smartsheet. These are examples of status labels you might encounter:
- Succeeded: The system successfully found the information
- Failed: The system didn’t find the information
Get User
Get user details based on an email or user ID and route the workflow depending on whether a user is found.
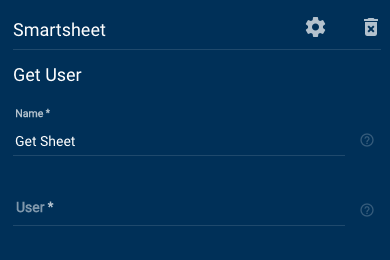
This module requires you to enter the fields below:
- Name: The name of the junction.
- User: The email or ID of the user.
If successful, this module returns the following data:
- Account
- ID
- Name
- Alternate Emails
- Company
- Department
- First Name
- ID
- Last Name
- Locale
- Mobile Phone
- Profile Image (Height, Image ID and Width)
- Role
- Timezone
- Title
- Work Phone
If the run was unsuccessful, it only returns the message "failed to find user "
List Columns
List Columns returns all the available columns in a specified sheet. You can use it along with Get Column to return the Column ID reference.
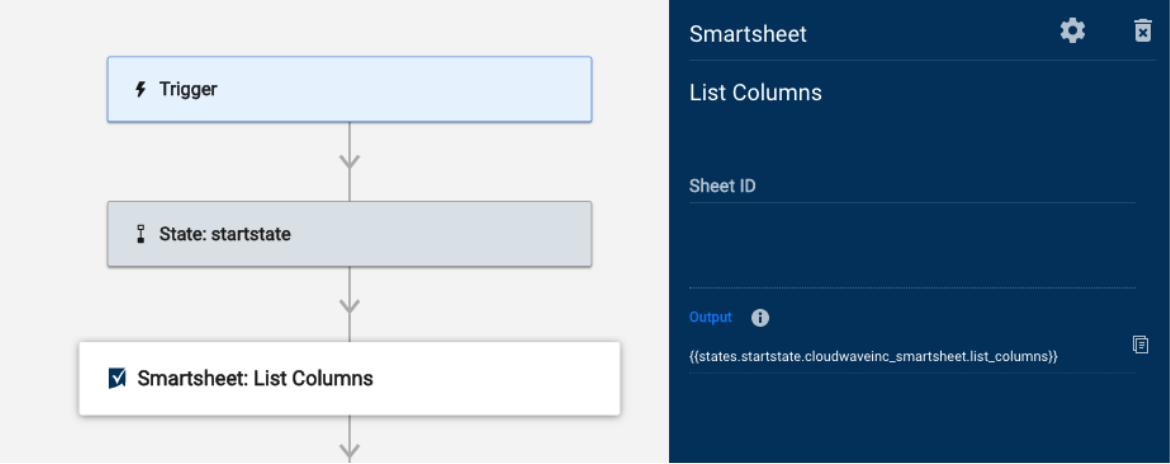
This module requires you to fill in the Sheet ID with the name or ID of the sheet where you want to return the columns. You can use data references in this field.
Once Bridge executes the List Columns module in a workflow, this information will be available in the runlog section.
- Data: Array
- Object
- ColumnID: String
- Index
- Column index or position
- This number is zero-based
- Primary: Returned only if the column is the Primary Column (Value = True)
- Title: Text name of column heading
- Type: The selected option from these column types:
- ABSTRACT_DATETIME
- CHECKBOX
- CONTACT_LIST
- DATE
- DATETIME
- DURATION
- MULTI_CONTACT_LIST
- MULTI_PICKLIST
- PICKLIST
- PREDECESSOR
- TEXT_NUMBER
- Validation: Indicates whether validation has been enabled for the column
- Width: Display width of the column in pixels
- Version
- Read-only
- The level of the column type
- Each element in the array is set to one of the following values:
- 0: TEXT_NUMBER, CONTACT_LIST, or PICKLIST
- 1: MULTI_CONTACT_LIST
- 2: MULTI_PICKLIST
- State: Refer to this section to check if the module worked
- Code: This is the success/error code that the module returns from Smartsheet
- Message: A system message that the module returns from Smartsheet. For example, if a module can’t find the value, the message might be “Not found”
- Status: This is the status that the module returns from Smartsheet. These are examples you might encounter:
- Succeeded: The module found the value
- Failed: The module didn’t find the value
- Object
List Sheets
List all the sheets that are available to you in Smartsheet.
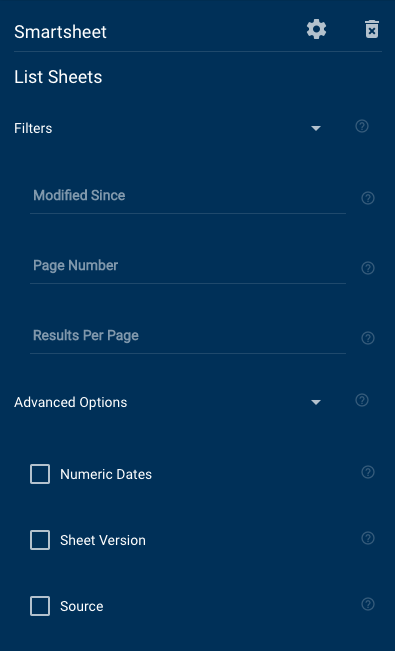
This module requires you to enter the fields below:
- Filters: Options to filter the columns and rows that will be returned.
- Modified Since: State if you want only the sheets that have been modified since a given time. The date is in the UTC zone in ISO-8601 format, YYYY-MM-DDTHH:MM:SS. If Numeric Dates is set, then the date is in milliseconds since the UNIX epoch (midnight on January 1, 1970, in UTC).
- Page Number: Used to get results in page batches, specify a page number from 1 to the number of pages available (a number greater than possible will return the last page) to get a subsection of the results. This will default to 1 if not set.
- Results Per Page: The number of results that will be returned at one time. Will default to 100 if not set.
- Advanced Options:
- Numeric Date: State if you want date values to be returned in numeric format, milliseconds since the UNIX epoch (midnight on January 1, 1970, in UTC). When not set dates will be returned is in the UTC zone in ISO-8601 format, YYYY-MM-DDTHH:MM:SS.
- Sheet Version: Include information on the sheet version.
- Source: Include information on the sheet source.
This module returns the following data:
- Data
- Access Level
- Created At
- ID
- Modified At
- Name
- Permalink
- Source
- ID
- Type
- Version
- Page Number
- Page Size
- Total Count
- Total Pages
Manage Alternate Email
Manage alternative emails for a user.
This module only functions if you're authenticated as the system administrator of your Smartsheet account.
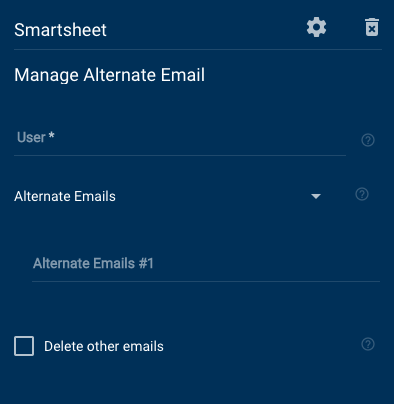
This module requires you to enter the fields below:
- User: The email or ID of the user you want to modify.
- Alternate Emails: A list of alternative emails you want to add to the user. You can leave this empty and select to delete other emails to remove all alternative emails from a user.
- Delete other emails: State if you want to remove any alternative emails from the user that are already set (not specified as alternative emails above.)
Manage Alternate Email-returned data
- Removed
- Added
- ID
Reactivate Smartsheet User
This module enables automation to reactivate a user in an organization's plan. When used to reactivate a user, they will regain access to Smartsheet and will have the same roles as when they were deactivated. This module will only run successfully when set up by system administrators of Enterprise organizations.
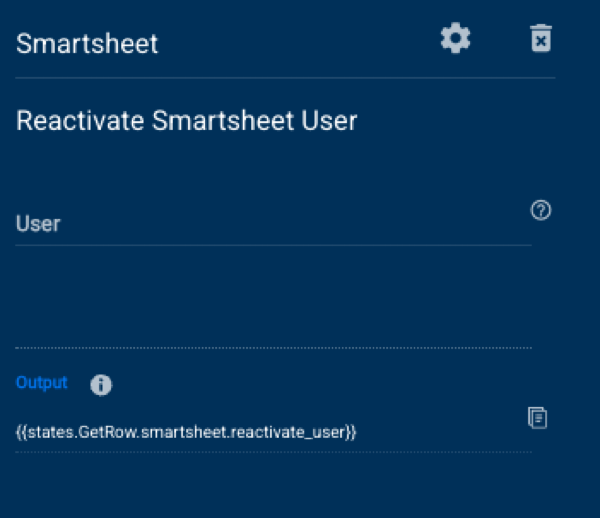
This module requires you to enter the fields below:
- User: Insert the email address or User ID of the user to deactivate.
Response data
- Message: Success or error message
- Code: 0 is Success; 3 is Partial Success
Search Sheet
Search a sheet and return the columns and rows that match filter conditions based on cell contents.
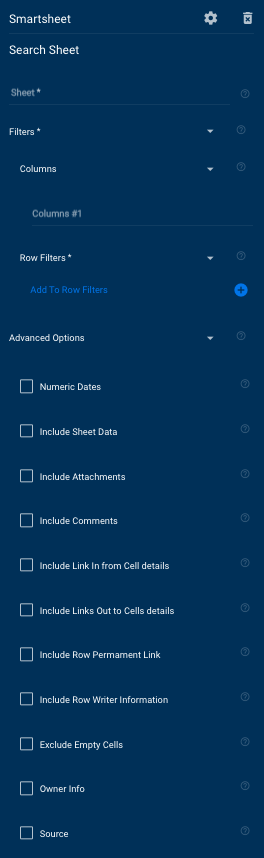
This module requires you to enter the fields below:
- Sheet: The ID or unique name of the sheet that is to be modified.
- Filters: Options to filter the columns and rows that will be returned.
- Columns: The name or ID of the columns you want to include in the response. If this is not set, all columns are returned. The cell data returned will only include the selected columns.
- Row Filters: An array of filter conditions that will determine what rows will be returned. A row must satisfy every filter condition to be returned. If you specify multiple values for a filter condition, the condition only has to be valid for a single value. The two exceptions are Is Not Equal To, where the cell value must not equal any of the supplied values, and Between, where you must specify two values and the cell value to be a valid number between the specified start and end values, excluding the start and end values.
- Column: The name or ID of the column.
- Condition: The condition type to be applied to the filter.
- Values: The values to be compared to the cell value based on the filter condition.
- Advanced Options:
- Numeric Date: State if you want date values to be returned in numeric format, milliseconds since the UNIX epoch (midnight on January 1, 1970, in UTC time).
- Include Attachments: Include any attachments on the sheet and rows.
- Include Comments: Include any comments and discussions on the sheet and rows.
- Include Link In from Cell details: Includes status, rowId, and columnId from the Cell Link In details.
- Include Links Out to Cells details: Includes status, rowId, and columnId from the Cell Link Out details.
- Include Row Permanent Link: Includes a direct link to the row in the Smartsheet application.
- Include Row Writer Information: Includes additional details about the rows creator and who last modified it.
- Exclude Empty Cells: Excludes cells that have never contained any data.
- Owner Info: Include information on the owner of the sheet.
- Source: include information on the sheet source.
Search Sheet returned data
The sheet data can be included by selecting the Advanced Option, Include Sheet Data. This will be the sheet object as defined by Get Sheet, with the rows and columns filtered as specified.
The data returned contains all columns (or only those set in the Filters) showing the Column Name and the value in the cell for all found rows.
Search Sheet known issues
Currently, filter conditions on date fields function differently depending on if Numeric Dates has been selected.
- If selected, the value will be treated as a number and the filter conditions must reflect that.
- Alternatively, if Numeric Dates is unchecked, then the cell value is a string; this means that Less Than, More Than, and Between filter conditions will not function.
Send Update Request
Use this module to send an update request when Bridge detects the trigger event(s) you've identified.
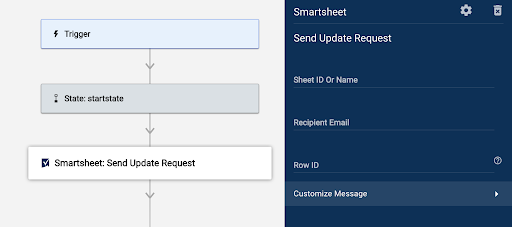
This module requires you to enter the fields below:
Note that data references can be used in these fields.
Sheet ID or Name
In this field, enter the ID for, or name of the sheet.
Recipient Email
In this field, enter the email or data reference of the recipient.
Row ID
The ID for the row to be sent as an update request.
Customize Message
In this section, fill in these fields to set up the message you need to send to the user:
- Message Subject: The subject for the Update Request email
- If you didn't enter text, the default subject will be Update Request: {{Primary Column Data}}
- You can use this field to write a custom subject that the workflow will always send in the Update Request email.
- You can also use data from another part of your workflow to populate the Subject line. To bring in data from another part of your Bridge workflow, copy the appropriate reference from the Run Log pane. Then paste it into this field.
- Message Content: The message in the Update Request email
- If you didn't enter a message, the default text will be Please update my online sheet.
- You can use this field to write a custom message that the workflow will always send in the Update Request.
- You can also use data from another part of your workflow to populate the Message field. To bring in data from another part of your Bridge workflow, copy the appropriate reference from the Run Log pane. Then paste it into this field.
- Include Specific Columns: By default, Bridge includes all columns.
- To only include specific columns, enter the column IDs or reference in this field. Then, separate the values with a comma.
- CC Sender?: CC the user who authenticated the Smartsheet integration
- Don't Include Attachments: Exclude attachments from the Update Request
- Don't Include Comments: Remove the Comments/Conversations column from the update request.
Once Bridge executes the Send Update Request module, this information will be available in the Run Log pane:
- Data
- ccSender
- columnIds: This will provide many different column IDs included in the update request
- id: The update request ID
- includeAttachments: Indicates whether attachments were included in the update request
- includeComments: Indicates whether comments were included in the update request
- message: The message text in the update request
- recipients: Users who received the update request
- rowIds: The IDs for rows included in the update request
- schedule: When the update request was sent
- sentBy: Reflects the email and name of the sender —the user who authenticated to the Smartsheet integration in Bridge
- subject: The subject line for the update request
- State: Refer to this section to check if the module worked
- Code: This is the success/error code the module returns from Smartsheet
- Message: A system message the module returns from Smartsheet
- For example, if a module couldn’t find the value, the message might be "Not found"
- Status: This is the status that the module returns from Smartsheet
- These are examples of status labels you might encounter:
- Succeeded: The system successfully found the information
- Failed: The system didn't find the information
- These are examples of status labels you might encounter:
Share Sheet
Share sheets with other users.

This module requires you to enter the fields below:
- Sheet: The ID or unique name of the sheet that is to be modified.
- Send Email: State if you want to send an email to the recipients as well as a notification in Smartsheet.
- Recipients: A list of recipients for the share request
- Email: The recipient's email address.
Group ID: The recipient's group ID.
Either Email or Group ID must be specified, but not both. Group ID will be ignored in favor of Email if both are supplied.
- Access Level: The access level for the recipient. This can be one of the following:
- Admin
- Editor
- Editor with sharing
- Owner
- Viewer
- Subject: The subject of the email to be sent to the recipient.
- Message: The message of the email to be sent to the recipient.
- CC Me: State if you should be included when emailing the recipient.
Update Column
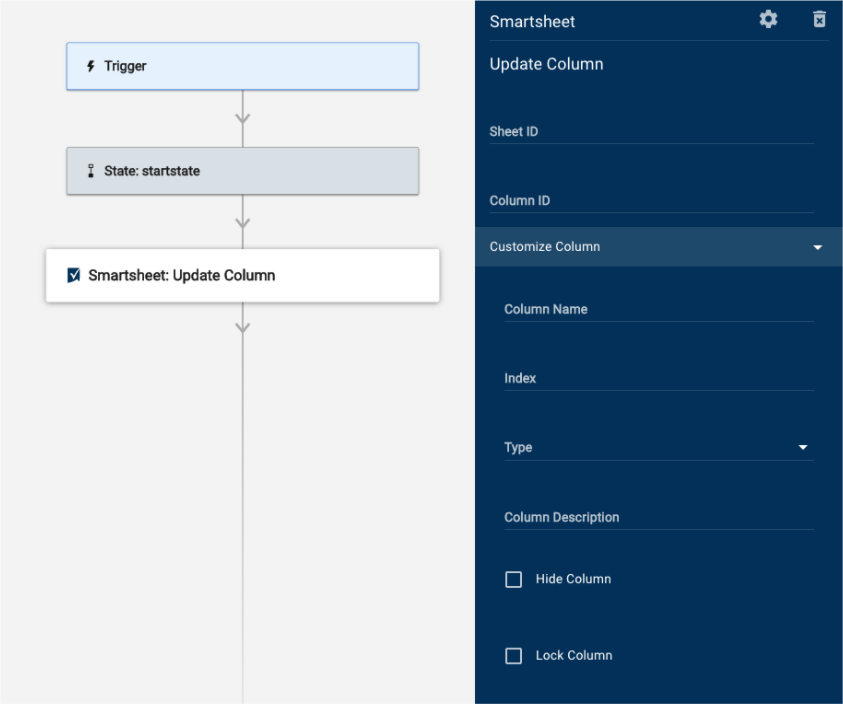
This module requires you to enter the fields below, in which you can use data references:
- Sheet: The name or ID of the sheet where you want to update column values.
- Column Name: The heading for the column.
- Position: The value that refers to a column’s position in a sheet.
The first column in a sheet is 0.
- Type: Select the column type (e.g. Date, Contact List, Text/Number, etc.).
- For Contact List columns provide the values as an object array or a reference to an object array. The format is inside square brackets, with each key/value pair contained in braces [{"name": "John Smith", "email":"john.smith@smartsheet.com"}, {"name": "Joe Bloggs", "email":"joe.bloggs@smartsheet.com"}]
- For Dropdown columns you can add the values as an array. To do this, type the values and press the Enter key to separate them. You can also format them as [1, 2 “value” , “value string”]. Alternatively, you can provide a reference to an array.
- Column Description: The text description of the column
- Hide Column: Select this to show hidden columns.
- Lock Column: Select this to show locked columns.
Once Bridge executes the Update Column module, this information will be available in the runlog section:
- Data: Array
- Object:
- ColumnID: String
- Index
- Column index or position
- This number is zero-based
- Primary: Returned only if the column is the primary column (Value = True)
- Title: Text name of column heading
- Type: The selected option from these column types:
- ABSTRACT_DATETIME
- CHECKBOX
- CONTACT_LIST
- DATE
- DATETIME
- DURATION
- MULTI_CONTACT_LIST
- MULTI_PICKLIST
- PICKLIST
- PREDECESSOR
- TEXT_NUMBER
- Validation: Indicates whether validation has been enabled for the column
- Width: Display width of the column in pixels
- Version
- Read-only
- The level of the column type
- Each element in the array is set to one of the following values:
- 0: TEXT_NUMBER, CONTACT_LIST, or PICKLIST
- 1: MULTI_CONTACT_LIST
- 2: MULTI_PICKLIST
- Object:
Update Row
Update a row on a sheet.
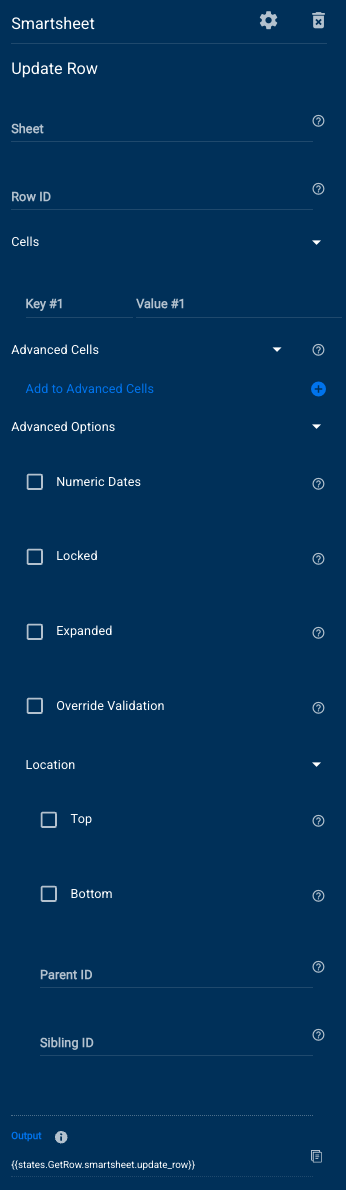
This module requires you to enter the fields below, in which you can use data references:
- Sheet
- Row ID
- Calls
- Key/Value
- Advanced Cells: An array of column definitions.
- Column: The column name or ID.
- Input Type:
- Value: The cell value.
- Formula: The formula expression to be set for the cell.
- Hyperlink: The Hyperlink to be set on the cell. You can link to a URL, a sheet, or a report.
- Link In From Cell: A link to another cell on another sheet to be set on the cell. You will need to specify the sheet, column, and row ID of the cell to link to this cell.
- Advanced Options:
- Numeric Dates: State if date values should be treated as Unix timestamps. This is for setting date values and a date format in the response. When this is not set, dates will be returned in ISO 8601 format, i.e. 2000-12-25.
- Locked
- Expanded
- Override Validation: Set if you want to ignore validation for all cells in the row by default. You can set it for each cell individually.
- Location
- Top: Move the row to the top of the sheet.
- Bottom: Move the row to the bottom of the sheet. This is ignored if Top is checked.
- Parent ID: Move the row as a child row to this specified row. It is moved as the parent's first child unless Bottom is checked. If Bottom is checked, it is moved as the last child.
- Sibling ID: Move the row next to the specified row. It is moved after the sibling unless Top is checked. If Top is checked, it is moved above the sibling.
This module returns the following information on the updated row:
- Column Name
- Column ID
- Display Value
- Value
- Created At
- Expanded
- ID
- Modified At
- Row Number
Update Smartsheet User
Update a user's permissions and name.
This module only functions if you're authenticated as the System Admin of your Smartsheet account.
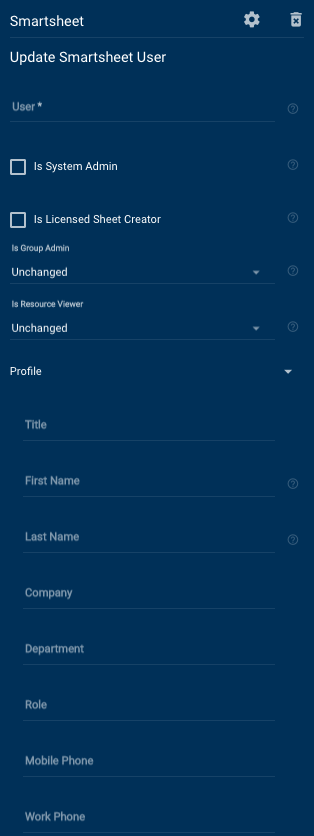
This module requires you to enter the fields below:
- User: The email of ID of the user you want to modify.
- Is System Admin: Indicates whether the user is a System Admin (who can manage user accounts and the organization's plan).
- Is Licensed Sheet Creator: Indicates whether the user is a paid user (can create and own sheets).
- Is Group Admin: Indicates whether the user is a Group Admin (can create and edit groups).
- Is Resource Viewer: Indicates whether the user is a resource Viewer (can access resource views).
- Profile
- Title
- First Name
- Last Name
- Company
- Department
- Role
- Mobile Phone
- Work Phone
This module returns the following user information:
- First Name
- Last Name
- ID
- Admin
- Licensed Sheet Creator