Enhance collaboration by sharing items via workspaces.
When you share a workspace with a user, the user can access all the items in that workspace.
If your sharing needs change, you can remove people from the workspace or change their sharing permission levels.
The people you share a workspace with can’t access any of your Smartsheet items outside the workspace unless you share them explicitly. To share workspace items individually, see Overview: Share sheets and reports for details.
Get started with workspace sharing
To open a workspace
- On the left Navigation Bar, select Browse
 .
. - Select Workspace, then select the name of the workspace you want to share.
When you’re in the workspace, check these two settings:
- Workspace Shared To: Shows who has access to the workspace.
- Sharing: Shows how a workspace item is shared. If an item is individually shared beyond the collaborators in the workspace, you’ll see the The
 icon. Hover over it to see which users or groups have access to the item.
Share a workspace
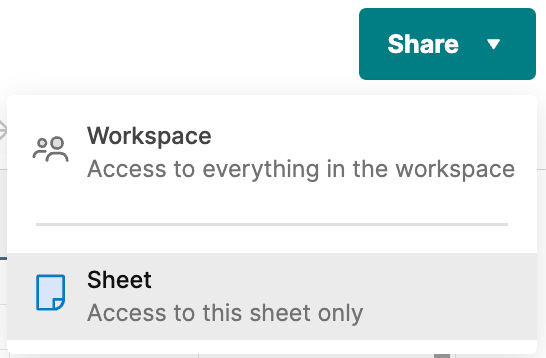
- In the upper-right corner of the workspace, select Share > Workspace.
- In the Invite people and groups field, type the email addresses of the users or groups you need to share the workspace with.
- Select a permission level for each collaborator.
- Optional: select Customize message to personalize the message that your collaborators will receive.
- Select Share.
The people and groups you invited are shared to the workspace and receive the notification.
If you have a large number of email recipients you’ll a dialog appears to confirm the invitation. If you still want to send the notification, select Notify anyway. You can otherwise remove people from the mailing list by selecting Back and clearing the Notify people checkbox.
Owner or Admins can share, unshare, and modify any collaborator’s sharing permissions.
Share an item in a workspace
- In the workspace, open the item you want to share
- In the upper-right corner of the item, select Share.
- In the Invite people and groups field, type the email addresses of the users or groups you need to share the workspace with.
- Select a permission level for each collaborator.
- Optional: select Customize message to personalize the message that your collaborators will receive.
- Select Share. You can also share the workspace by selecting Share to workspace.
Differentiate when a collaborator has access to the item only, or to the workspace by looking at the icon next to the permission level they have.
- When they have access to the workspace, you see this
icon.
- When they have access only to the item, you see the respective item icon.
Stop sharing or change permission levels
- In the upper-right area of the workspace, select Share.
- Open the Collaborators section of the Share workspace form.
- Hover over the collaborator you'd like to remove or change.
- Remove a collaborator or change their permission level by using either of these elements:
Remove from Workspace Sharing: Select this icon to remove the collaborator from the workspace.
If you stop sharing with a collaborator at the time that they are viewing a sheet in the workspace, the collaborator receives an error message at the next save or refresh.
- Permissions: Select a new permission level from the dropdown list.
Workspace sharing permissions
A user's (or a group's) access to a workspace and its items depends on the permission level you grant them. For this reason, it's a good practice to share a workspace using the lowest level permissions (e.g., Viewer, Commenter).
If you change a workspace Admin’s permission to Editor or Viewer, you’ll be the new owner of the Smartsheet items they own in that workspace. They’ll lose ownership rights over the sheets they created.
Refer to this table for examples of how a user's access to a workspace, or a sheet in a workspace, could be affected.
| When you | The user | For example |
|---|---|---|
| Give a user higher workspace sharing permissions than they have on an individual item | Receives the higher permission level on the item located in that workspace | You gave someone Editor-level access to a sheet, and they have Admin permissions in the workspace where the sheet is located. That person will have Admin-level permissions on the sheet. |
| Give a user lower workspace sharing permissions than they have on an individual item | Sees no changes to their access to the item in the workspace | A user is an Editor on a sheet. Then, you gave them Viewer access to the workspace where the sheet is located. The permission level they have in that sheet won’t change: they will still be an Editor on that specific sheet. |
You can't give another collaborator a higher access level than you have yourself. For example, if you’re an Editor, you can't promote another Editor to Admin.
| Task | Viewer | Commenter | Editor | Admin | Owner |
|---|---|---|---|---|---|
| View all workspace item contents | ✓ | ✓ | ✓ | ✓ | ✓ |
| Add comments and attachments to rows | x | ✓ | ✓ | ✓ | ✓ |
| Edit content in sheets and reports | x | x | ✓ | ✓ | ✓ |
| Share the workspace or workspace items | x | x | x (unless specified) | ✓ | ✓ |
| Rename or add workspace items | x | x | x | ✓ | ✓ |
| Move workspace items in or out | x | x | x | ✓ | ✓ |
| Delete workspace items | x | x | x | ✓ | ✓ |
| Delete the workspace | x | x | x | ✓ | ✓ |
For details on permission levels and how they impact Smartsheet items (sheets, dashboards, and so on), see the Sharing Permission Levels article.
You can make workspace sharing easier to manage with Smartsheet Contact Groups. Note that if you share a workspace with a Smartsheet Contact group, all group members inherit the selected permission level.