Workspaces are customized selections of sheets, reports, and dashboards that you can share with specific people.
You can manage people's access to items in a workspace. To learn more about sharing items in a workspace, see Share a workspace and Manage items in a workspace.
To access workspaces, select Home on the left sidebar and then select All workspaces.
Create a new workspace
There are two ways to create a workspace:
- On the left navigation bar, select Home or select the + icon.
- If you're in Home, select the Start a new project, program or process button.
- Select Workspace under the Start from scratch section or select any of the options under the Choose a new workspace starting point section.
- Enter a name for the workspace in the left panel.
- Select Add to start adding more items to your workspace.
To access your new workspace, go to Home > All workspaces and look for the name of your workspace.
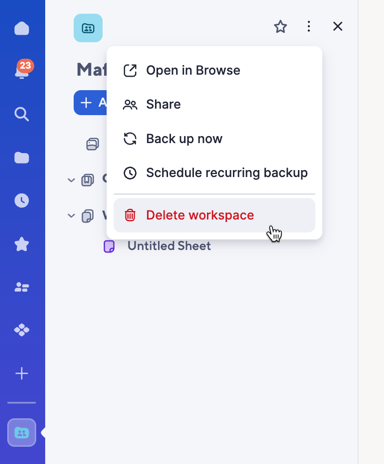
Delete a workspace
Only the person who created the workspace can delete it.
To delete a workspace, follow these steps:
- Go to Home > All workspaces
- Find your workspace and open it.
- Go to the three-dot menu at the top of the left panel and select Delete workspace.
If you're an Admin on the workspace, you can delete all the items within it, remove everyone - including yourself - from sharing, or get Owner permissions to delete the workspace.