Only a calendar Admin can edit the calendar’s settings. All users who are Admins on the underlying sheet or report are Admins on the calendar.
USM Content
Only a calendar Admin can edit the calendar’s settings.
How you get started with changes depends on what you’re looking at in the Calendar App:
- If you’re viewing a calendar: In the upper-left area of the calendar, select the dropdown arrow. Then, select Settings
 .
. - If you’re in the Calendar List page: Go to the row of the calendar you want to edit. Then, select Settings
.
Share or publish the calendar
If you’re on a different page in the Calendar App, return to the Calendar List page to search for the calendar you want to share.
Make the calendar accessible to collaborators
Sharing a calendar creates a shareable link that requires users to log in.
To share the calendar with people who aren’t shared to the sheet or report, and to make it visible on the Calendar List page:
- Go to the calendar row on the Calendar List page.
- Select
 .
. - Turn on the Sharing toggle.
- Enter the email addresses or the domains of the users to add.
- (Optional) Copy the link.
- Select Save.
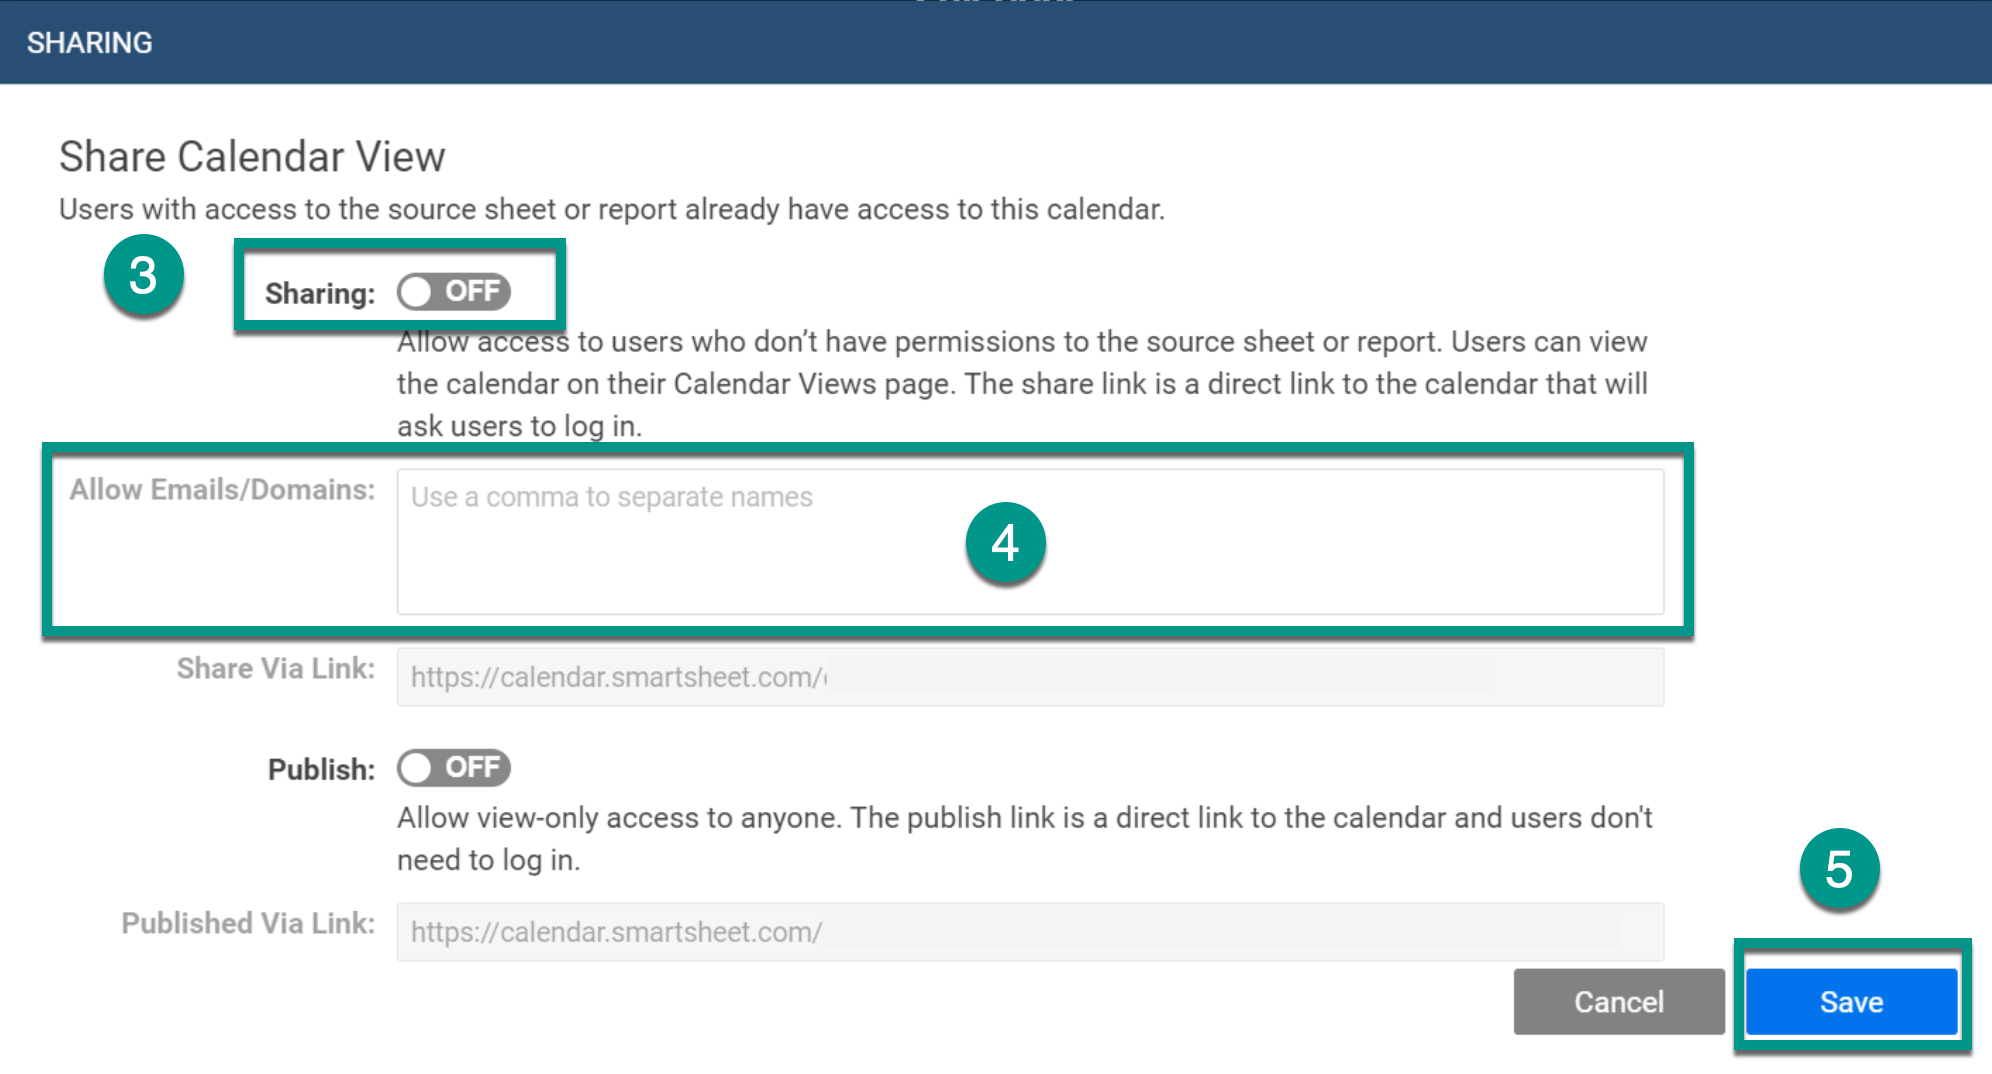
Users with access to the source sheet or report already have access to the calendar. Users with Editor permissions to the source sheet or report can edit information directly in the calendar. If sharing is toggled on, then the calendar appears in the list view for all users who are calendar Admins or added to the calendar share list. If sharing is off, the calendar only appears in the primary's list view.
Let others know about the shared calendar
People who are shared to the calendar can access it from the direct link. They can also view the calendar by logging in to the Calendar App.
If you use Smartsheet dashboards or portals, consider including a link to the calendar there to make it easy for others to find.
Publish a calendar
You can publish a read-only version of the calendar.
Before you begin
- To publish a read-only calendar, you must be an Admin on the calendar’s source sheet or report.
- If both Publish and Sharing options are on, Admins or Editors of the calendar’s source sheet can directly modify the published calendar.
- Before editing a published calendar, calendar Admins and Editors must first sign in to the Calendar App.
To publish a read-only calendar
- On the Calendar List page, go to the calendar row.
- Select
.
- Turn on the Publish toggle.
- Copy the link.
- Select Save.
If you want to remove access to a published calendar:
- In the Sharing dialog, turn off the Publish toggle.
- Refresh your browser.
After doing this, the old URL becomes invalid.
A System Admin can deactivate publishing in the Admin Center. If your System Admin has done this, the Publish toggle is greyed out.
Share link vs. published link
Sharing is limited to individuals who are shared to the source sheet or report or who are specifically listed in the Allow Emails/Domains box. The share link requires users to log in.
A published link provides access to the calendar to anyone who has the link. Users who access the published calendar don’t have to log in to the Calendar App.
Transferring a calendar to another user
The person you’re transferring a calendar to must be an Admin on the calendar’s source sheet or report and must have logged into Calendar App at least once.
Calendar Admins
If you're a calendar Primary Admin, you can transfer the calendar to another user.
On the Calendar List page, select the row for the calendar you want to modify.
Select the transfer arrows.
Enter the new Admin’s email address.
Select Transfer.
System Admins
If you’re a System Admin, you can transfer a calendar between two users (including transferring calendars from a deactivated user to an active user).
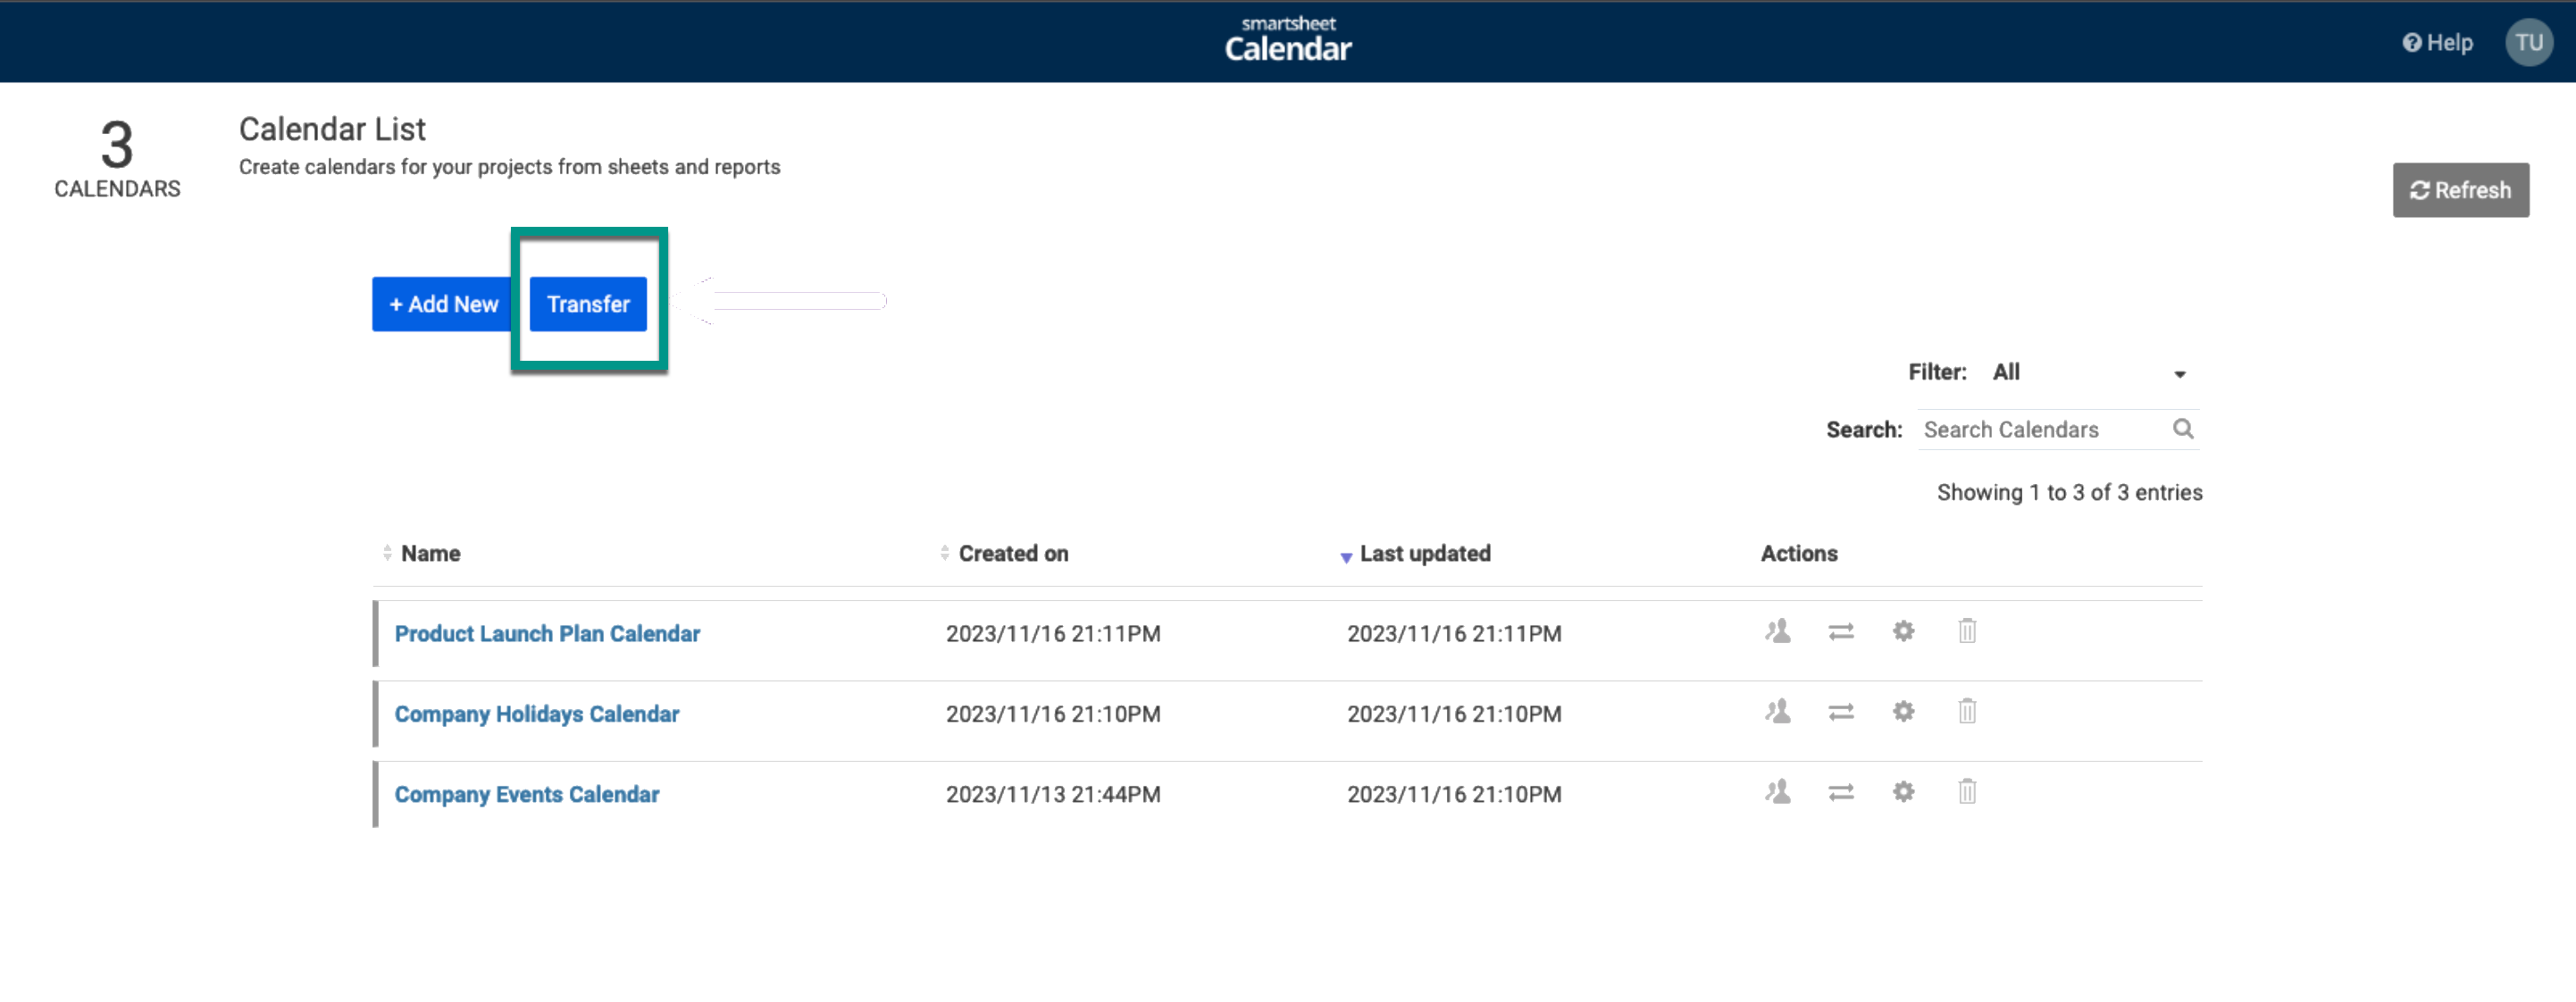
On the Calendar List page, select the Transfer button at the top.
- Enter the current Admin’s email address.
- Select the calendars to transfer.
- Enter the new Admin’s email address.
- Select Transfer.