The Smartsheet Calendar App is a premium add-on that helps you build flexible, customizable, and shareable calendars using your Smartsheet data.
With the Calendar App, you can:
- Color-code by a primary and secondary category
- Easily export the calendar for email or print
- Sync with existing project data

Sign in to the Smartsheet Calendar App
To access the Calendar App, follow these steps:
- On the left navigation bar, select Launcher.
- Select Calendar.
Another way to access the Calendar App is by visiting this URL: calendar.smartsheet.com.
If you have trouble accessing the app from the Launcher, see Access Premium Apps and Templates with the Launcher.
Once you’re signed in, you get to the Calendar List page. Any calendars that you’ve created or that have been shared with you appear on this page. To open a calendar, select its name.
To narrow your search, use the Filter list or type the calendar name in the Search bar.
Create a basic calendar
Admins can create calendars with the Create New wizard.
To start the wizard, select + Add New.
Step 1: Select sheet
- Select the sheet or report that contains the Smartsheet data you want to display.
- The sheet or report you select must include at least one date column.
- Select Next.
Any Admin on the underlying sheet or report is automatically an Admin on the calendar. Use the underlying sheet or report to manage permissions.
Step 2: Choose a view
To choose the default view for your calendar, select one of the following options:
- Monthly
- Daily
- Weekly
- Multi-Month
- Quarterly
- Day-Month
After you've created your calendar, you can switch between these views at any time.
Step 3: Map columns
Map the columns from your sheet to their corresponding fields in the calendar.
- In the Smartsheet Columns section, select which columns contain the data you want to display in the calendar. Fields with a red asterisk are required fields.
If you're using a report as the source of your calendar, use consistent column names across your sheets to ensure that your calendar is clean and easy to read.
- (Optional) In the Data Grouping section, select any columns (up to two) that you’d like to use to categorize your tasks into horizontal collections. These groups appear on the left side of the calendar and drive the color coding in your calendar.
Once you choose columns under Data Grouping, you can assign a specific color to each column value in the Custom Category List Order section.
- If you’re ready to see the calendar, select Add.
- If you want to refine your calendar with advanced features, select Advanced.
Refine your calendar with advanced features
Do more once you get a basic calendar working. For example, you may want to:
- Add additional columns
- Sort tasks
- Change the date and time display and format calendar tasks
- Change the logo that appears with the calendar
- Show or hide weekends
When you select the Advanced button, you see the following tabs:
- Additional Columns
- Time & Design
- More Options
- Confirm
To proceed, select Next.
Step 4: Add more columns to your calendar
- To add more information to your calendar, use the following sections:
- Additional Columns: Select additional columns to display from your source sheet or report.
- Sort Columns: Sort your tasks based on column data.
- Select Next.
Step 5: Configure how to display dates and time periods
Use the Time & Design tab to configure how dates and time periods appear and the style of calendar tasks.
Step 6: Edit other calendar details
Use the More Options tab to do the following:
- Add a calendar name
- Identify the start day of the week
- Identify the quarter-start month
- Show tasks on weekdays only, hide weekends, or show both weekdays and weekends
- Open and find the web form link
- Set up how the calendar appears to users and what they can do in the calendar.
Allow Attachments
Select this option if you want people to attach files to Calendar App tasks.
Files attached to comments appear with the comment. You don't see the attachments in the Attachments column or on a Calendar App task.
Allow Comments
Users must have at least Editor permissions on the source sheet or report to add comments to the calendar. People with Viewer permissions can view comments in a calendar.
Select this option so others can comment on tasks within the Calendar App. This setting is enabled by default when you create a new calendar.
When you add comments to a calendar, they're also added to the source sheet or report.
Use the @mention capability in comments to increase the visibility of your calendar entries.
Allow New Events
Allow anyone with Editor permissions to the source sheet to add tasks directly to the calendar.
Web Form Link
If the source sheet includes a form, paste the form's link in the Web Form Link field. When you add the web form link to the calendar, you can access the form from the Calendar App.
To access the web form from the Calendar App:
- In the upper-left area of the Calendar App, select the dropdown icon.
- Select Open Web Form.
Use a 454 Calendar
To allow 454 Calendar as a display option, select the 454 Calendar checkbox. You can also select Default 454 Calendar if you want this to be the default display option.
In a 454 calendar, the calendar year is divided into months based on this format: 4 weeks – 5 weeks – 4 weeks. The layout of the calendar lines up holidays and ensures that the same number of Saturdays and Sundays appear in comparable months. (The 454 format is commonly used in retail businesses to compare sales between years more accurately).
Step 7: Verify the settings you set up
In the Confirm tab, review and verify the settings you edited. If you need to make changes, select Previous to navigate to the appropriate page and make adjustments. Select Add or Update when you're ready.
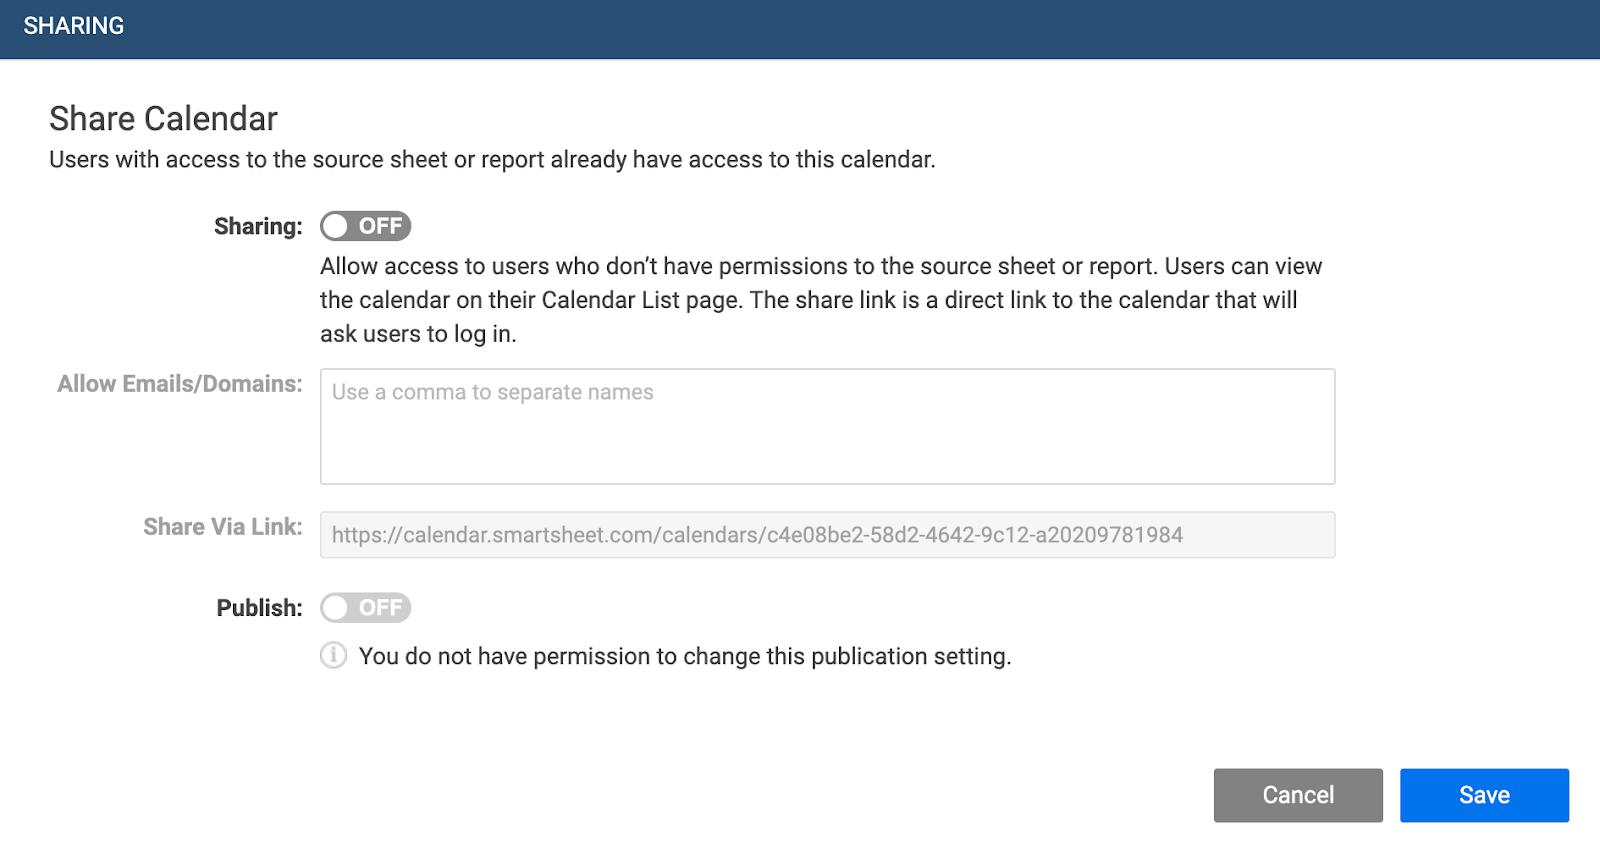
Share your calendar
Once you’ve created your calendar, select the arrow in the upper right corner, then select Share. Here, you can toggle sharing on and off, share the calendar with specific users or domains, copy the share link, and publish the calendar.
If the sharing toggle is on, the calendar appears in the list view for all users who are calendar Admins or added to the calendar share list. If it isn't on, the calendar only appears in the list view for the Admin.
All users who view a calendar see the calendar as the Admin does.