Users can share a link to individual asset modules or groups of assets.
The heart of the Brandfolder platform is intuitive, reliable, and secure for sharing. Brandfolder offers several options for sharing assets, creating an effective collaboration between teams and partners, minimizing asset sprawl, and maximizing company resources.
Share individual assets
There are two ways you can share individual assets:
Share from the asset modal
- Select the asset you want to share.
- Select Share.
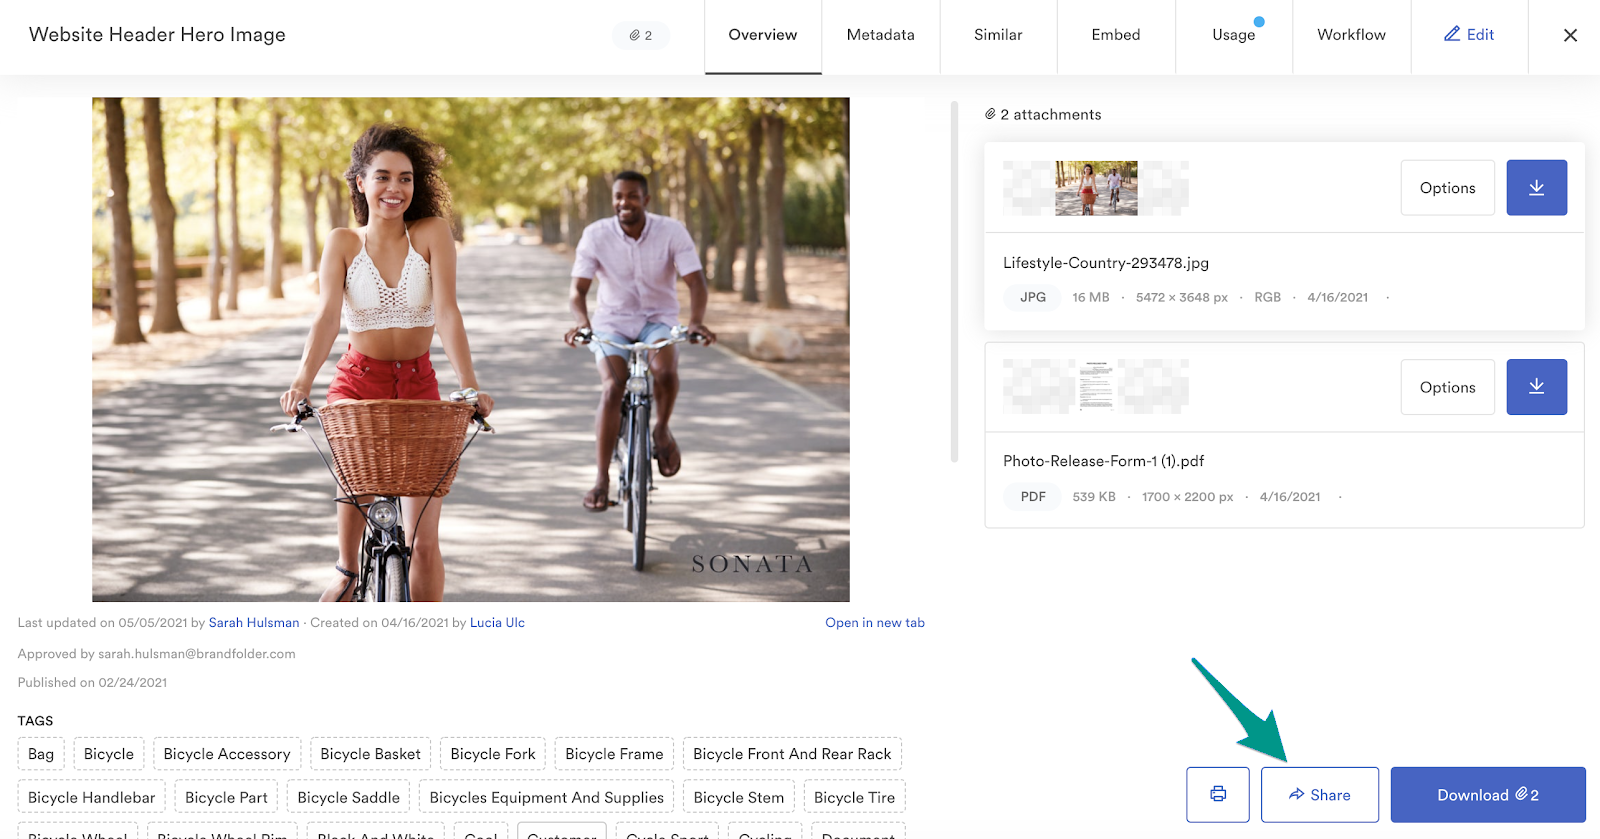
- Copy the link and send it as needed.
Take care of your assets using the available features when selecting More Options. Refer to the Share links options section below for details.
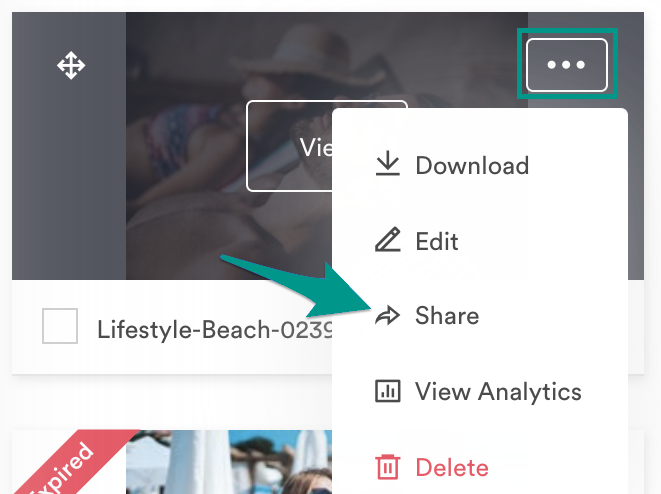
Share from the Brandfolder or Collection
Collections mentioned in this article refer to a Brandfolder feature. For collections in Smartsheet, see the collections in workspaces overview.
- From the Brandfolder or Collection level, hover over the asset and select the ellipses in the upper right-hand corner.
- Select Share.
Share assets in bulk
- From the Brandfolder or Collections level, select the assets you want to share using the checkboxes on the asset tiles.
- Select Share from the Bulk Management Toolbar at the bottom.
Check the number of assets you selected in the bottom left-hand corner.
Share link options
Whether you are sharing one or more assets, the asset-sharing modal includes several options:
Brandfolder Image
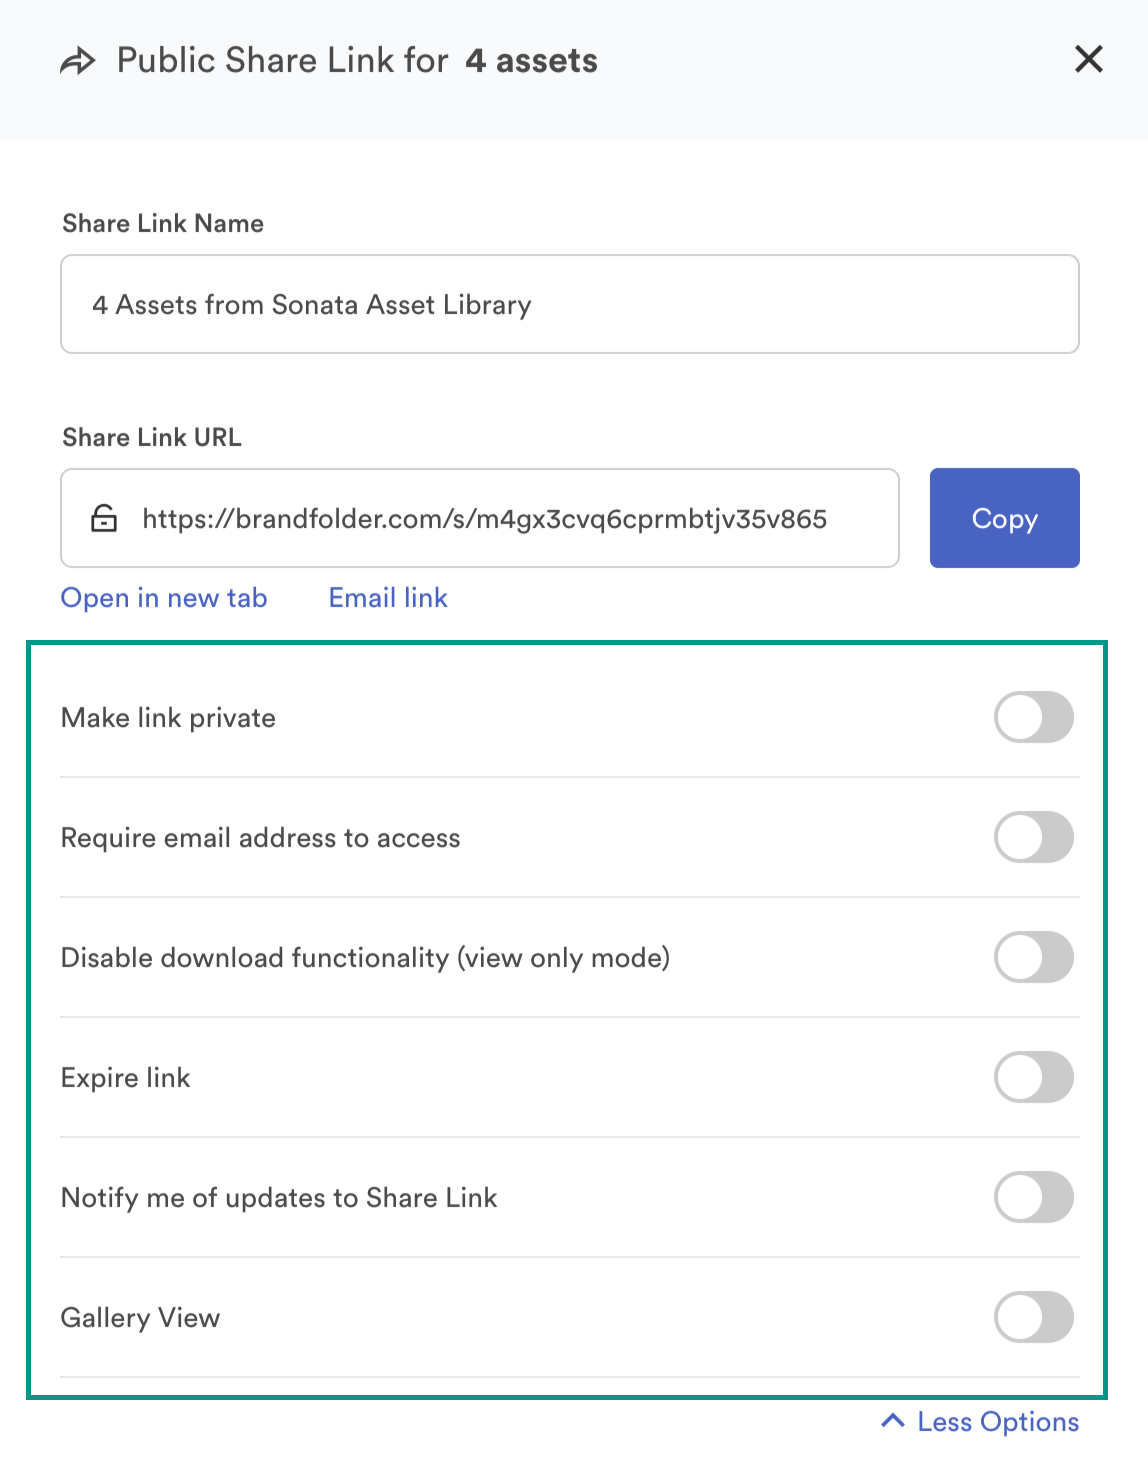
- Make link private: Only users with a Brandfolder login or Simple Password (when enabled) can see shared assets. This hides the Require email address to access option.
- Require email address to access: Requests users to provide an email address to see the shared assets.
- Disable download functionality (view only mode): Users can only view content within the share link; they cannot download or share assets. View-only Brandfolders or Collections allow Guests to request access to download the files.
- Expire link: Set an expiration date for your share link. After the expiration date has passed the link will be inaccessible.
- Notify me of updates to share link: The share link Creator will be notified when someone opens the share link or downloaded assets.
Notification center updates are real-time based on the share link activity. Email notifications are sent hourly.
- Enable Gallery View: Gallery view creates a sleek and on-brand sharing experience. Extra information like sections, asset names, and asset details are not displayed. Instead, all of your attachments appear, and if your share link allows downloads, users can hover over the asset and select Download. You can also upload a logo, which will appear at the top of a gallery view share link.
Administrator sharing settings
Admins can adjust a few additional sharing settings by going to Settings > General settings > Advanced tab.
- As an additional security control, enable Restrict Sharing to Users of this Brandfolder to restrict sharing to only Brandfolder users.
- Default share links to private by enabling Make share links private by default.
The user sharing links can toggle the link back to public.
- Set a default amount of time for share links to expire by enabling Expire new share links in a default amount of time.
- Require users to enter an email address to access the share link by enabling Require ID for public shares. The entered email address is for tracking users in Insights only and does not need to be associated with a Brandfolder account.
Admins can manage their share links from the bulk management area by navigating to Settings > Bulk Management > Share Links. There, administrators can:
- View basic information about each share link, such as its name, creator, number of assets, access settings, creation date, expiration date, and whether it requires an email address to view.
- Select Edit to make adjustments to the settings configured on the share link.
- Delete share links by selecting the trash can icon.
- Delete share links in bulk by selecting the checkboxes to the left of each link, then select Delete.
Remove or add assets from share links
Users with editing permissions for a given share link can remove assets from it after it is created.
The following users can edit permissions on share links:
- Users with admin permissions on the resources that have been shared
- Guests or Collaborators who created the share link.
To remove assets from a share link:
- Navigate to the share link URL.
- Select the assets to remove by selecting the checkboxes in the asset tile.
- Select Remove from Share Link at the bottom.
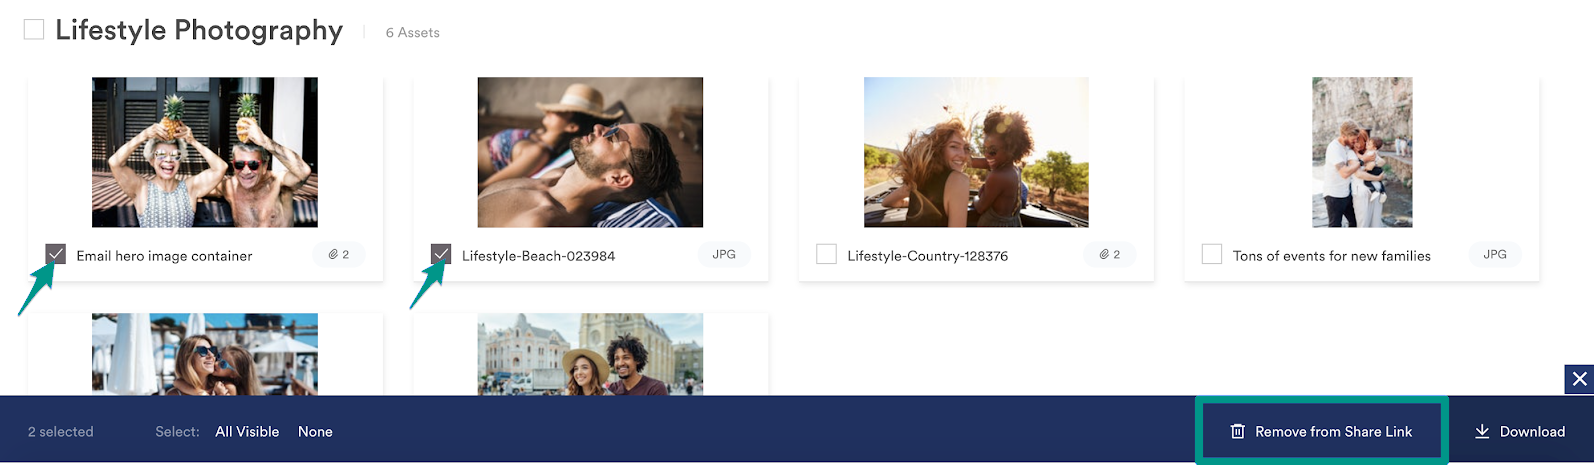
Select Remove assets.
To add to a share link:
- Select the assets to add to the already created share link by selecting the checkboxes in the asset tile.
- Select Add to > Add to Share Link in the bulk toolbar.
- Select the share link to which you want to add the assets. You can search for the link using the share link URL (exact match), the name of the share link (contains), or the creator of the share link.
Administrators can toggle on Only display Share Links I created to narrow the search.
4. Selecting the desired share link. A Preview is displayed at the right of the screen.
5. Select Add to Share Link.
Share link information visible to editors
After a share link is created, an editor can view the share link and see two panels of information about the share link on the right-hand side.
The first panel includes the following information:
- The Brandfolder from which the assets are being shared.
- The number of hidden assets (unpublished, expired, or unapproved).
- The number of assets shown.
- Access (public or private).
- Creation date.
- Expiration date.
- Created by.
- Notifications—This can be toggled on or off. You will receive notifications when users view the share link if toggled on.
The second panel is dedicated to share link activity. It shows who has viewed the share link by displaying their email address, the date they viewed it, and the time they viewed it.