Invite users to interact with your Brandfolder assets.
Invite users to the Organization
You can add users at the Organization level to give them access to all Brandfolders, Brandguides, Collections, Workspaces, and Portals.
- Select Settings > Manage Users.
- In the Send New Invitations box, enter the email address(es) for the user(s) you want to add—separate multiple email addresses with commas.
- Add a personal message if necessary.
- Select the user permission for the invite.
- Select Send.
Invite users to Brandguides, Workspaces, and Portals
In the organization-level user management page, use the menu on the left to find the specific Brandguide, Workspace, or Portal. Then, invite users using the same steps above.
Invite users to the Brandfolder, Collection, or Subcollection
You can add users at the Brandfolder level to give them access to that specific Brandfolder and its associated Collections. You can also add users to a collection. These users can only see the assets in the Collection they are in. They cannot access the Brandfolder that houses the Collection (unless invited at the Brandfolder level).
User permissions are cascading. Inviting users to the Brandfolder level will grant them access to the entire Brandfolder and its Collections. Users invited to individual collections can only see the individual Collection.
- Next to Settings, select Users.
- In the Invite Users box, enter the email address(es) for the user(s) you want to add—separate multiple email addresses with commas.
- Add a personal message if necessary.
- In the Resource dropdown, select the other Brandfolders, Collections, Portals, or Brandgduides within your Organization to which you want to give them access.
- Select the user permission for the invite.
- Select Send.
Tips and troubleshooting
- You must input a user's full email if sending invitations for the first time.
- You need to separate multiple emails with a comma.
- If the user is already in the system and is a part of your Organization, you can start typing their email, which populates automatically.
- Use the arrow keys to locate the correct user and select enter, or you can also click on their email in the list to choose the user.
- Once you select a pre-existing user for an invite, you can hover over their name to reveal their entire email.
- Users can select x next to their name or backspace to remove an email from the invite list.
Users in pending user invites and access requests will not appear in the dropdown list of pre-existing users.
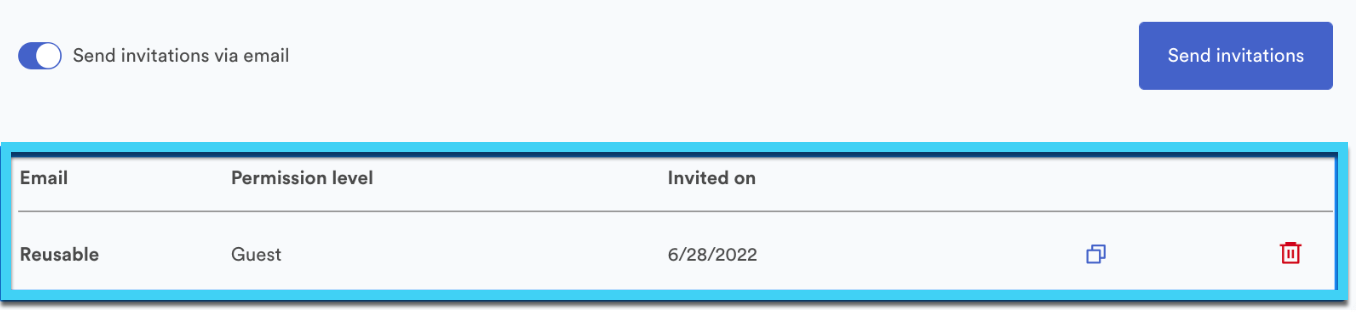
Reusable invite link
If you want to create a link to hyperlink in an email or be able to distribute universally to invite users to your Brandfolder or Collection, create a reusable invite link.
- Enter an asterisk* in the invite box for the appropriate resource(s).
- Select the user permissions the link will grant.
- Select Send invitations.
- Select the copy invitation link button to grab the link you can distribute to other users.