Manage your users at the Organization, Brandfolder, and Collection level.
You can manage users at the Organization, Brandfolder, and Collection levels.
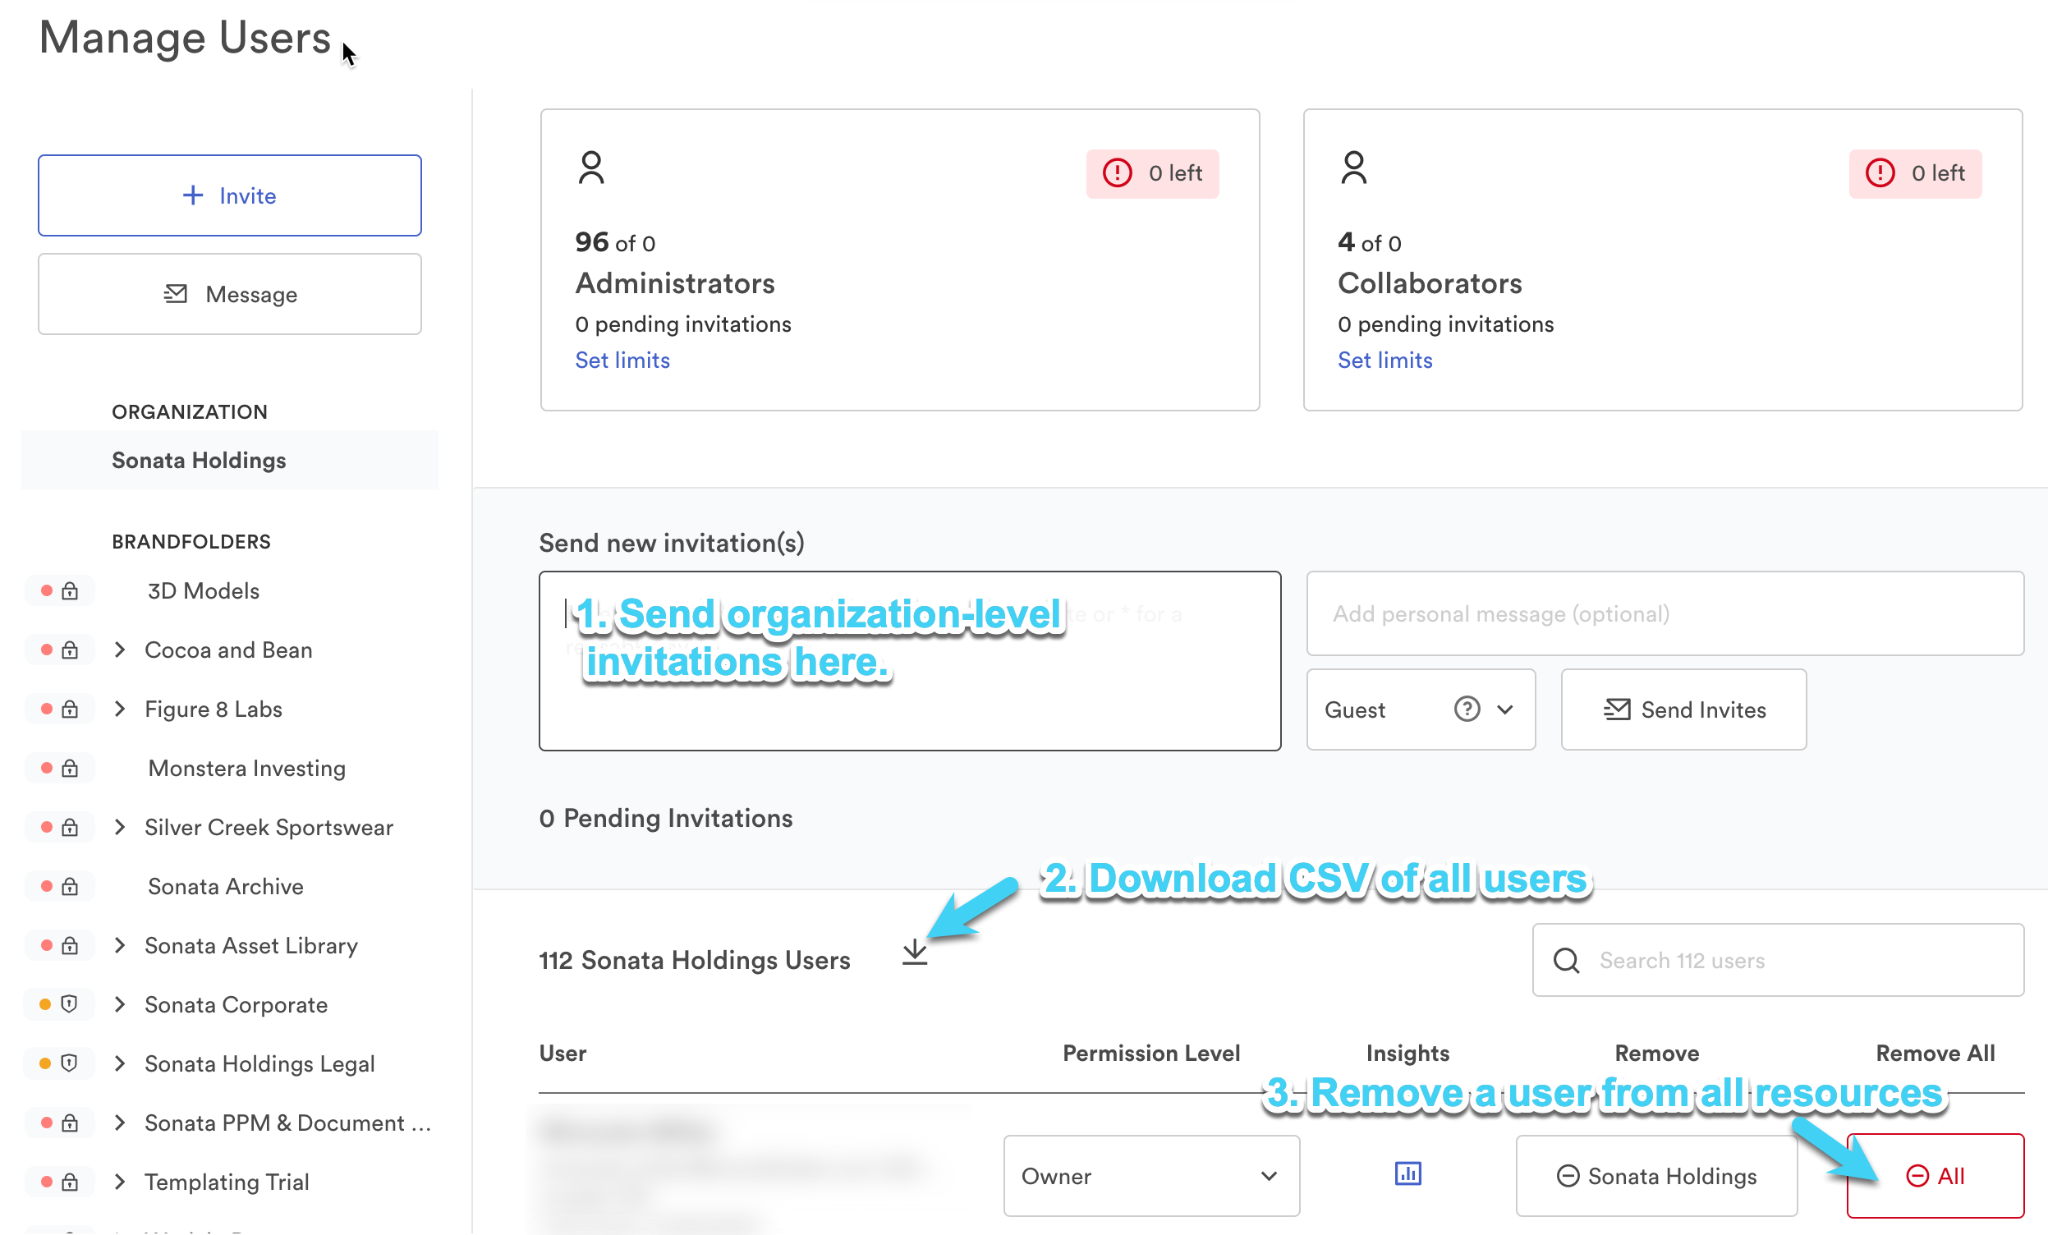
Organization-level user management
At the organization level, navigate to Settings > Manage Users. There are a few essential capabilities:
- Invitations must come from the organization-level user management modal to give users access at the organizational level. When you invite users at the Organization level, their permissions will automatically cascade down to all Brandfolders and Collections within your Organization.
- Account owners can download a CSV that lists all users associated with their Organization. This CSV is below the invitations area next to # [Your Organization’s Name] Users.
- If you want to remove a user from all resources across the Organization, you must do so at the organization level. Once you locate the user at one of the resource levels, select All under the Remove All column.
- You can manage SSO Presets at the Organization level through the Default Permission Level dropdown in the top right-hand corner.
- The Default Permission Level dropdown grants users access. If you select a Guest in the dropdown, then if any user logs in through SAML, they automatically have access to that specific resource as a Guest.
- Be sure to navigate to the Brandfolder or Collection level where you want to set the Default Permissions; otherwise, users have default permissions at the Organization level.
Brandfolder-level user management
You can manage individual users at the Brandfolder level. At the Brandfolder level, select Users in the top right corner.
On the left-hand side of the User Management page, you will find an all-encompassing list of your resources, including Brandfolders, Collections, Brandguides, Portals, and Workspaces.
Access request
At the top of the page is an area for Access Requests.
To approve requests, select the check box next to the user’s email, select their permission level from the dropdown, and select Grant access.
To deny requests, select the red button to the right of their email address.
Plan limits
Below access requests, there is an area for Plan limits. Plan limits are an overview of the number of Administrators and Collaborators in your plan and the number of seats in use.
Within each Administrator and Collaborator box, there is the option Set limits. Selecting Set Limits opens a new modal window to change the limits set on each Brandfolder, Portal, and Brandguide.
When setting limits, consider the following:
- Must exceed current usage error message. The error message appears when you input a limit smaller than currently used. For example, if a Brandfolder uses three collaborators, you can’t adjust the limit to two collaborators.
- You allocated less than your current limit. This error message shows up when the sum of all Brandfolder limits is lower than the Organization’s limit. If you have 20 Admins, you must allocate them. You can’t assign only 15 of them.
- You allocated more than your current limit. This message displays when the sum of all Brandfolder limits exceeds the Organization’s plan limit.
Brandfolder counts total seats, not total unique users. For example, if the same user has admin-level permissions on two separate Brandfolders in your Organization, they occupy two Admin seats.
Manage users
Within User Management, there is an area that lists all of the users associated with a particular resource. Here, you can make the following adjustments to the user:
- Adjust their permission level by selecting a new level of access from the dropdown.
- Remove from this Brandfolder (Collection, Workspace, Brandguide, Portal) will remove the individual user’s access to the selected resource.
- Remove from all removes access to the current resource and its nested resources.
- View user Insights data. This page shows the user’s Asset Views, Downloads, Shares, and Activity.
