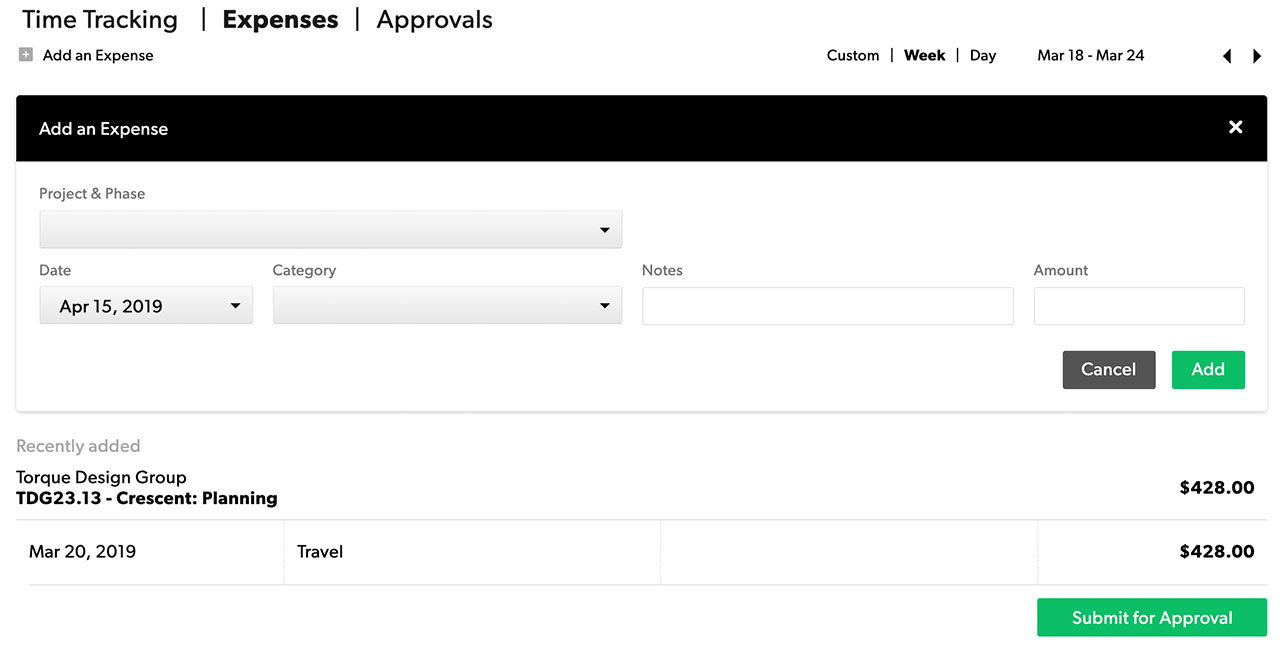
You can submit expenses at any time, though you may want to follow your organization's schedule (daily, weekly, biweekly, etc).
On your My Work page, select Time & Expenses, and then select Expenses.
- Click Add an Expense and fill out the form. When you've added all your expenses, click Submit for Approval.
Use the approvals tab
You can review approved, pending approval, and rejected time (and/or expenses) from the approval tab on your My Work page.
Review submitted expenses:
- On the Approvals tab, click My Time & Expenses.
Use filters on the left side bar to see time by:
- Time Frame: Use a preset or custom date range.
- Type: Switch between time and expenses (if your organization tracks both).
- Approval status: Show approved, rejected, or are pending approval status.
- Approver: Filter items on specific approvers.
Resubmit expenses
You can edit and resubmit an expense report at any time before it's approved. After you edit the time entry you'd like to adjust, select Re-Submit for Approval.
Set time or expenses to lock automatically
Resourcing Admins can set submitted expenses to lock upon approval.
- Open Account Settings.
- If you are working in Resource Management in Smartsheet, select the kebab menu in the top right corner, then select Account Settings.
- If you are working in standalone Resource Management, select Settings > Account Settings.
- Navigate to the Approvals Workflow section.
- Select the option to Lock time and expense entries upon approval
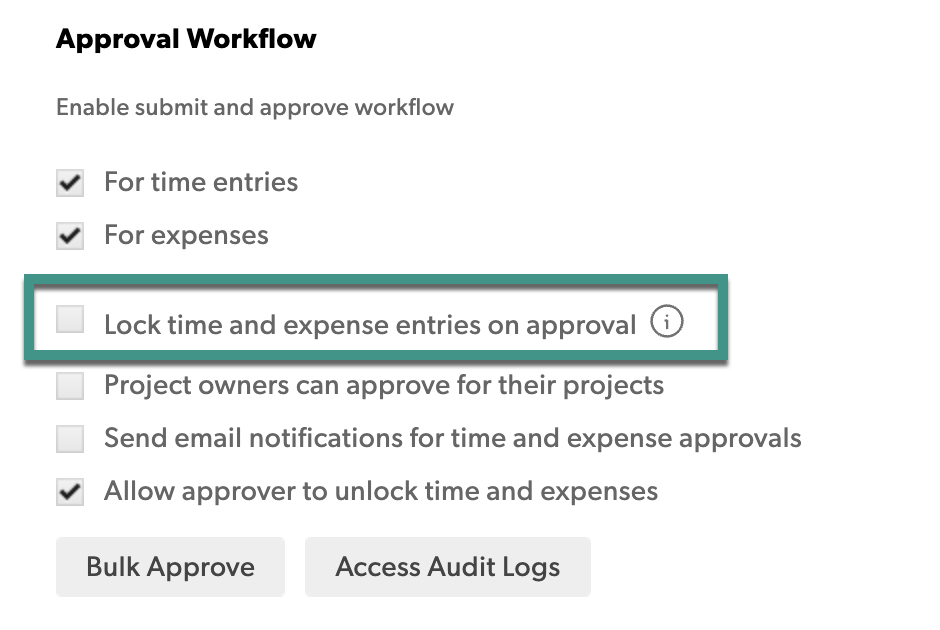
Activating this setting means that users cannot edit their approved expense entries in any way.
If this setting is not activated, then users can add additional expenses to approved and locked entries.