Use a dropdown list column to standardize how key information gets collected. Collaborators pick one or more values from a set list, so your data stays clean and easy to track and report on.
USM Content
Your collaborators need Editor permissions or above to select the values from the dropdown columns.
Create a dropdown list column in table view
To create a dropdown list column in table view:
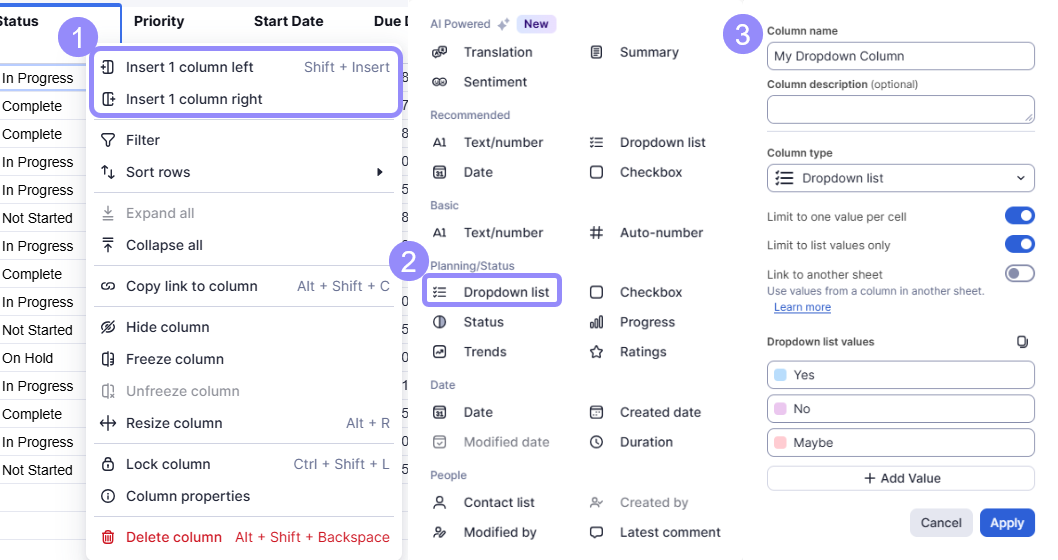
- Select the column menu
 and select Insert Column Left or Insert Column Right.
 - Select Dropdown list from the column types panel.
- In the column configuration panel:
- Add a column name. Optionally, add a column description.
- If you want only a single value to be selected, toggle on Limit to one value per cell.
- If you don’t want to allow free text values to be entered in the column, toggle on Limit to list values only.
- You can also use values from a column in another sheet via Link to another sheet. Refer to the Create linked dropdown columns article to learn more.
- Enter the values you want in the spaces under Dropdown list values. You can create new list-value spaces via the Add Value button or by pressing Enter/Return.
- Select Apply.
Create a dropdown list column in grid view
To create a dropdown list column in grid view:
- Select the column menu
and select Insert Column Right or Insert Column Left.
- Type the name of the column in the Name box.
- Select the Dropdown list column type.
- To enable multi-select, toggle Allow multiple values per cell.
- To block free-text values, toggle Restrict to list values only.
- Type your values under Values. Press Enter or Return to put each value on a new line.
- Select OK.
Values in Dropdown cells are ordered by their appearance in the values list.
If the text equivalent of a hyperlink is inserted under Values, it appears as plain text in the values field but is a clickable hyperlink when selected from the dropdown.
Edit a dropdown list column in table view
To edit a dropdown list column in table view:
- Select the column menu
and select Column Properties.
- You can:
Copy all values at once: Open the Options menu next to Dropdown list values and choose Copy all values.
Brandfolder Image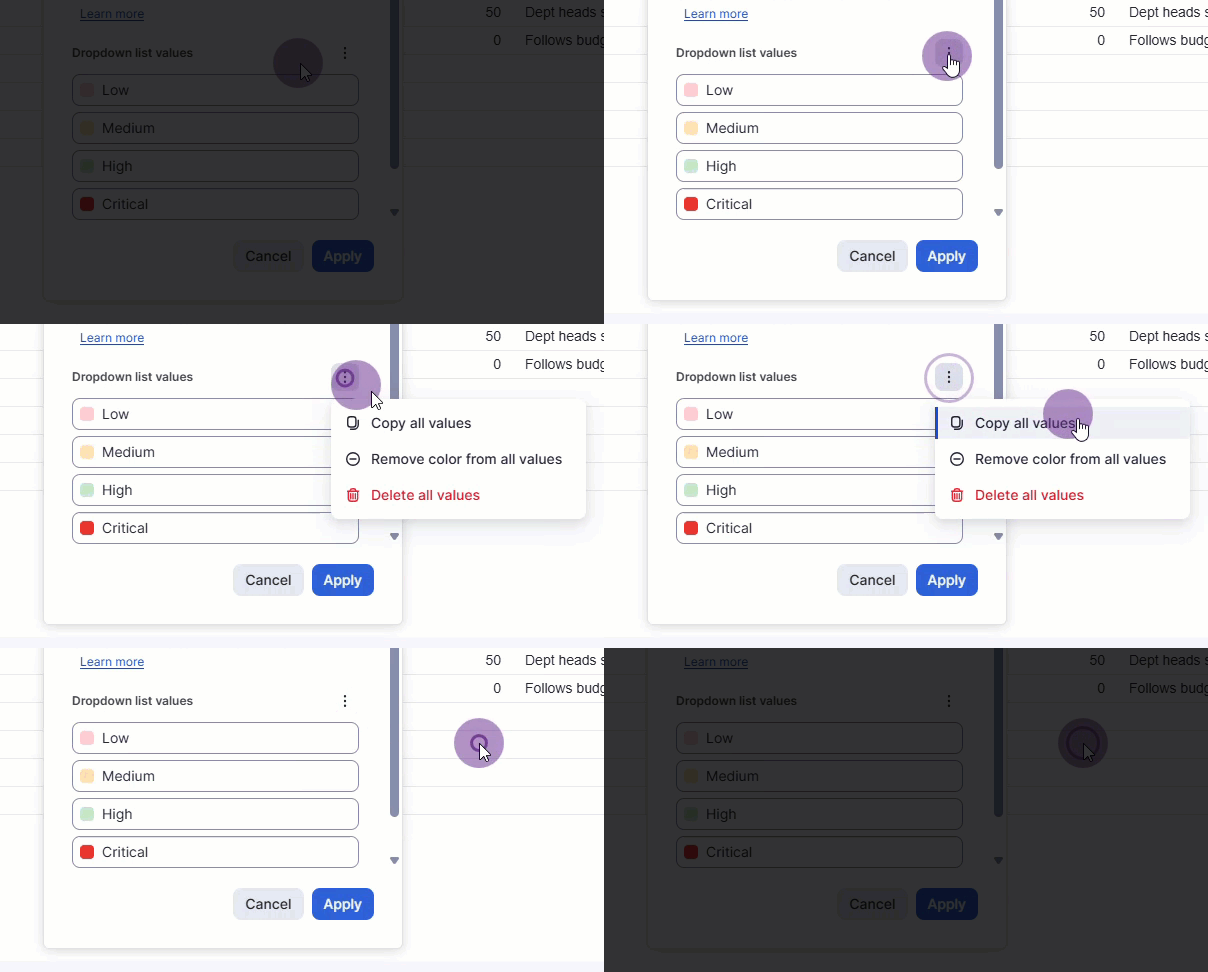
Change or remove the value color: Select the color swatch to the left of a value to change its color or remove it. Alternatively, choose Remove color from all values from the Options Menu to leave all list values colorless.
Brandfolder Image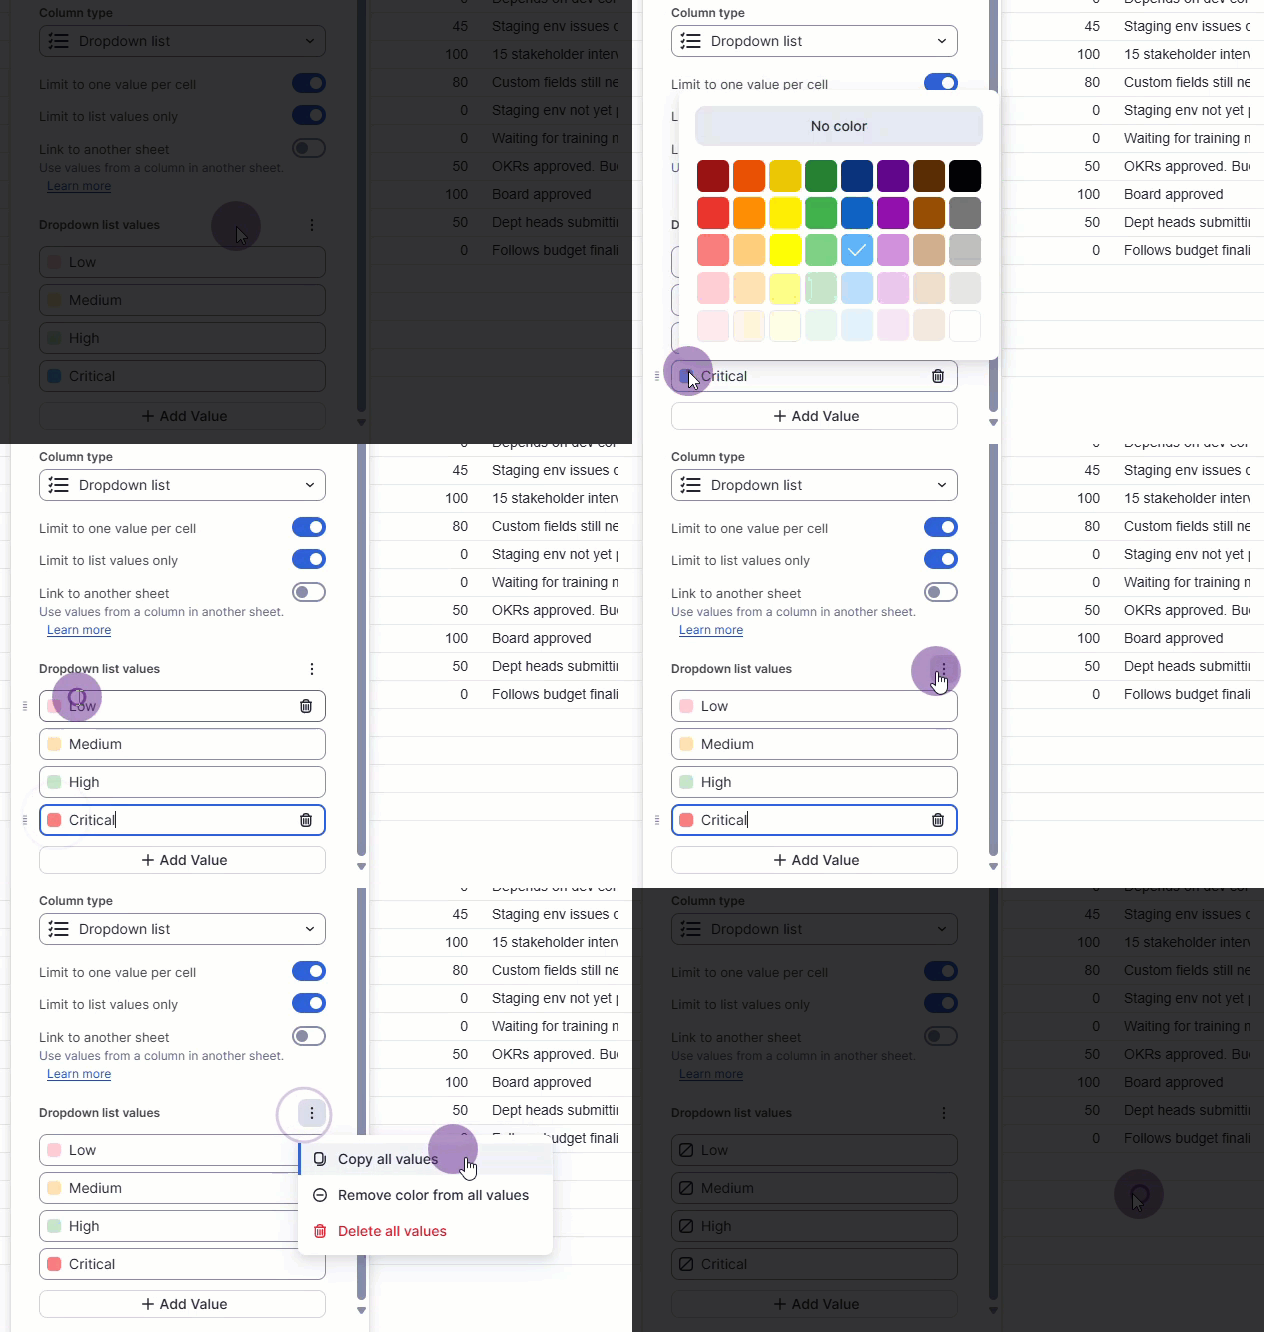
Delete values: To delete an entry, select the trashcan icon or press Backspace/Delete. To delete several values, hold down Backspace/Delete, or select Delete all values from the Options Menu.
Brandfolder Image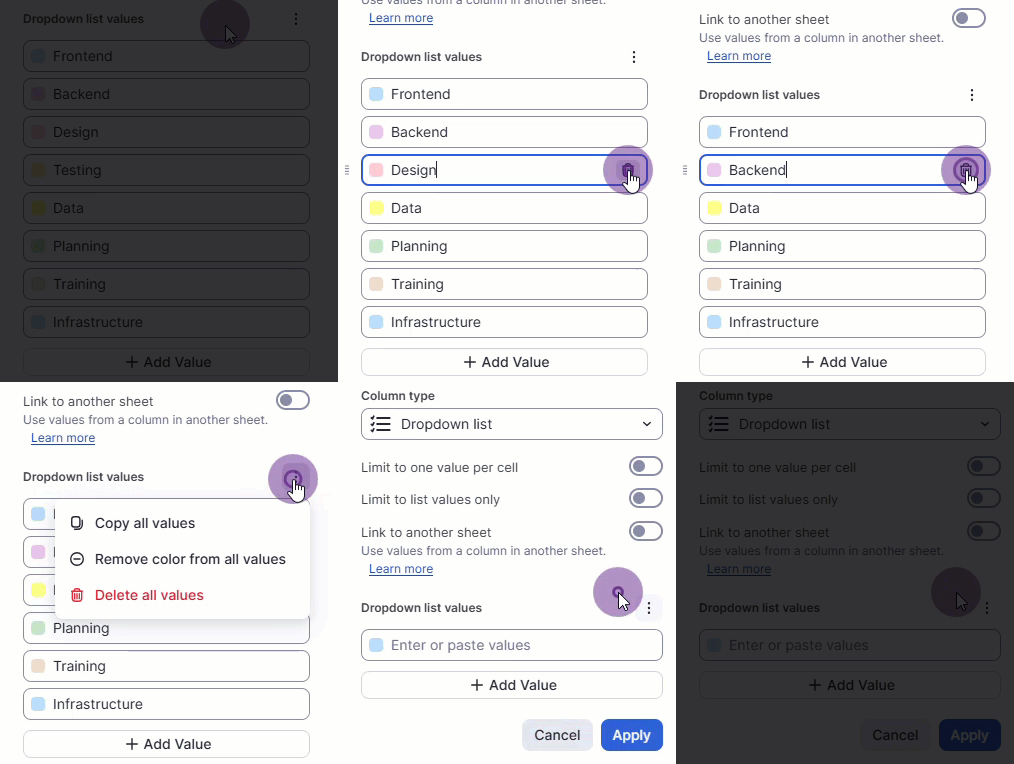
Reorder your list: Hover over an entry and drag the handle on the left to reorder.
Brandfolder Image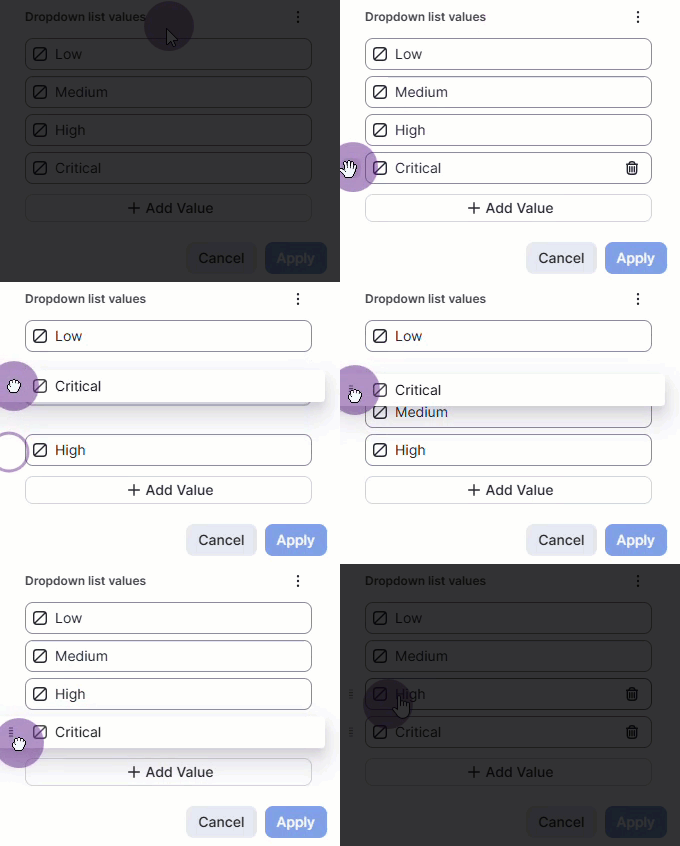
Insert a value between others: Select the value above where you want the new one, then press Enter/Return. You can quickly move through the list with the Up and Down arrow keys.
Brandfolder Image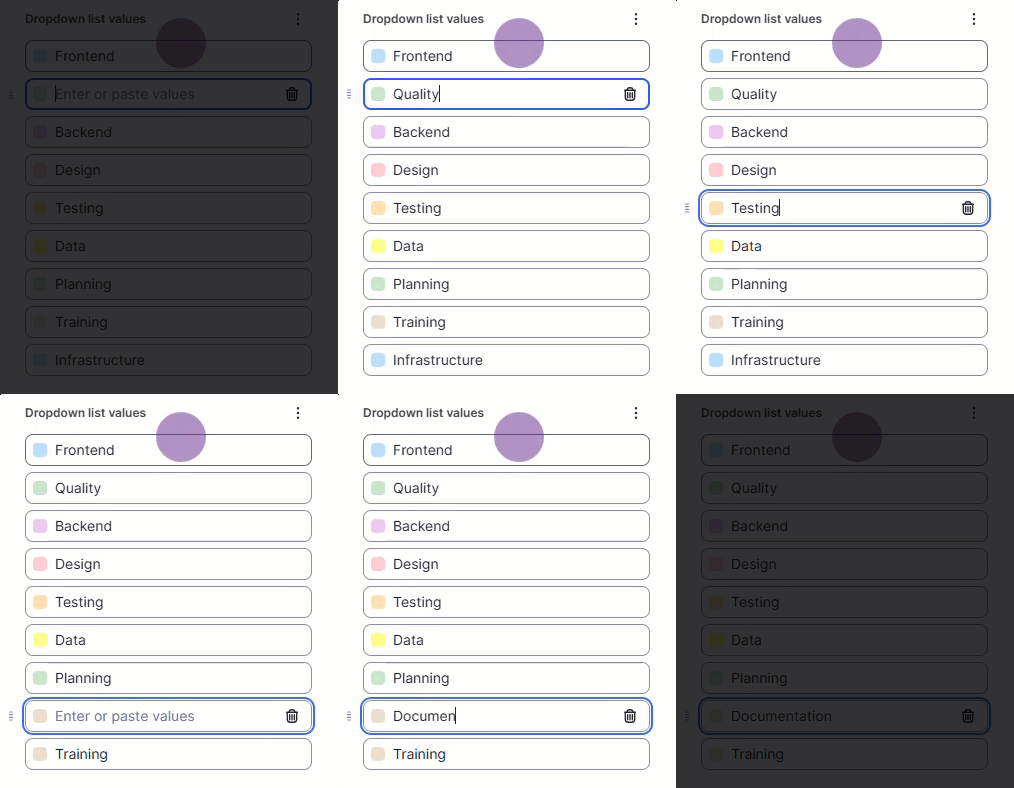
Paste values: Click into an empty list item and press Ctrl+V (Cmd+V on Mac) to paste a single value or a whole copied list.
Brandfolder Image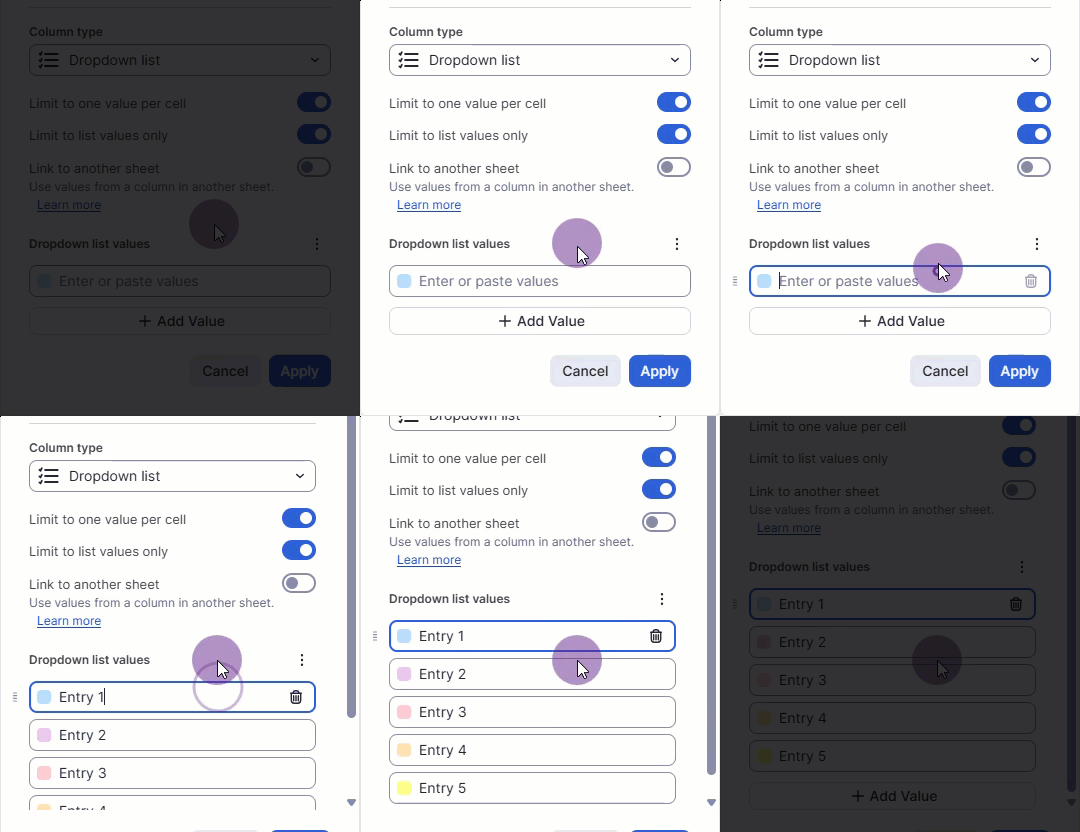
- When you’re done with your edits, select Apply.
Edit a dropdown list column in grid view
To edit a dropdown list column in grid view:
- Select the column menu
and select Edit Column Properties.
- Grid view allows only basic edits, such as manually modifying the values listed under Values and turning Allow multiple values per cell and Restrict to list values only on or off.
- Select Ok.
Note the following if you decide to switch between column types:
- When switching between Single Select and Multi-Select dropdown column types, Values in the column properties remain the same. The only difference is that Single Select lets you select a single value from the dropdown list, while Multi-Select lets you select multiple values.
- When you switch from a Single Select or Multi-Select dropdown column type to a non-dropdown column type, cells with a single dropdown value appear as text, and cells with more than one value appear as line-delimited text.
- When switching from a non-dropdown column type to a Single Select or Multi-Select column type, the entire content of each cell is captured and added as one value in the Values section of the dropdown column properties.
- Reports containing those columns need to be updated when switching between single-select and multi-select column types.
Tips for working with dropdown columns
Keep the following in mind when modifying cells in dropdown columns:
- If the dropdown column isn’t restricted to list values only, you’re able to enter a free-text value in the cell by double-selecting the cell and typing the value. These free-text values are added to the dropdown list in the cell where they're added, but they aren’t added to the Values section of the dropdown column properties.
- In Multi-Select dropdown columns, free text values are saved alphabetically at the end of the cell they're added to.
- The number of values you can select in a Multi-Select dropdown column is unlimited (up to normal cell character limits).