Dynamic View allows you to share sections of your sheet or report without sharing the underlying source sheet.
USM Content
Dynamic View allows you to surface specific data for others to view and edit.

Before you begin
Create the source sheet or report on which the Dynamic View will be based.
A sheet or report must exist to select for your Dynamic View.
Create a new view
There are two different ways to create Dynamic Views.
From Dynamic View home
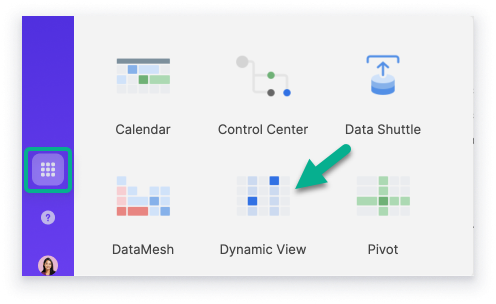
- Go to Dynamic View home by selecting the Launcher icon and then selecting Dynamic View.
- Start the view creation process by selecting Create View in the upper-right area of the screen or selecting the Plus icon
Brandfolder Image
 in the left navigation bar. The Create View window appears.
 - Select the source sheet or report for your view in the Create View window. Then select Create.
The Settings window for your new view appears.
If you select the wrong source item, create another new view. You can't go back and select a different source item.
From the source item
- Select Dynamic View in the menu at the top of your sheet or report.
- Select Create Dynamic View.

The Settings window for your new view appears.
Configure your view
In the Settings > General tab for your view, you can name your view, set what people can see, allow people to add new items, and more.
Here are some key settings:
- Review view by current user: Filter a user's view on their assigned tasks via the Contact List column.
- Restrict view by sheet filter: Sheet filters determine the data that appears in a sheet. Select any shared sheet filter to refine the data for your view.
- New Item Submission: You can allow users to create new entries. If your source is a report, specify the underlying sheet—not just the report.
If you gather information from a wide range of users, you may find it useful to create an intake form instead of using New Item Submission. A form makes your data consistent, and it's another way to ensure everyone uses their view correctly.
Select the fields to display
In the Settings > View Display tab, you can select specific fields to show in your view.
- Select the View Display tab.
- In the Available fields section, select the fields you want to display in the view.
- To filter data on specific fields, add any dropdown or symbol fields from your source data.
- Optional: Add attachments or comments with the following settings:
- Attachments
- Display attachments
- Users can add attachments
- Comments
- Display comments
- Users can add comments
- Attachments
The fields you select in this step appear as columns in your Dynamic View rows. If you want to show fields only when certain conditions apply, don't add them in the Visible fields section. Instead, set the conditions or logic in the Details Panel tab.
Configure the Details panel
In the Settings > Details Panel tab, you can customize the Details panel content that appears for users when they select a row in the Dynamic View. You can use the details pane to gather information and provide detail.
- From Add Field section on the left, drag the fields to the Details Panel Layout section.
- (Optional) Switch on Details panel description to enter instructions for your users. They'll see your the instructions when they open the Details panel for a row in your view.
- Select a tab to focus on when the Details panel appears. Here are the tabs:
- Data
- Attachments (if enabled)
- Comments (if enabled)
- Edit properties or logic for each field. Field properties define the field, and logic allows you to apply conditional logic to the field.
- On the right-hand bar, select the Field Properties icon.
When you select a field in the Details Panel Layout section, the Field Properties panel appears. - To edit the field logic, select the Field Logic icon in the right-hand bar.
- On the right-hand bar, select the Field Properties icon.
Field properties
Use the following | To do the following | Notes |
|---|---|---|
Use the following Custom label | To do the following Create a custom label for the field. | Notes To add a custom label, expand the Custom label box. |
Use the following Field options:
| To do the following Set a field's level of importance. | Notes The field will be optional and editable if you turn off all these options. |
Use the following Display as | To do the following Fine-tune the field size. | Notes Select an option:
|
Use the following Initial value | To do the following Set a default value in a field. | Notes If you allow new submissions to the View, the value you add in this field will be the default value. |
Read only field
Some fields may not be editable depending on their data type or the information in the cell. The following conditions make a field read-only in Dynamic View:
- Field is from a System Column
- Field is from a Gantt End Date Column
- Field is the End date column in the date range display of the project settings
- Field is from a Gantt Predecessor Column
- Cell in source sheet contains a formula
- Cell in source sheet contains an inbound cell-link
- Cell in source sheet contains a Hyperlink
Field logic
When you add field logic, your view shows or hides fields. This logic is based on the conditions or changes on the Smartsheet item or in Dynamic View.
Field logic relies on dropdown lists and symbol columns. You need a dropdown or symbol column in your source sheet to name and save your field logic rules.
If your source is a report with multiple sheets, the dropdown values in a given column must be consistent across all sheets. You may not be able to use value in your field logic if a sheet is missing a value in the column properties.
- In the Field Logic pane, select + Logic.
- Assign a name for your field logic.
- In the When section, identify the column and the value(s) which will trigger the logic.
- In the Action section, select what will happen when the View detects the trigger. You can:
- Hide selected fields.
- Show selected fields as Read-only.
- Show selected fields as Editable.
- Show selected fields as Required.
- Choose the field(s) that will appear in or disappear from the View; then select Save.
Visibility permissions defined here appear in the Details pane. To access the Details pane, select a row in the View.
It's possible to create rules with conflicting actions. Dynamic View favors the rule with the lowest permission level
Share your dynamic view
Use the Settings > Sharing tab to set up who can see and edit the view. Refer to Share your Dynamic View for details.