Applies to
- Business
Capabilities
Who can use this capability
To create or edit workflows with the Smartsheet Jira Connector:
- You must be a licensed user.
- You must have Editor permissions or higher on any mapped sheet.
- You must be able to login to Jira and have access to the Projects you’d like to build a workflow to.
- If your System Admin activates the Restrict Users setting in the Jira Connector, you must also hold the Jira User role in Smartsheet.
- Smartsheet Jira Connector must be a premium application available on your plan and the initial connection to the Jira environment must have already been established.
Administration and setup of the Smartsheet Jira Connector
The Smartsheet Jira Connector syncs information between Smartsheet and one or more Jira instances. This article explains how to set up the Smartsheet Jira Connector with both Jira Cloud and Jira Self-hosted Server.
The Smartsheet Jira Connector is available as a premium offering. For information about pricing, contact our sales team.
If you have the Smartsheet Jira Connector purchased on your plan, log in to start creating workflows between Smartsheet and Jira.
Log in to the Smartsheet Jira Connector
Terminology and permission types
Before beginning, these are some helpful terms:
- Connection: The link between Smartsheet and a specific Jira instance.
- Workflow: The link within Jira Connector connecting Jira elements to a Smartsheet sheet.
Three levels of users can interact with the Smartsheet Jira Connector:
- Smartsheet System Admin: Manages Jira Connector Admins and Jira Connector Users from the Smartsheet application. System Admins can also enable a setting to restrict access to the Connector.
- Jira Connector Admin: Establishes the connection between a Jira instance and the Smartsheet Jira Connector.
- Jira Connector User: Can create workflows to sync information between Smartsheet and Jira.
Features by permission type
This table shows which users can complete specific tasks using the Jira Connector.
| Smartsheet System Admin | Jira Connector Admin | Jira Connector User | |
|---|---|---|---|
| Create connection | Yes | Yes | No |
| Create workflows | Yes* | Yes* | Yes |
| Edit own workflows | Yes* | Yes* | Yes |
| Disable own workflows | No | No | Yes |
| See all workflows in the organization | Yes | Yes | No |
| Disable any workflow in the organization | Yes | Yes | No |
| Enable or run any workflow in the organization | No | No | No |
| Assign Jira Connector User role | Yes | Yes | No |
| Assign Jira Connector Admin role | Yes | No | No |
| Enable Restrict Access setting | Yes | Yes | No |
| Add individuals to the Restrict Access list (after restrictions have been enabled) | Yes | Yes | No |
*Smartsheet System Admins and Connector Admins can create and edit their workflows if the restrict access list feature is enabled. If your System Admin activates the Restrict Users setting in the Jira Connector, you must also hold the Jira User role in Smartsheet. Learn more about restricting access.
Connection setup
To begin using the Smartsheet Jira Connector, you must first set up the connection between Smartsheet and your Jira instance so users can build workflows to connect specific elements in Smartsheet and Jira.
Smartsheet advises using a generic licensed email account (e.g., smartsheet-jira@yourdomain.com) for both Smartsheet and Jira to establish the connection. This prevents the need to redo connections or workflows if the person managing the Jira link leaves your organization, as connection ownership can't be changed.
Prerequisites
To set up the connection between Smartsheet and Jira, you must have the following permissions:
In Jira:
- Jira System Admin role
In Smartsheet:
- Smartsheet license
- Smartsheet System Admin role or Smartsheet Jira Connector Admin role
While only the Smartsheet System Admin role OR the Smartsheet Jira Connector Admin role is required, Smartsheet recommends that you have both roles to set up the Connector.
As the Smartsheet Jira Connector enables the implementation of automatic workflows, the application must have Jira System Administrator credentials to create or configure a Webhook with the Jira REST API. The Jira System Administrator’s credentials are only used to create and configure the webhooks.
The account used for setup must remain active with Admin rights in both Jira and Smartsheet. Removing this user's Admin status triggers an error: Missing user credentials for this endpoint. Restoring Admin permissions fixes the connection, resuming normal workflow sync. If Jira Admin credentials are removed, you must rebuild the application link due to token changes.
Step 1: Register a new Jira Server in the Smartsheet Jira Connector
You may need to set up your firewall settings and configuration before setting this connection up.
- Log in to the Smartsheet Jira Connector. If prompted to allow access to your Smartsheet account, select Allow.
- Select the menu in the upper-left corner of the page and then select Account Admin.
- Select Register New Jira Server.
- In the Settings page:
- Enter the JIRA Host URL of the Jira environment you want to connect to your Smartsheet environment (e.g., https://mbfcorp.atlassian.net/).
- The JIRA API URL likely is the same as your JIRA Host.
- For Name, either accept the default name or change it to a more helpful descriptor.
- Select your JIRA Version.
- When you have completed these items on the Settings page, select Continue.
- On the Configuration page, see the Consumer Key, Consumer Name, and Public Key. Copy these values as you will need them later.
Step 2: Create an Application Link (AppLink) to Smartsheet in Jira
- Sign in to Jira (you must have Jira Administrator permissions).
Go to Jira Settings (the gear icon in the top right corner) and select Products.
Brandfolder Image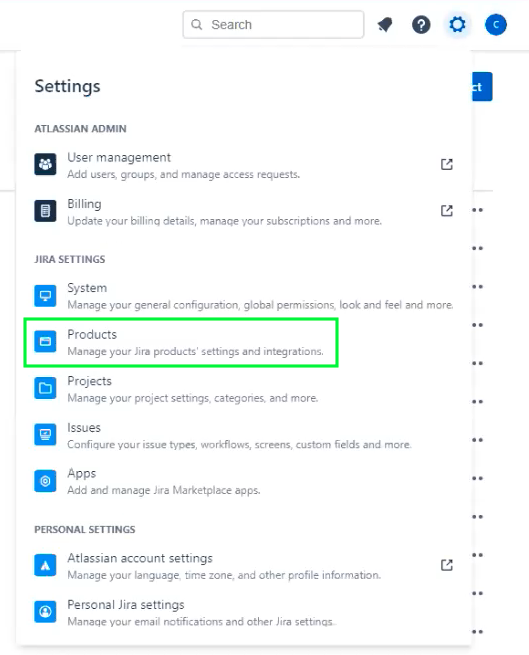
On the Products page, under Integrations, select Application links.
In previous Self-hosted versions of Jira, choose Settings > Applications and select Application links.
Brandfolder Image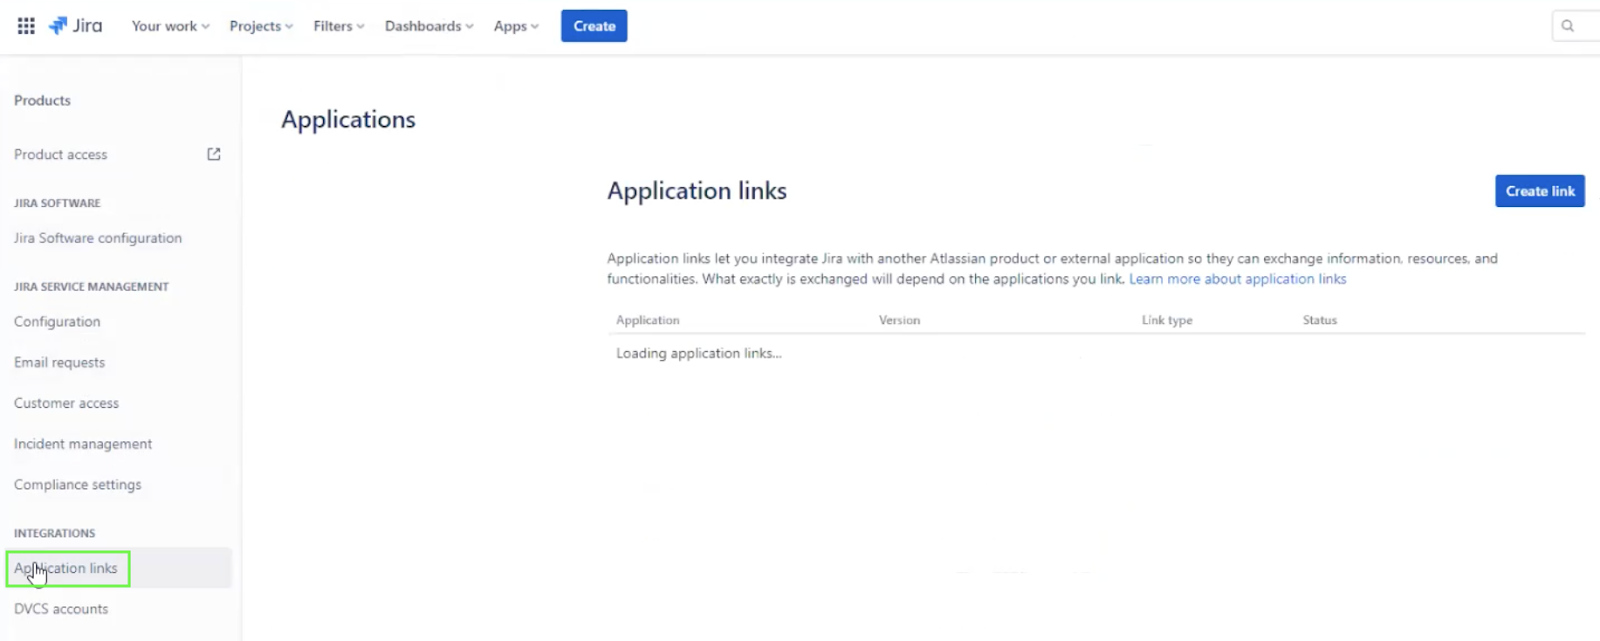
- Select Create link; a Create link box pops up. Fill out the fields as follows:
For Jira Cloud, select Direct application link and enter https://app.smartsheet.com for the Application URL. Then, select Continue or Create new link.
Brandfolder Image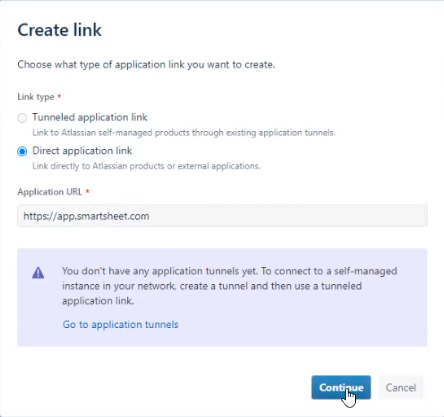
For Jira Self-hosted versions 9 and above, select Atlassian product and go to https://app.smartsheet.com for the Application URL. Then, select Continue or Create new link.
Brandfolder Image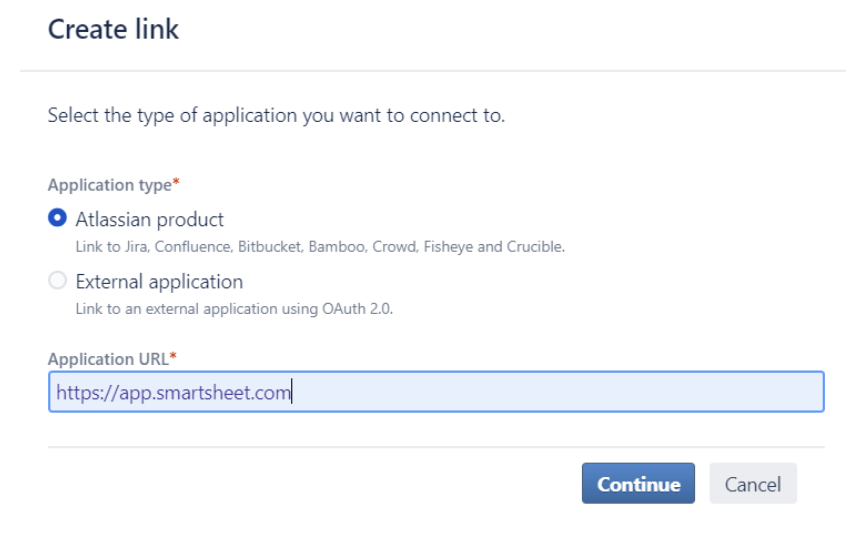
- Once prompted with one of the following messages, select Continue and keep the new URL unchanged.
- No response was received from the URL you entered - it may not be valid. Please fix the URL below, if needed, and select Continue.
- The supplied Application URL has been redirected once. Please check the redirected URL field to ensure this is a URL you trust.
- You'll now have a Review link or Link applications box pop up. Fill out the fields as follows:
- In the Application Name box, type Smartsheet.
- For Application Type, accept the default value of Generic Application.
- For Jira Self-Hosted v9 and above, check the Create incoming link box.
Select Continue.
Brandfolder Image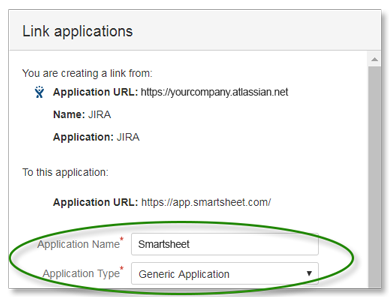
Step 3: Edit the Application link
- For the Application link you just created in Step 2, select the three-dot menu that appears when you hover over the Application Link or select the Edit icon (version dependent).
A Configure box pops up. Select Incoming Authentication.
Brandfolder Image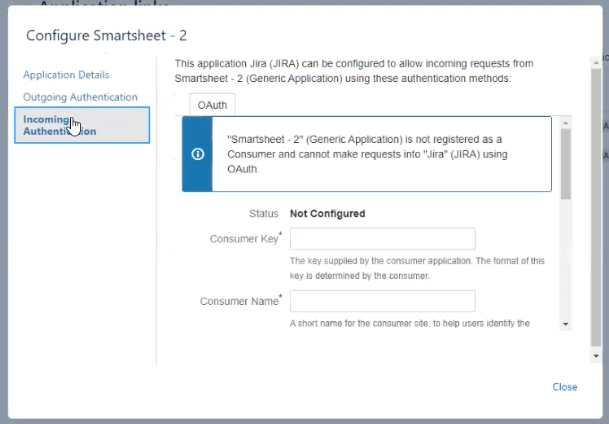
- Fill in the fields as follows:
- Service Provider Name (if needed): Smartsheet
- Consumer Name: Paste in the Consumer Name you copied from the Jira Connector in Step 1
- Consumer Key: Paste in the Consumer Key you copied from the Jira connector in Step 1
- Public Key/Shared Secret: Paste in the Public Key you copied from the Jira Connector in Step 1
- Description: Add in a description as desired
- If the Request Token URL, Access Token URL, or Authorize URL are required in your Jira environment, use this URL to populate those fields: https://api.smartsheet.com/2.0/token
At the bottom of the Incoming Authentication, select Save, then Close in the bottom right corner.
Step 4: Complete the Smartsheet Jira Connection
- Return to the Smartsheet Jira Connector configuration (should still be on the Configuration page where you copied the keys) and select Continue.
- On the Connect screen, select Connect to complete the connection from the Smartsheet side.
A dialogue screen asks if you allow Smartsheet to read and write to your Jira environment. Select Allow.
Brandfolder Image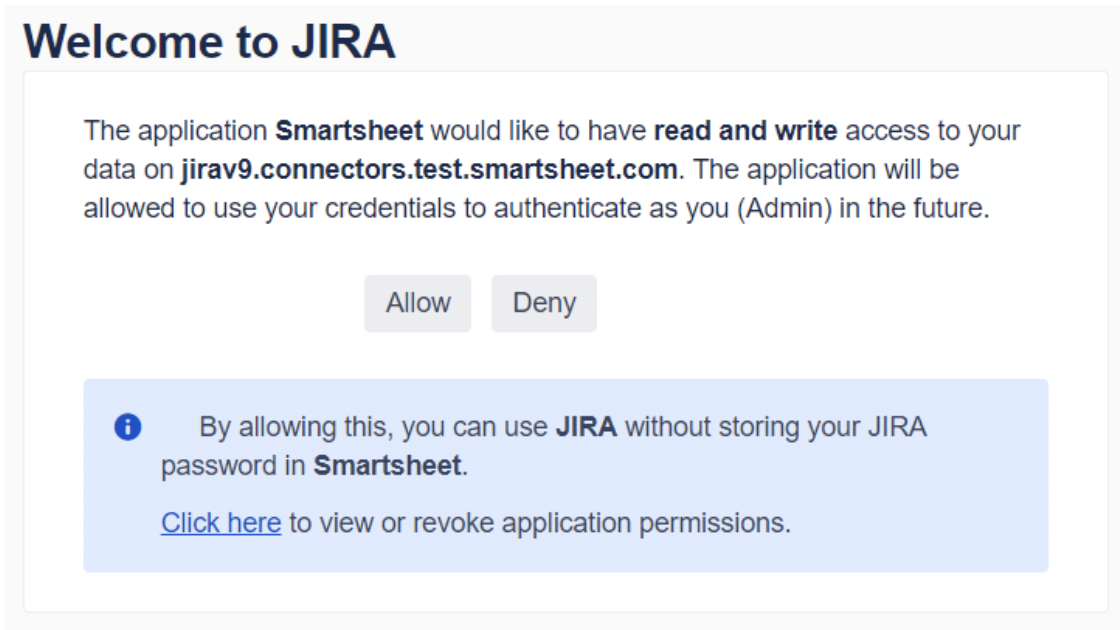
Your connection between Smartsheet and Jira is now set up! Licensed users on your account can now create workflows between items in Jira and sheets in Smartsheet.
You can connect multiple Jira environments to your Smartsheet account with the Smartsheet Jira Connector. Repeat the above instructions for each additional Jira instance you want to register.
Restrict access to the Smartsheet Jira Connector
If you'd like to further restrict who can build workflows within the Smartsheet Jira Connector, you can restrict access to certain licensed users on your account. What you can do in the Jira Connector always depends on the permissions you have on items in both Smartsheet (sheet sharing permissions) and Jira (issue field read/write permissions), regardless of whether additional restrictions are enabled.
The connector respects the permissions granted to you in both Jira and Smartsheet. For example, suppose the person who created a workflow in the Connector doesn't have permission to edit specific project data in Jira. In that case, the workflow can't edit that project's data through the connector.
To restrict access
To limit who can create workflows with the Jira Connector, the Smartsheet System/Jira Admin can turn on the Restrict Access setting.
- Sign in to the Smartsheet Jira Connector with your Smartsheet credentials.
- Select the menu icon in the upper-left corner of the page and select User Management.
Check the Restrict which users can access the Smartsheet JIRA Integration checkbox.
Brandfolder Image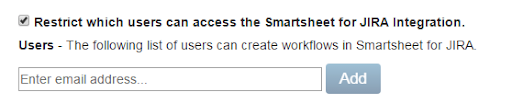
- Add the email address of anyone you want to access the connector.
To remove access
Any users removed from the list can't create or edit their workflows.
- Sign in to the Smartsheet Jira Connector with your Smartsheet credentials.
- Go to User Management.
- Select the Delete icon to the right of that person's account information.