Custom Fields provides a controlled taxonomy tool by adding key/value pairs to your assets.
With controlled custom fields that support single and multi-values, you can ensure that your asset data is set up and maintained to work with the ecosystem of tools you use daily. Custom Field keys can be controlled by Admins or added by Admins or Collaborators.
Set up custom fields (single & multi-value)
- Go to the Settings button in the top right corner and select General Settings.
- Select the Advanced Tab. Enable Control Custom Fields.
- Next, select the Custom Fields tab.
- Here, you can define custom fields for keys and values. Admins must set keys. You can provide values or leave them blank so other users with editing capabilities can add them as needed.
- If you select Allow multiple values, asset keys can have one or more values. Separate each value with a comma, or press enter after each value to input multiple values.
- If you select Required, when users upload new assets, they must input the custom field before uploading the asset. Children of dependent custom fields can be marked as required.
- When defining key and value pairs, . "" and : are not supported characters.
- Once an asset has multiple keys for a value, you cannot unselect the option to allow multiple values. First, you must remove the multiple values from the asset in Bulk Management Custom Fields.
5. Select Update Custom Fields. You can now add Custom Fields through the asset modal, or bulk toolbar.
You can enable dependent custom fields to create a cascading relationship. Learn how to allow dependencies to.
Add custom fields within the asset modal
You can define controlled custom fields for an asset in the asset modal.
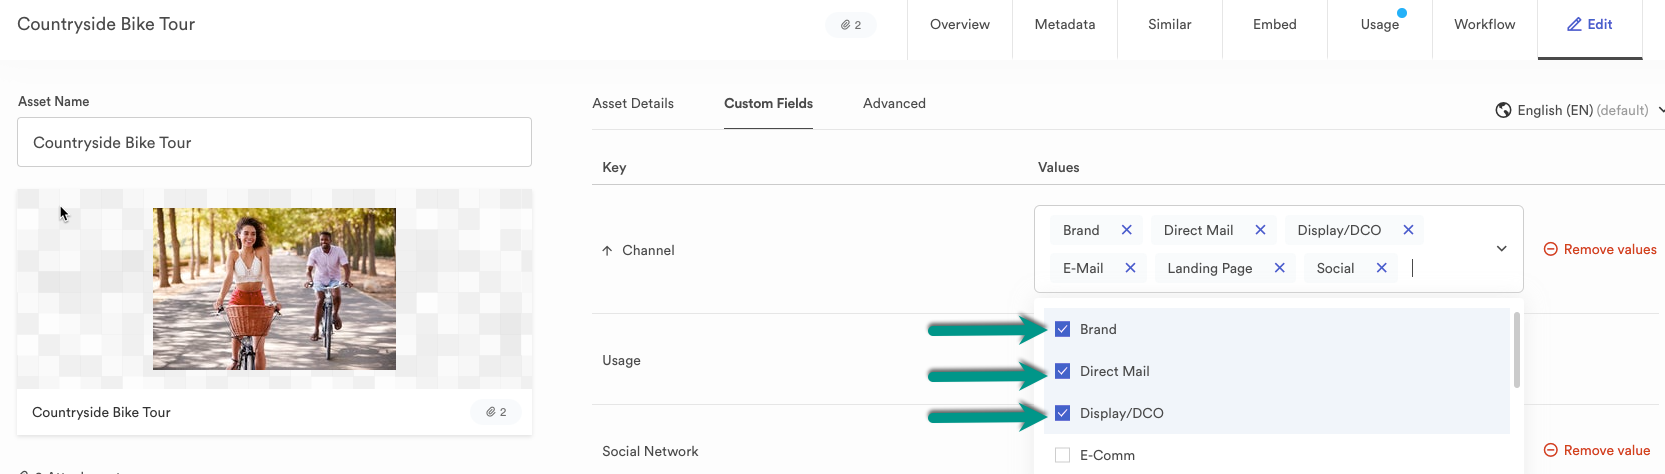
Navigate to the asset modal and select the Edit tab, then the Custom Fields tab.
- For multi-value custom fields with predefined values (restricted entry), users can select the checkboxes for multiple values to assign to the asset.
- You can only select one value from the dropdown menu for single-value custom fields.
- For multi-value custom fields with no values defined (unrestricted entry), you can add multiple values into the asset modal by typing in the values and separating them with commas. Once you place a comma after a value, it is in the system.
- For single-value custom fields, you can only input one value.
- Finally, for dependent custom fields, the appropriate dependent custom field will surface below the parent field once the value is selected.
You can add translations for single-value custom fields similarly via the asset modal. Translations for multi-value custom fields are not currently supported.
Once editing is complete, Save Changes. You can view changes in the asset modal's overview tab.
Add custom fields through the bulk toolbar
- Select the assets you want to edit.
- The bulk toolbar will appear at the bottom of the screen.
- Within the bulk toolbar, select, tag, then choose the bulk custom fields tab in the modal.
- The user can select predefined values from a dropdown or add various values for custom fields that allow multiple values.
- Select Save.
If an asset has an existing single value custom field, bulk adding a different value will override the original value. If you bulk add values for a multi-value key, it will add them rather than override the original values.