Applies to
- Enterprise
Capabilities
Who can use this capability
- System Admin
Prepare your IdP for IdP-role based groups
Before you set up IdP-managed access on your Smartsheet plan, ensure that your Identity Provider (IdP) system is configured to synchronize user roles with Smartsheet. Check the specific instructions for your IdP, whether it's Okta, Microsoft Entra ID, or another IdP.
Who can use this?
Plans:
- Enterprise
Permissions:
- System Admin
Find out if this capability is included in Smartsheet Regions or Smartsheet Gov.
Prerequisites
- IdP-managed access requires domain-level SAML SSO already set up. To continue, your IdP system must have an existing SAML integration with Smartsheet.
- Ensure your IdP system includes a user profile attribute with user role(s) data. The data type of the profile attribute should be a String or String Array.
Notes
- Values in the user profile attribute can’t have 4-byte UTF-8 characters, which include emojis and characters from certain languages. If those characters are present in the role values, an error will occur, and the user won’t be able to sign in to Smartsheet.
- Values containing non-alphanumeric characters (excluding the “ . ”, “ - ”, “ * ”, and “_” characters) will be URL form-encoded on the Smartsheet side.
- The assertion can have multiple SAML attribute values if the user profile role attribute is of string array type.
- On the Smartsheet side, the values will be collapsed into a comma-delimited string with enclosing brackets ( [ ] ), which can be up to 2048 characters long.
- If the maximum length is exceeded, users will encounter an error when signing in to Smartsheet. Note that URL form-encoded characters will take up additional spaces.
Okta
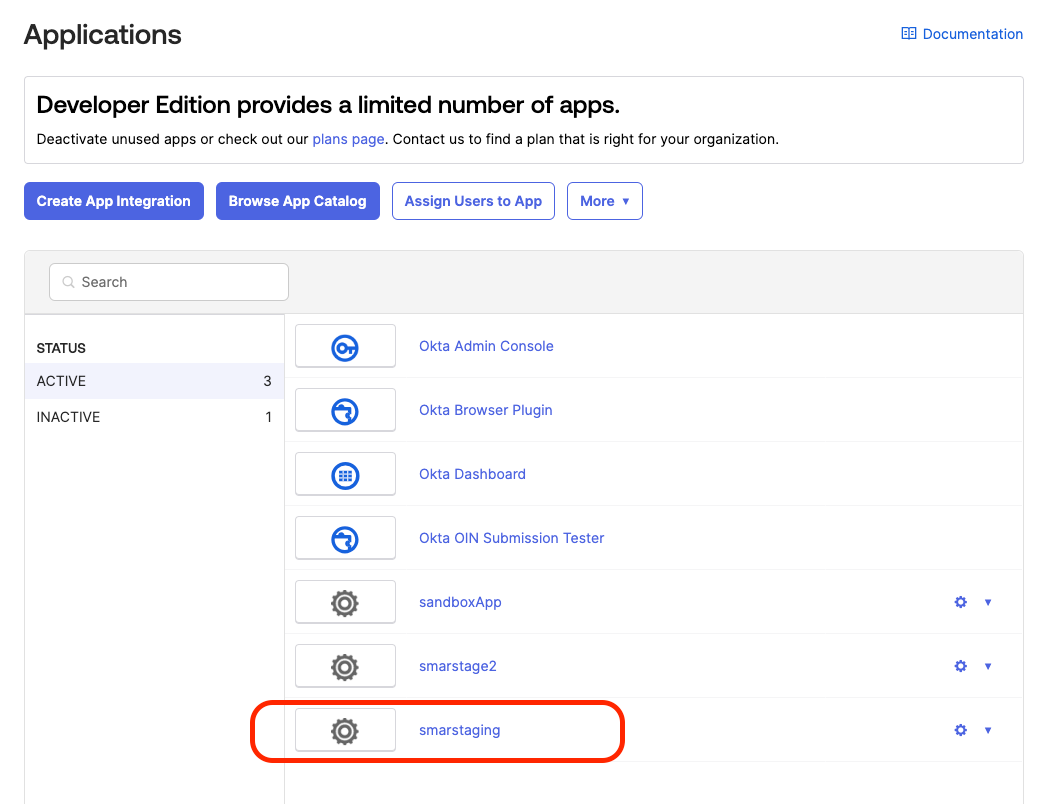
In Okta Admin console, go to Applications > Applications, locate the existing Okta integration with Smartsheet, and open it up.
Brandfolder Image
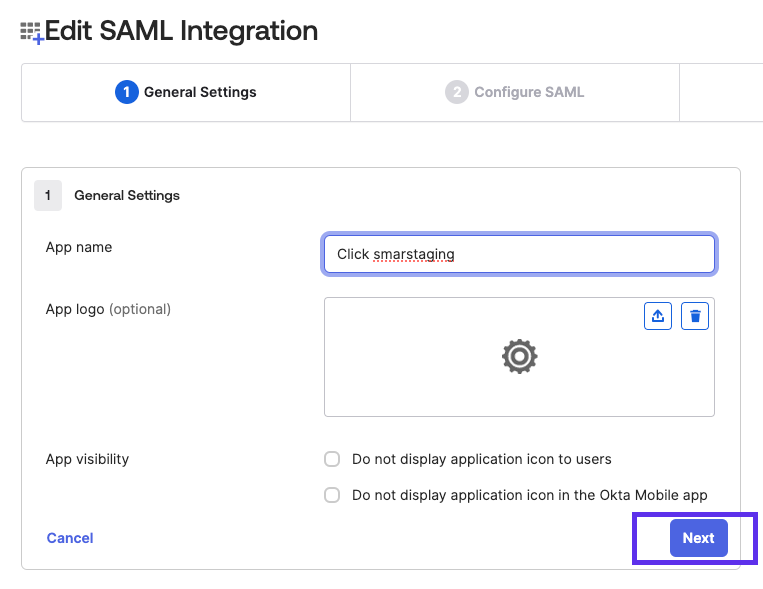
- In the General tab, navigate to the SAML Settings card and select Edit.
Select Next.
Existing app properties auto-populate.
Brandfolder Image
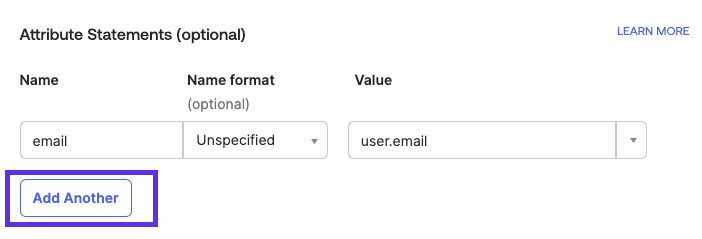
Go to the Attribute Statements (optional) section at the bottom and select Add Another.
Brandfolder Image
- Provide the following values:
- Name: http://schemas.smartsheet.com/ws/2022/03/identity/claims/idproles
- Name format: URI Reference
- Value: Use the profile attribute that has user roles. The profile attribute should have “string” or “string array” as data type
Select Preview the SAML Assertion. The following attribute element displays:
<saml2:Attribute Name="http://schemas.smartsheet.com/ws/2022/03/identity/claims/idproles" NameFormat="urn:oasis:names:tc:SAML:2.0:attrname-format:uri"> <saml2:AttributeValue xmlns:xs="http://www.w3.org/2001/XMLSchema" xmlns:xsi="http://www.w3.org/2001/XMLSchema-instance" xsi:type="xs:string"/> </saml2:Attribute>- Select Next > Finish.
Microsoft Entra ID (Azure)
- In Azure Portal, go to Microsoft Entra ID > Manage > Enterprise applications and select the existing Smartsheet Enterprise application that allows your users to sign in to Smartsheet via domain-level SSO.
- Go to Manage > Single sign-on and choose SAML-based Sign-on if needed to see the Set up Single Sign-On with SAML page.
- Go to Attributes & Claims > Edit > Add a new claim and provide the following values:
- Name: idproles
- Namespace: http://schemas.smartsheet.com/ws/2022/03/identity/claims
- Name format: URI
- Source: Attribute
- Source attribute: Select the source attribute for your users that contains the roles.
- Advanced SAML claims options: Check the box Expose claim in SAML tokens in addition to JWT tokens
- Select Save.
- When you return to the Set up Single Sign-On with SAML page, the newly added claim should be shown on the list.
Other IdPs
- Log in to the IdP Admin console and locate the existing Smartsheet application.
- Locate the place where custom attribute mappings are defined and configure the following:
- Attribute name: http://schemas.smartsheet.com/ws/2022/03/identity/claims/idproles
Source attribute: Select the source attribute that contains the roles.
There can be multiple attribute values if users have multiple roles.
Test the configuration to check if the IdP supports such testing. The resulting SAML assertion should look similar to the example below:
Since different IdPs may handle custom attributes differently, this is provided only as a reference.
<saml2:Attribute Name="http://schemas.smartsheet.com/ws/2022/03/identity/claims/idproles" NameFormat="urn:oasis:names:tc:SAML:2.0:attrname-format:uri">
<saml2:AttributeValue
xmlns:xs="http://www.w3.org/2001/XMLSchema"
xmlns:xsi="http://www.w3.org/2001/XMLSchema-instance" xsi:type="xs:string">role 1
</saml2:AttributeValue>
<saml2:AttributeValue
xmlns:xs="http://www.w3.org/2001/XMLSchema"
xmlns:xsi="http://www.w3.org/2001/XMLSchema-instance" xsi:type="xs:string">role 2
</saml2:AttributeValue>
<saml2:AttributeValue
xmlns:xs="http://www.w3.org/2001/XMLSchema"
xmlns:xsi="http://www.w3.org/2001/XMLSchema-instance" xsi:type="xs:string">role 3
</saml2:AttributeValue>
</saml2:Attribute>