The Azure configuration at the domain level allows you to implement a unified SAML single sign-on (SSO) for your domain across plans.
You must be a System Admin on Smartsheet and Azure to configure Azure for domain-level SAML single sign-on to Smartsheet.
Step 1: Connect Azure with Smartsheet
- Sign in to Azure AD.
- On the homepage, scroll down to Azure services.
- Go to Enterprise applications > New application > Create your own application > Name your application. For example, Smartsheet SAML SSO.
- Select the Non Gallery application option.
- While in the new application tile, select Single sign-on > SAML under the Manage section.
Under Basic SAML Configuration, grab the values from the Configure SAML IdP page in Admin Center and enter them in the Identifier/Entity ID and Reply URL/ACS URL fields. Learn how to get to the Configure SAML IdP page.
These values don't apply to SAML configurations on Gov plans.
Step 2: Edit user attributes and claims
- Exit the Basic SAML Configuration and go to User Attributes & Claims.
- Open the Unique User Identifier attribute:
- Set the Source attribute to user.userprincipalname OR user.mail
- Set the Name identifier format to Email address
- Double-check that the non-editable fields are set to the following:
- Name: nameidentifier
- Namespace: http://schemas.xmlsoap.org/ws/2005/05/identity/claims
- Remove all additional claims.
- Add a new claim for the required email claim with the following:
- Name: email
- Namespace: Leave this field blank (by default)
- Source: Attribute
Source attribute: user.userprincipalname OR user.mail
The source attribute passed is up to you as the customer; however, it must pass the email address value to Smartsheet.
- (Optional) Add other recommended claims:
- Add Given Name claim as follows:
- Name: givenName
- Namespace: Leave this field blank (by default)
- Source: Attribute
- Source attribute: user.givenname
- Add Surname claim as follows:
- Name: surname
- Namespace: Leave this field blank (by default)
- Source: Attribute
- Source attribute: user.surname
- Add Given Name claim as follows:
- Under SAML Certificates, check the following:
- The status is set to Active.
- The notification email is correct. This will notify you when the certificate approaches expiry.
- Copy the App Federation Metadata URL (recommended) or download Federation Metadata XML and open the file in a notepad or another raw text Editor of your choice.
- From the left panel, under Manage, select Properties and scroll to the bottom to turn off User assignment required?
Once you've confirmed that it's configured and working as expected, you can return to this page to turn it back on and assign specific users.
Step 3: Configure Azure in Smartsheet Admin Center
- Sign in to Admin Center.
- Select the Menu icon at the upper-left corner of the screen.
- Navigate to Settings > Authentication.
Select Add a SAML IdP or select Configure on your existing IdP.
The Configure SAML IdP window displays.
Brandfolder Image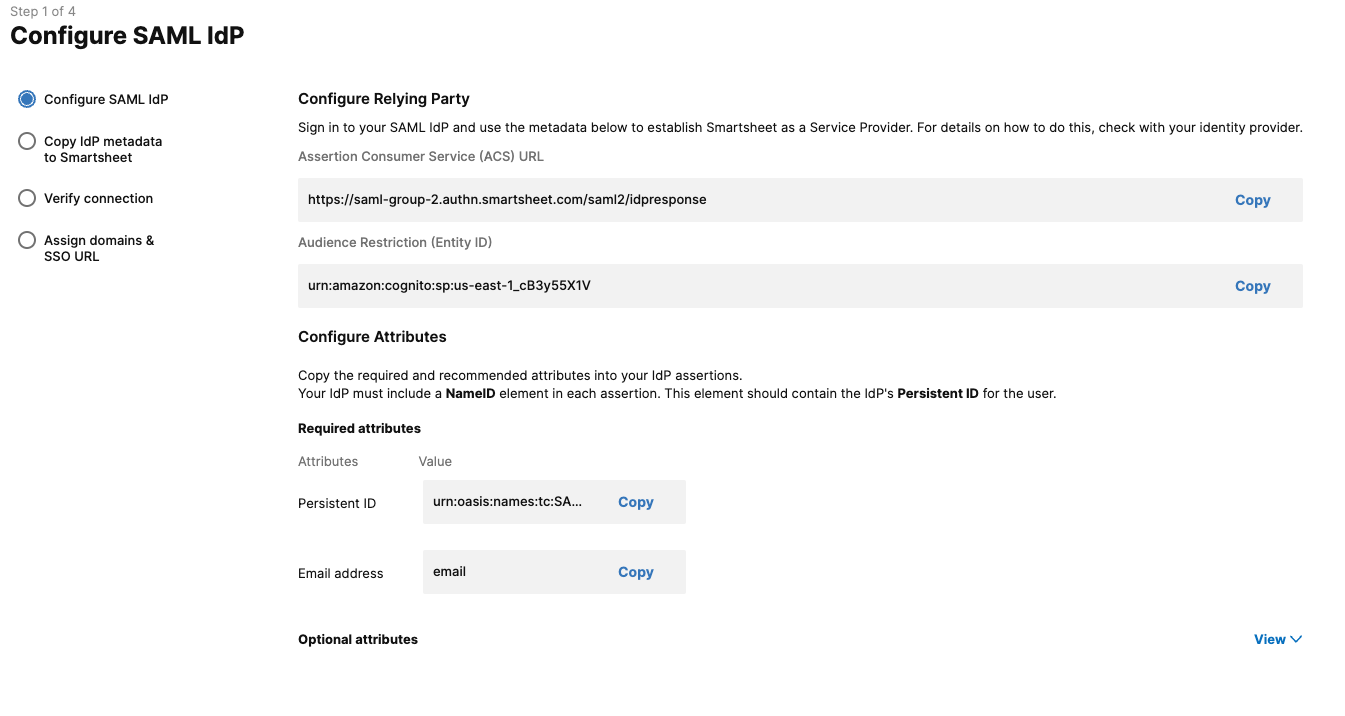
Select Next.
You don't need to copy the values from the Configure SAML IdP window because you've already configured Smartsheet as a relying party in Step 6 of the Connect Azure with Smartsheet section.
Paste the XML URL or XML file on the Copy IdP metadata to Smartsheet page and enter a name for your custom SAML configuration in the Name SAML IdP field. For example, "Azure SAML SSO."
Use the XML URL or XML file you copied from Step 6 in the Edit user attributes and claims section.
Brandfolder Image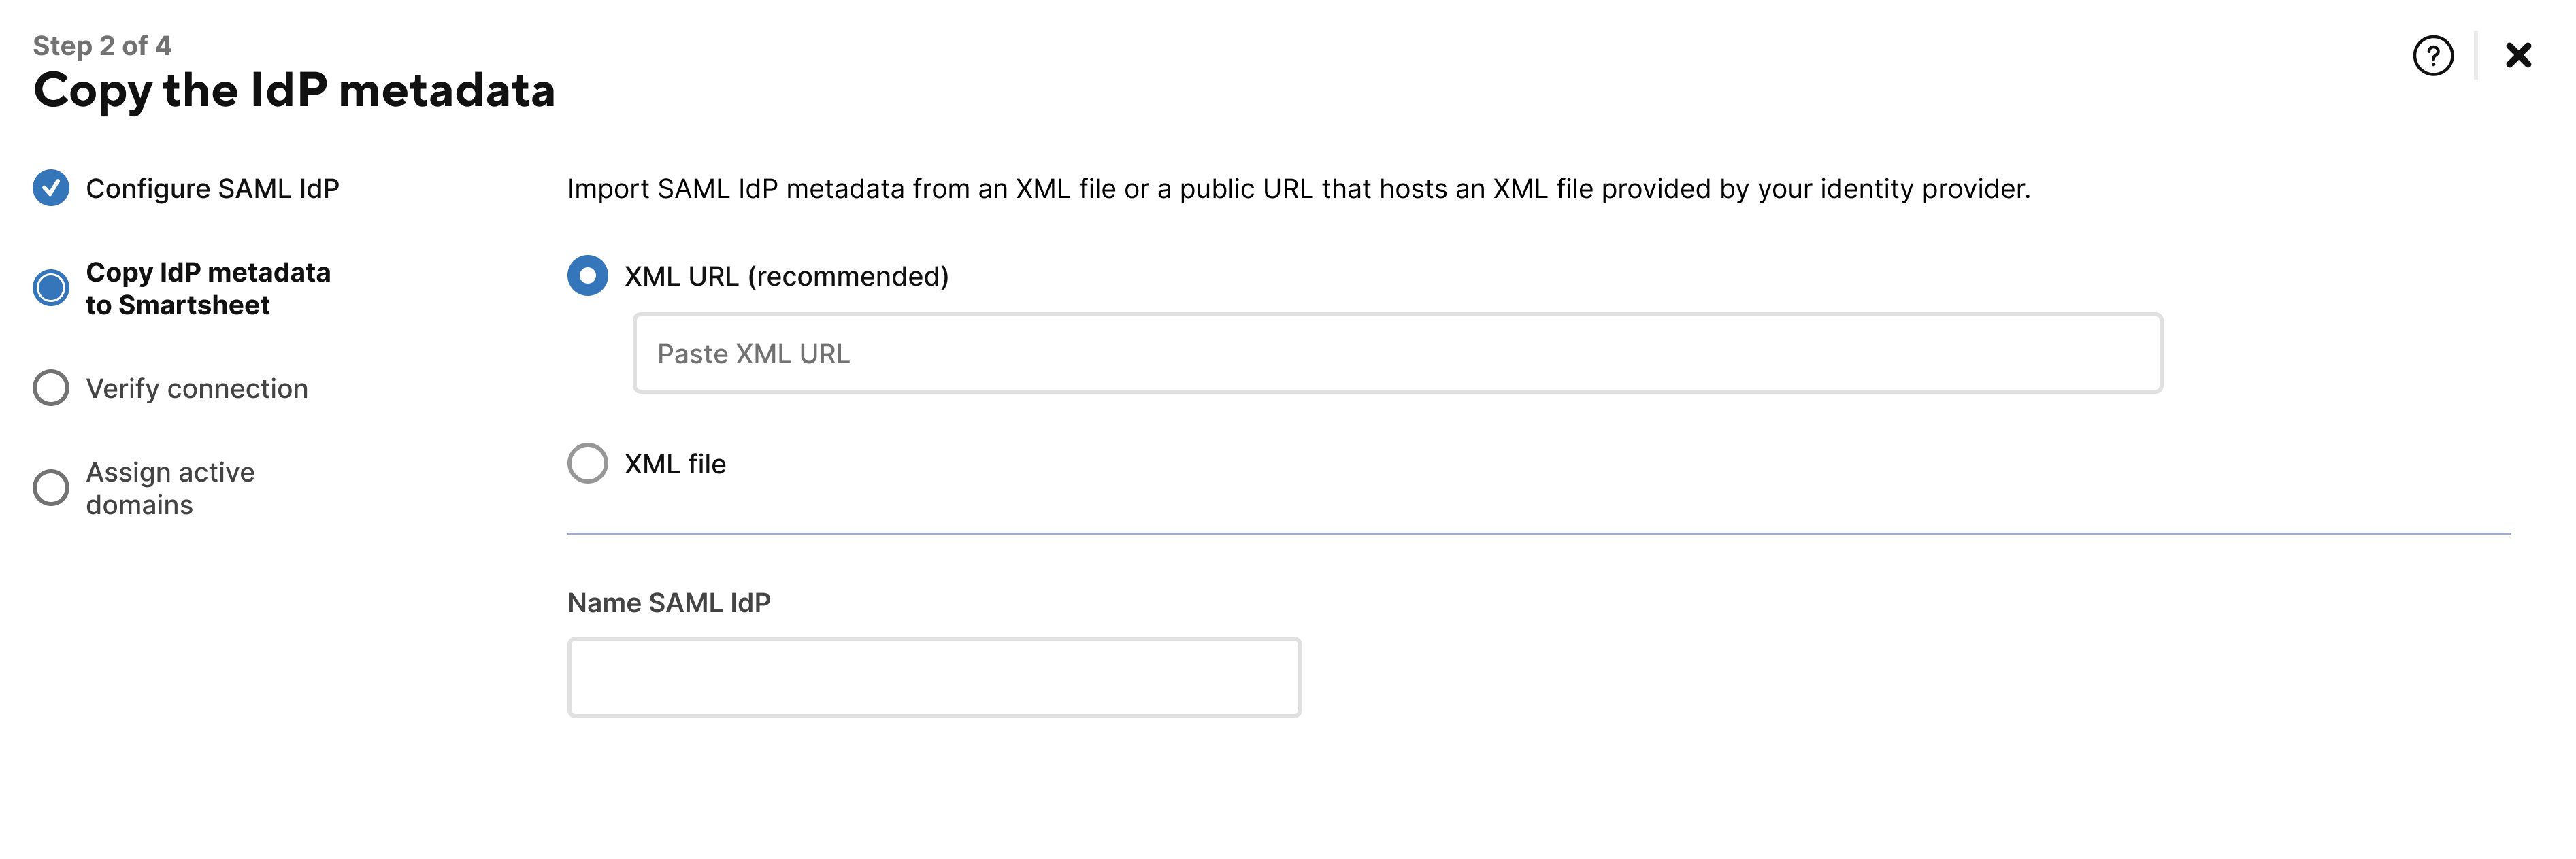
You must test your connection by signing in to Smartsheet using your custom SAML IdP. Select Verify connection. Once verified, check the I have successfully verified the connection box.
Brandfolder Image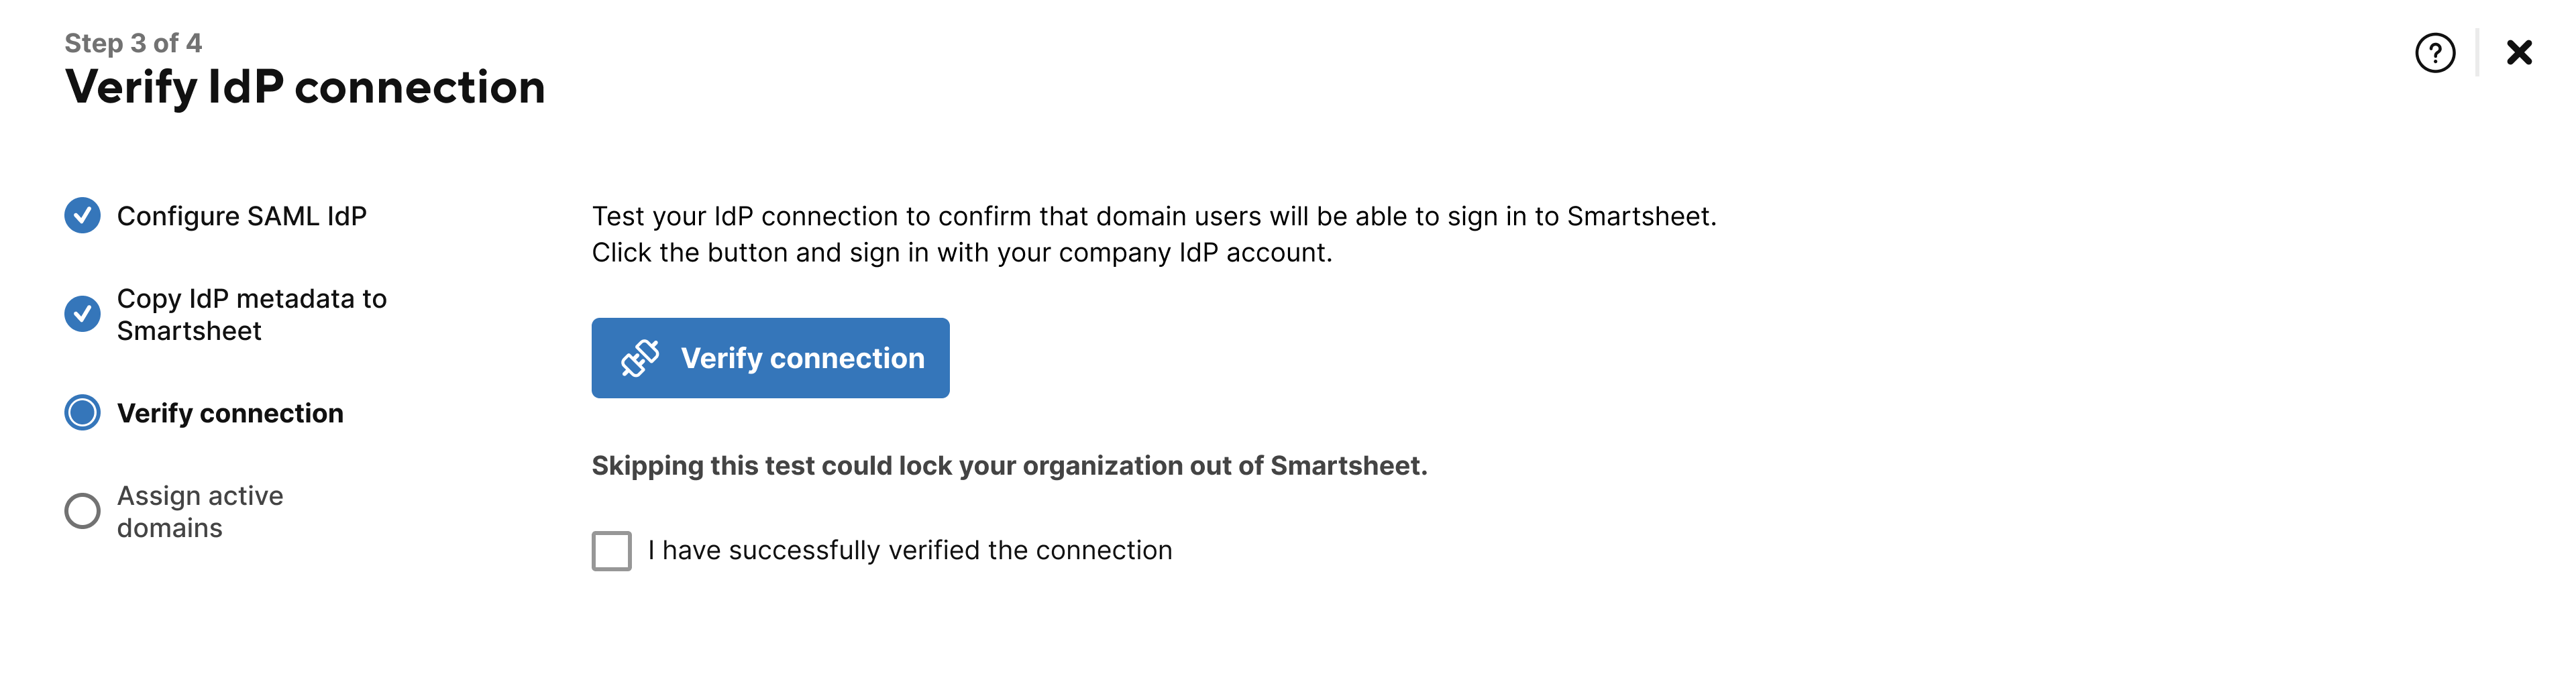
Use the drop-down field to assign your active domains to your Azure SAML IdP or select Add domain to find any domains you wish to add.
To authenticate through the tile, copy the SSO URL from Smartsheet and add it to the Sign On URL field in your Azure configuration. If you don’t add the Sign On URL, an error will appear if you attempt to authenticate via the tile.
Brandfolder Image
Select Finish > Turn on.
Return to the Authentication page in Admin Center and verify that the toggle is on.
Brandfolder Image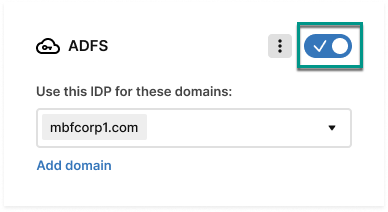
After turning on your Azure configuration, users from the assigned domain should see the Your Company Account button on the Smartsheet login page, which they can use to log in with SAML.