Brandfolder templating allows end-users to customize templates to fit their needs.
Brandfolder templating allows end-users to customize templates to fit their needs. Customizable templates are dependent on the locking configuration that was defined by the creator of the template. The features outlined below are not available in basic templating.
This article outlines all customizable features. Not all customizable features outlined will be available on the template you are working on. If you have questions about what is available for you to customize on your template, contact the creator of the template or the individual who shared the template with you.
The four customizable templating items include:
- Text: add text including, headers, subheadings, lines of text, and bullet points. Also, select from a variety of fonts, colors, sizes, and alignments.
- Images: upload from your computer, Unsplash, Pexels, and Iconfinder.
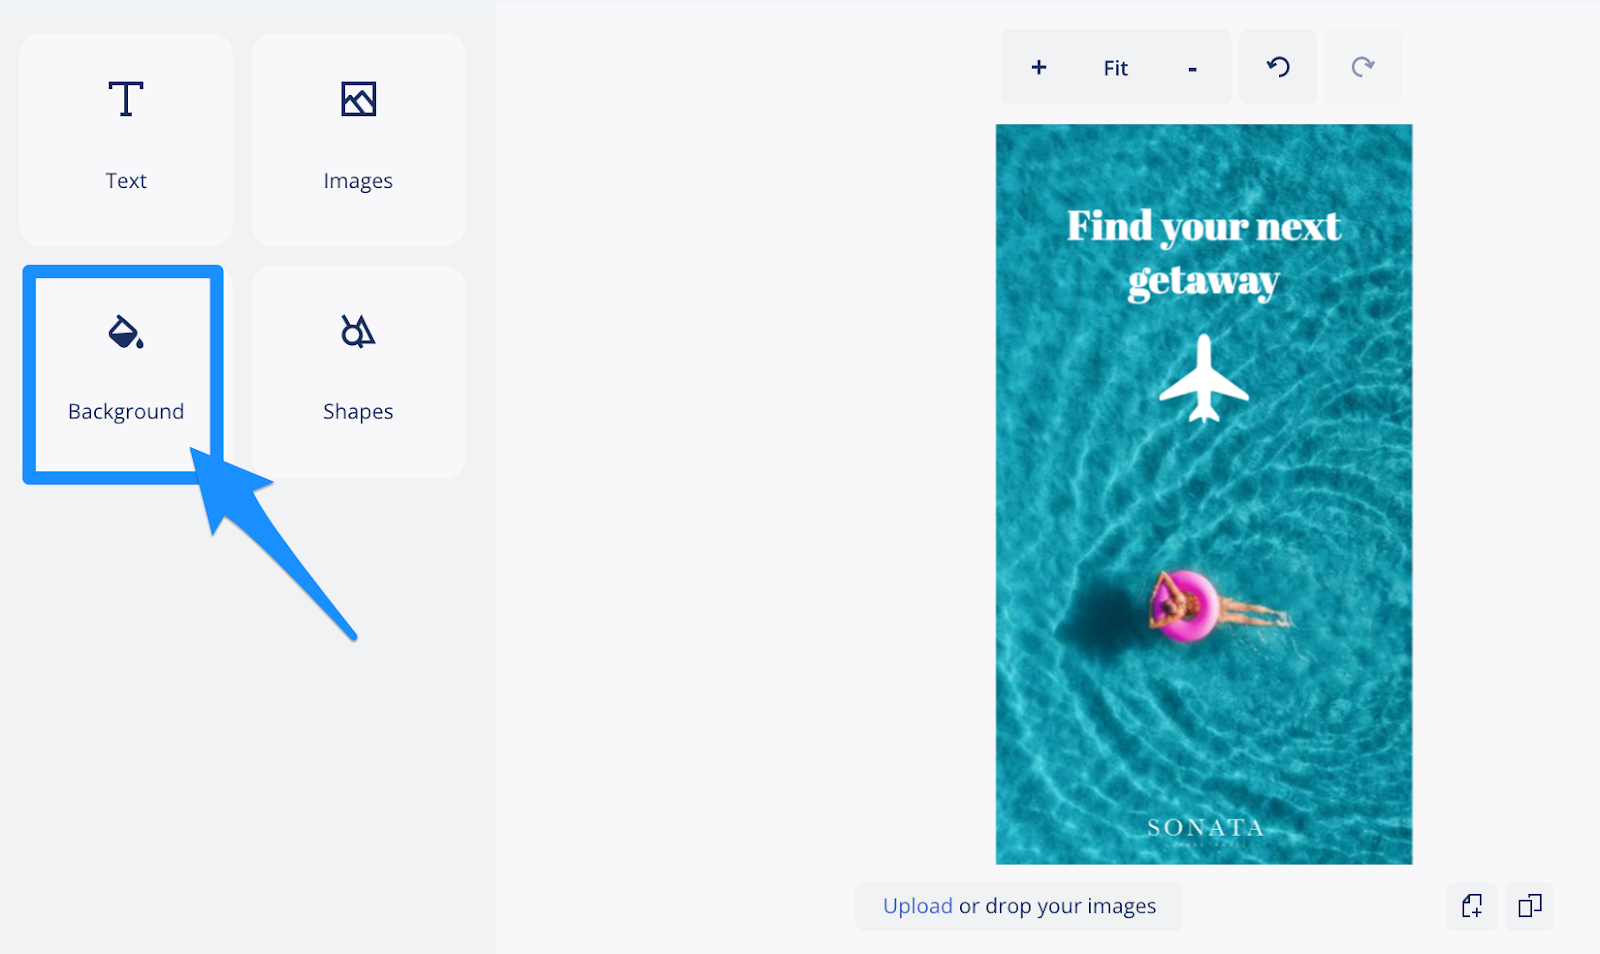
- Background: add background images or colors.
- Shapes: add shapes to the template using either Iconfinder or basic preloaded shapes. Also, insert images into the shapes.
Owners, Admins, and Collaborators can build templates in Brandfolder. The finalized template can be used by all users to input content.
Customize templates
Open the template asset by hovering over the asset and clicking visit.
You will then arrive at the area where you can customize the template.

Text
When you select already established text on a template a WYSIWYG editor will appear. A new menu will also appear on the left-hand side of the screen with additional editing options. The font file types that are able to be uploaded to Brandfolder custom templates are: .OTF, .TTF, and .WOFF.
All editing options are listed below. What editing options appear on your template are dependent on what the creator of the template has enabled.
- WYSIWYG
- Text alignment (left, center, right)
- Bold, Italic, and Underline (dependent on if the font supports these options)
- Capitalization
- Drop shadow
- Clone
- Delete
Side navigation edit options
- Fill (choose a color through HEX code, a picker, default options, or from the document)
- Font type (chose from fonts in the document or web fonts in the system)
- Font size
- Hyperlink
- Arrange (send to the front, send to back, send forward, send backward)
- Transparency
- Letter spacing
- Line height
- Drop shadow (click on the wheel to choose a color, distance, direction, blur, and transparency)
The reset button at the bottom of the side navigation menu will restore the text back to its original format.
Images
When you select a predetermined image on a template a WYSIWYG editor will appear. A new menu will also appear on the left-hand side of the screen with additional editing options. The image file types that can be uploaded to Brandfolder custom templates are: .JPG, .PNG, .SVG, .TIFF, and .HEIC.
The default size limit for images is 25 Mb.
All editing options are listed below. What editing options appear on your template are dependent on what the creator of the template has enabled.
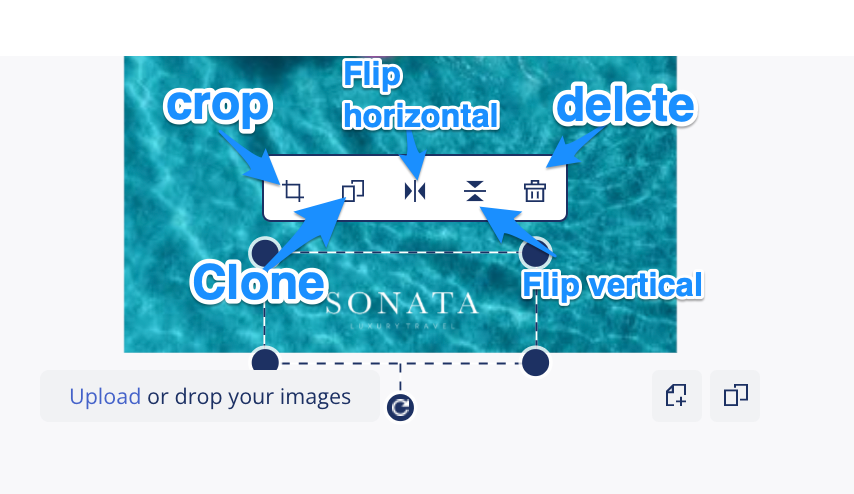
- WYSIWYG
- Crop
- Clone
- Flip horizontal
- Flip vertical
- Delete
Side navigation edit options
- Resize width and height
- Arrange
- Align to canvas
- Transparency
- Color overlay (click the color block to choose from HEX code, a color picker, defaults, or the document)
- Exposure, brightness, contrast, saturation, vibrance, hue, and blur
If you want to utilize another image than the one that is provided click on the image button on the left-hand side.
This will show you possible image replacement options such as uploading from your computer, Brandfolder, Unsplash, Pexels, and Iconfinder.
The first time you upload from Brandfolder you will need to input your API key.
Background
To edit the background of the template you will need to select the background button on the left-hand side.

This will reveal the following options:
- Color (Fill)
- Photo (reposition, resize, filter, or replace image with upload, Unsplash, or Pexels.)
- Size (select from social post sizes, headers, and custom sizes)
Shapes
When you select a predetermined image on a template a WYSIWYG editor will appear. A new menu will also appear on the left-hand side of the screen with additional editing options.
All editing options are listed below. What editing options appear on your template are dependent on what the creator of the template has enabled.
- WYSIWYG
- Color
- Photo
- Clone
- Flip horizontal
- Flip vertical
- Delete
Side navigation edit options
- Color
- Fill
- Stroke (color and weight of stroke)
- Resize (constrain proportions, width, and height)
- Arrange (send to the front, send to back, send forward, send backward)
- Align to Canvas (align right edges, align horizontal centers, align left edges, align vertical centers, align bottom edges, align top edges)
- Transparency
- Photo
- Upload from a computer, Brandfolder, Unsplash, or Pexels.
- Stroke (color and weight of stroke)
- Resize (constrain proportions, width, and height)
- Arrange (send to the front, send to back, send forward, send backward)
- Align to Canvas (align right edges, align horizontal centers, align left edges, align vertical centers, align bottom edges, align top edges)
- Transparency
Finalize your template
Once you have completed editing text, images, background, and shapes you can either download your template or request approval. This will be dependent on if the admin of your organization has enabled approvals on templates. If you are an admin or collaborator user you can also save your template to Brandfolder.
Request Approval
1. In the top right-hand corner select Request Approval.
2. This will put the customized asset into an awaiting approval state. When awaiting approval, the asset cannot be edited or downloaded. Owners and admins at the Organization and Brandfolder levels will receive a notification to approve.
3. Once the template is approved the creator will receive a notification in the notification center as well as an email notification.
4. Once you navigate to the approved template you will be able to follow the downloading directions outlined below.
Download
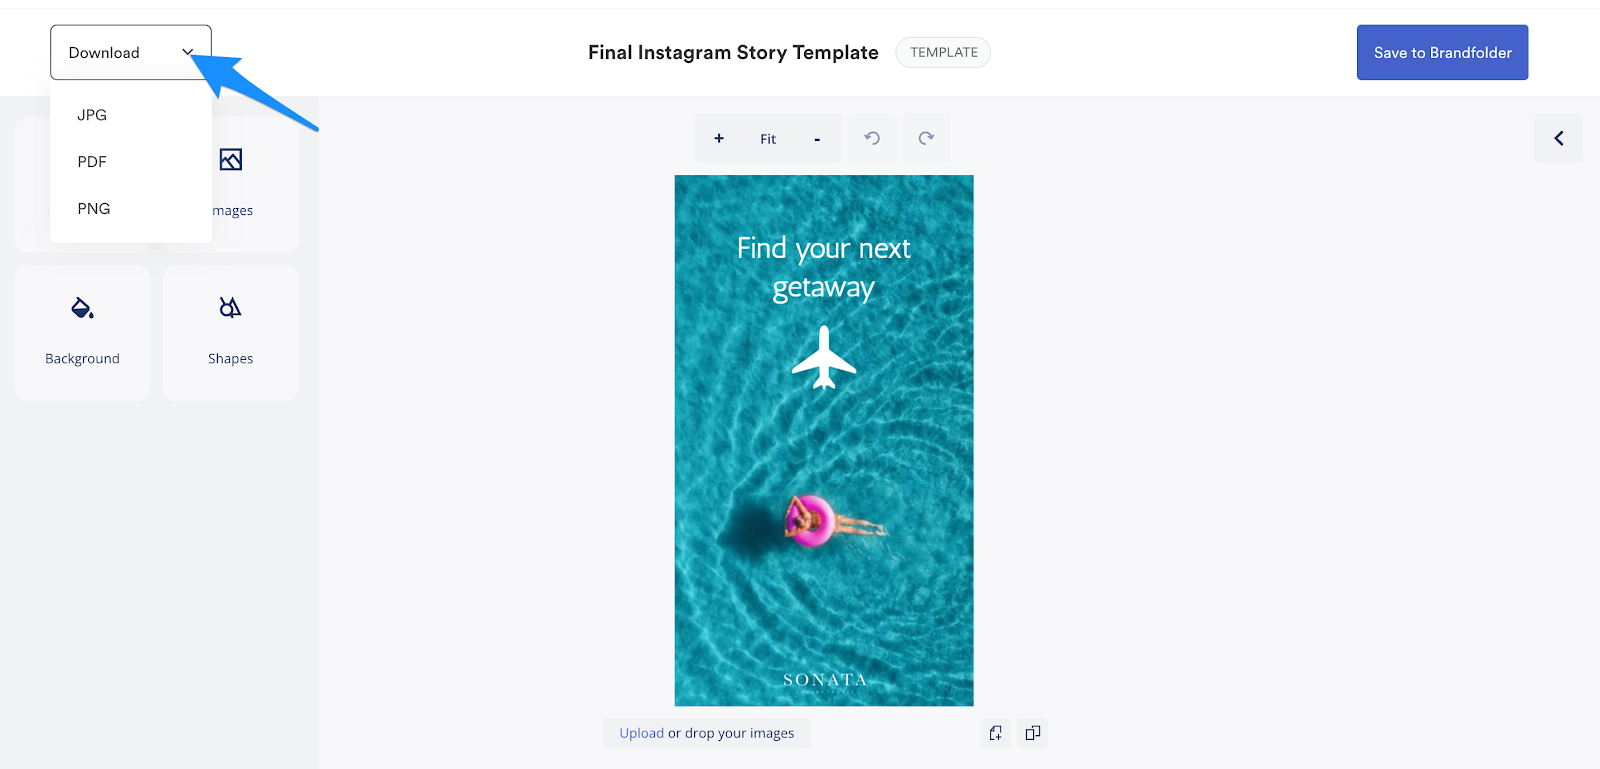
Navigate to the top left of the page to the download dropdown. Choose JPG, PDF, or PNG. Once you select your output a download will automatically begin.

Save to Brandfolder
1. Once your template is complete navigate to the top right-hand corner and click on the Save to Brandfolder button.
2. A new modal will appear. You will be prompted to name the template, choose a section to save it to and select a file type (JPG, PDF, or PNG). Select Save Asset.
3. Once the template is saved you can choose to go back to the template or to view the new asset you just saved.
