Applies to
- Brandfolder
Capabilities
Who can use this capability
- Admin
- Designer
- Author
- External Contributor
Send exported documents to a professional printer
Send printable documents directly to professional printing services.
Documents can only be sent to a printing service if:
- Your Marketing/Brand Team has permitted one of the artworks to be assigned to an external printing partner.
- The artwork has been approved and/or exported.
- The format and size of the artwork are compatible with the printer's offered services (for example, a printer may be able to print A2-sized documents but not A1).
If your artwork can not be professionally printed, you may want to either:
- Check that you have not used a digital format template.
- Print the document on a local printer, such as one in your office or home.
- Contact your administrator to request that the template be available for professional printing.
Get started
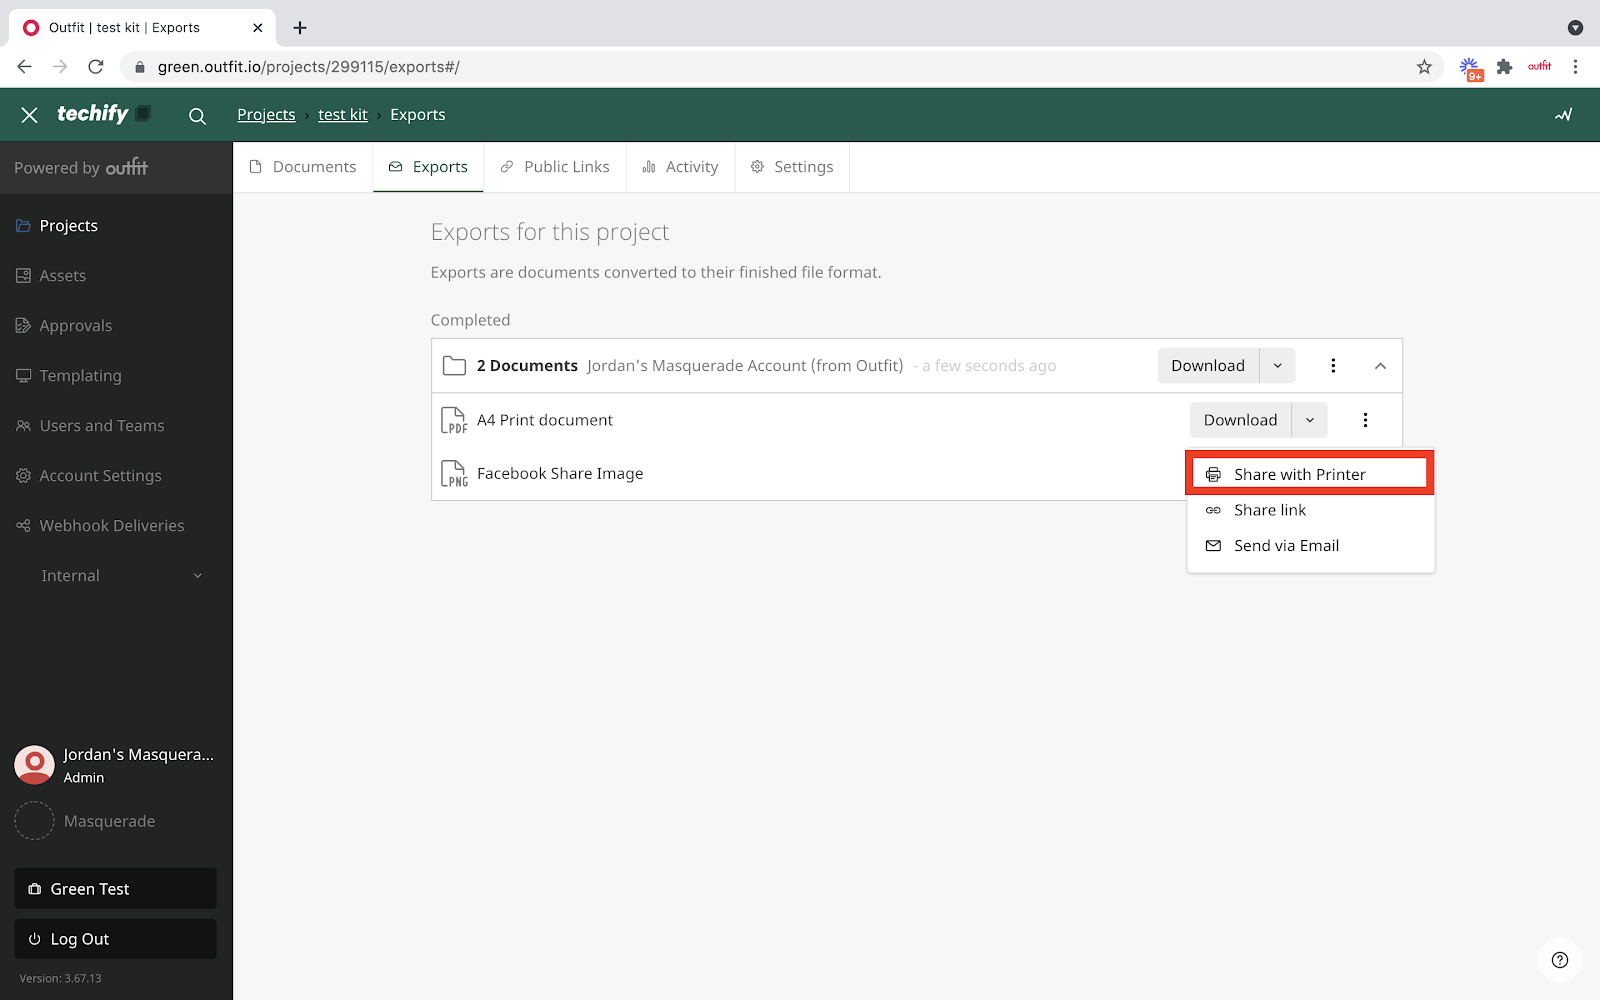
Once your artwork has been approved and exported, you are directed to Exports for this Project, listing all the artwork you have exported for print on this occasion.
Each exported document will have a button labeled Download with a drop-down arrow. On the drop-down menu, there is an option to select Share with Printer for print-supported exports.
If the button is greyed out, the artwork is not available for print due to its format or functionality – this is typically the case with digital artwork.
Brandfolder Image
If you have exported multiple documents for print simultaneously, you must select the first item in the export list to Share with Printer. You can send more items to the printer once directed to the Order Form page, provided the printing partner supports the documents.
Order form and artwork
Next, you are directed to the Order Form & Artwork Items page. Here you need to populate the print order details.
Underneath the Order Summary, the Pricing Sheet is available for review detailing the unit prices for the artwork you choose to print. You can view the printer’s details and any delivery methods and turnaround times information in the Printer Notes underneath the order summary.
Review and submit print order
If you have not yet selected all items you wish to print, click the button that says Add more items to your order and follow the same process outlined above. You can also add duplicate artwork items to the order if needed.
Once all documents have been added to your print order, you will be instructed to review them to ensure you are happy with their appearance before payment. Once you are satisfied with how they look, select Continue.
Populate your contact details for Invoicing and Delivery. If the invoice address is the same as the delivery, select copy to delivery details so you don’t need to populate them twice. Select Continue to be directed to the order summary. Complete a final review of the order summary.
You can't go back and edit the entered details.
Once the order has been reviewed, you need to tick the check box indicating you have reviewed your artwork and are responsible for the print order that has been created. You can then select the green Send Order button to finalize the order. Now the order information is sent via email to both the printer and the email of the user who created the order.
Once the printer receives your order, they will send you a confirmation email with a link for payment. Follow the prompts to complete the order.
Once the order leaves Content Automation, all print and order-related queries must be forwarded to the Printer directly. You can view the printer’s details in the Printer Notes or by contacting the internal Marketing department.