With the Smartsheet mobile app, you can take your work with you, collect information from resources in the field, and maintain visibility into key metrics so you can make decisions on the go.
Getting started
To download and set up the app, see Get up and running with the Smartsheet mobile app.
To find your Smartsheet items, use the Search bar at the top of your screen. Home, Browse, and Notifications are at the bottom of the screen.
Menus appear across the top of the app; tap the More icon  to see the full menu.
Working with sheets and reports
First, configure your sheets and reports on the desktop. Then, view and modify data in those items from within the mobile app.
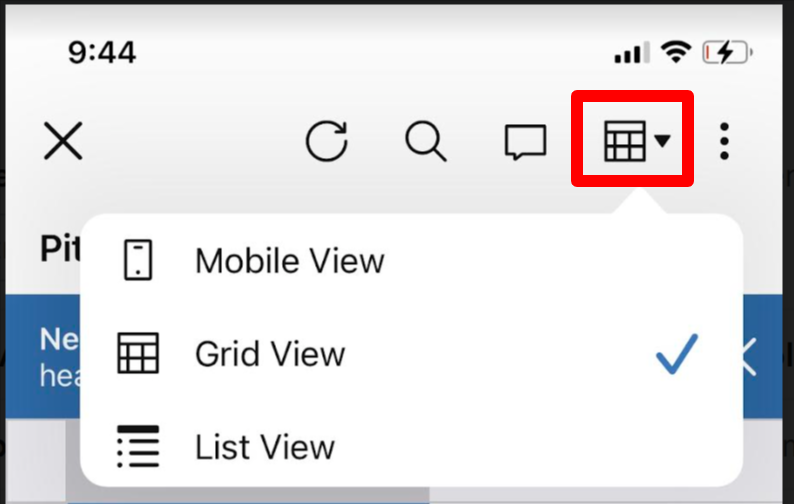
Switch views to change how you see your work
To switch views tap the Views icon on the navigation bar.
Optimize how you see information
- Open the item you want to work with.
- At the top of the screen, select the View switcher and then select Mobile.
Select the fields you want to display
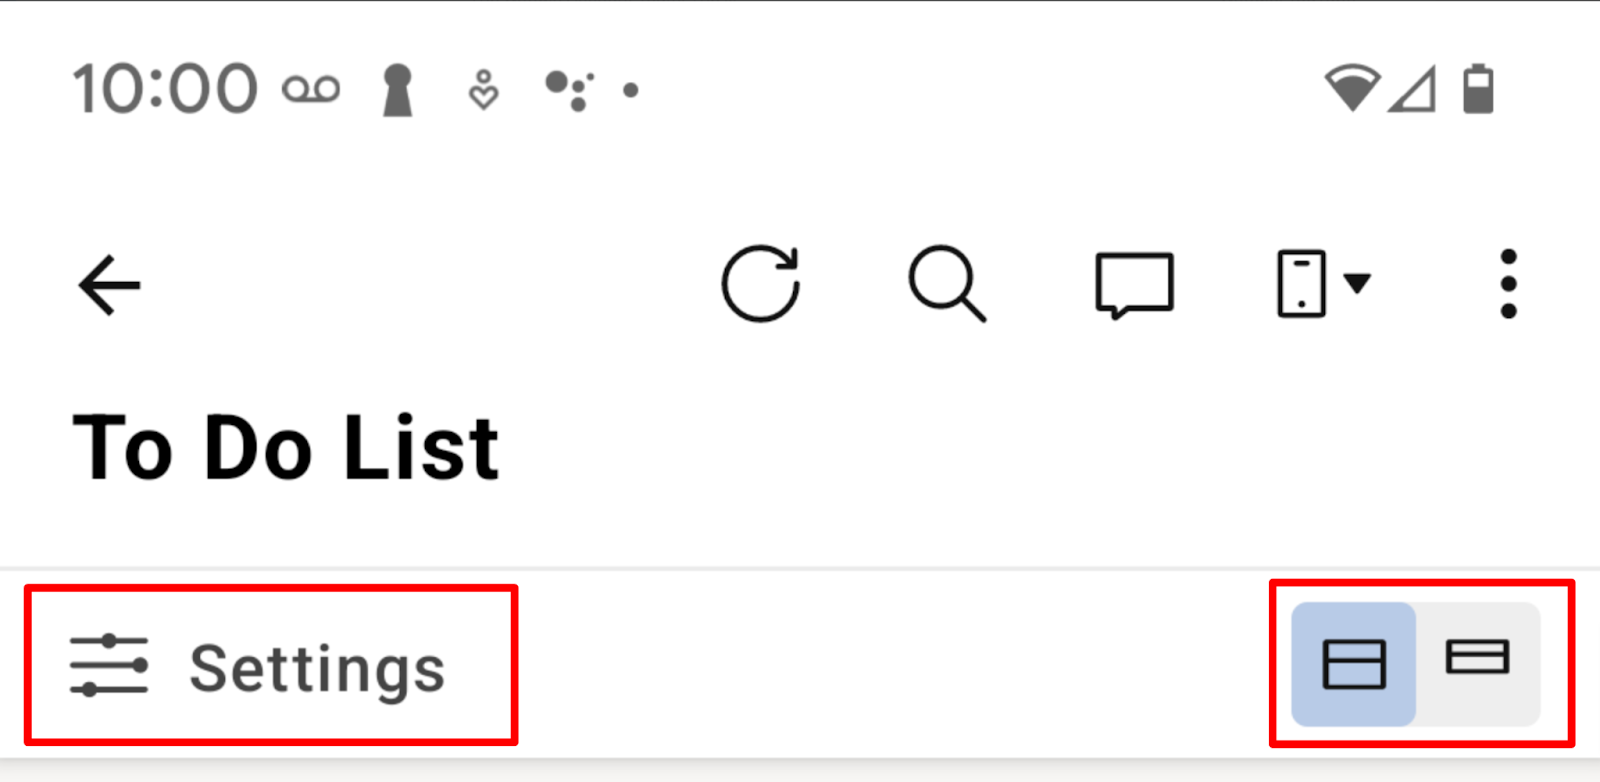
- To specify the fields you want to see for a particular sheet or report, select Settings.
- Select expanded view or collapsed view from the icons on the right.
Tips for using views
- Compact view displays only the primary column.
- To view and edit all fields on the row, select > Edit Row.
- A return symbol indicates child rows
; the parent row is referenced in smaller, gray text at the top of the entry.
- Only the immediate parent will be displayed at the top of the child entry. To see nested rows, switch to Grid View.
- To open individual cards tap the primary card's name.
Actions in Gantt view:
Tap any item in the view to access its menu.
Actions in grid view
- To access the row toolbar, tap a row number.
- To access the column toolbar, tap a column header.
- To access a cell toolbar, tap and hold the cell.
- Scroll up from the bottom of the screen to see more menu items.
- Tap-and-drag from the row number on the left of a sheet to move the row.
Actions in mobile view
- To access the menu, tap the More icon on the top right corner of an entry.
Troubleshooting
If you're having issues with the app, the following steps may fix most issues:
- Make sure you're running the latest version of the app. Update as needed.
- Log completely out of the app and then log back in again.
- Restart your device.
