Enterprise plans can create a custom welcome screen to share instructions and messages with your users when they login to Smartsheet.
Create a custom welcome message, help page, or upgrade screen
There are multiple ways to create custom content to help your team get up to speed on using Smartsheet:
- A welcome screen that displays a message to users the first time they log in
- A help screen to guide team members about how to use Smartsheet
- An upgrade screen to assist your users in the onboarding process.
Create a custom welcome screen
The welcome screen displays to all new users that you invite to the Enterprise plan User Management the first time they log in to Smartsheet, and to existing users on their next login. You might use the welcome screen to display internal terms and conditions to your users, and require them to accept the terms before continuing.
People must accept terms and conditions using Smartsheet in a computer browser, as opposed to the mobile application or mobile browser. They can then use the mobile application as normal after accepting the terms and conditions from a computer browser.
- Log in to Admin Center.
- Select the Menu icon in the upper-left corner of the screen.
Navigate to Settings > Branding & Personalization > Personalized Pages and select Manage personalized welcome pages.
The Account Administration window appears.
- Select Edit next to Custom Welcome Screen.
The Custom Welcome Screen window appears - Select the Custom Content Enabled box to turn the setting on for users.
Enter the secure (https://) URL where your custom content is located.
Unsecured (http://) links and links to internal files aren't supported. The link must be accessible from the web and embeddable. If the link isn't embeddable, you'll run into an error stating the domain refused to connect.
Select the box to Require user to click "Accept" if desired. When this is selected, your users must check a box indicating that they've read and understood the information in the welcome screen before they continue into Smartsheet.
You can download the user list from the User Management screen to determine which users have accepted the terms.
- Select Reset to display the welcome screen to all users the next time they login, regardless of whether they've reviewed previous versions in the past.
- Select the Preview button to preview the way your welcome screen will appear.
- Select OK to save your changes.
Customize an internal help screen
Your internal help screen displays as an option in the drop-down list any time a user on your Enterprise plan selects Help in the lower left corner of Smartsheet. You might use the help screen to instruct users which sheets are relevant to which teams, how to participate in a workflow, or who to contact for assistance.
- Log in to Admin Center.
- Select the Menu icon in the upper-left corner of the screen.
Navigate to Settings > Branding & Personalization > Personalized Pages and select Manage personalized help pages.
The Account Administration window appears.
- Select the Edit button next to Custom Help Screen.
The Custom Help Screen window appears. - Select the Custom Resources Help link enabled box to turn on the setting for users.
- In the Help Link Text field, enter the name or brief description of your help screen. This text appears in the drop-down list when your users select Help in the lower left corner.
- Enter the URL where your help content is located. The link must be accessible from the web.
Select whether to Launch in a new browser tab. When de-selected, the custom content displays in an iFrame that pops up within the Smartsheet interface. When selected, a new browser tab will open and display the content.
The Launch in a new browser tab box must be selected when using an unsecured (http://) URL.
- Select the Preview button to preview the way your internal help screen will appear.
- Select OK to save your changes.
Create a Custom Upgrade Screen
Your custom upgrade screen will appear any time an unlicensed user on your plan takes an action only available to licensed users (for example, if they attempt to create a new sheet). When this occurs, Smartsheet presents the unlicensed user with the following message:
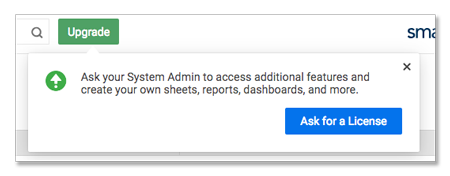
By default, selecting Ask for a License will display a window revealing the email address of your account's main contact so the user can reach out and request a license. When they make this request, they're enrolled in a 30-day trial while they wait for the approval.
You might customize the upgrade screen to display an internal page requesting/providing more information on how the user should proceed with their request, or a form that collects more information about the user's Smartsheet needs to help you determine whether or not to provision them a license.
- Log in to Admin Center.
- Select the Menu icon in the upper-left corner of the screen.
Navigate to Settings > Branding & Personalization > Personalized Pages and select Manage personalized welcome pages.
The Account Administration window appears.
This feature is only available to System Admins. If you're a System Admin and don't see an option for Account Settings in your Account Administration window, contact our Support team for assistance.
- Selectthe Edit button next to Custom Upgrade Screen.
The Custom Upgrade Screen window appears. - Select the Custom upgrade screen enabled box to turn on the setting for users.
- Enter the URL where your custom content is located. The link must be accessible from the web.
Select whether to Launch in a new browser tab. When de-selected, the custom content displays in an iFrame that pops up within the Smartsheet interface. When selected, a new browser tab will open and display the content.
The Launch in a new browser tab box must be selected when using an unsecured (http://) URL.
- Select the Preview button to preview the way your upgrade screen will appear.
- Select OK to save your changes.