Applies to
Route workflows with junctions
You can include junctions in Bridge to route your workflow in different directions based on specific criteria.
Junctions have two stages
- The first is where the decision is made.
- This stage is based on input from another system, or it can also be data stored from elsewhere in the workflow. There are many kinds of junctions in Bridge. All the junction options describe the type of data analyzation done in this stage.
- The second is where the possible options for routing are defined.
- This stage can consist of two or more states. You can build your workflow out to take one of multiple paths—the path determined by the data analyzed in the first stage.
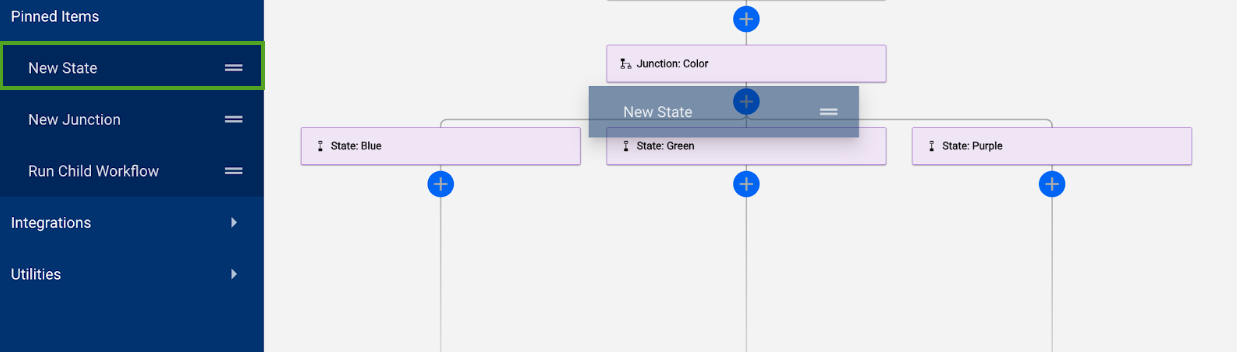
Do the following when creating a new junction
- Name three elements:
- One junction
- Two states
- To specify additional pathways, drag the new states below the junction.
Conditional Junctions
Junctions can analyze different kinds of data, depending on which junction module you use.
Conditional Junction modules make your workflows identify which route to take. You can use them by applying logic to the data collected, which is pulled from an external data source during the workflow.
For more information on referencing a pre-existing value, refer to the Reference Data in the Workflow article.
To find Conditional Junction modules
- Search for Conditional Junctions; or
- Go to Utilities > Conditional Junctions.
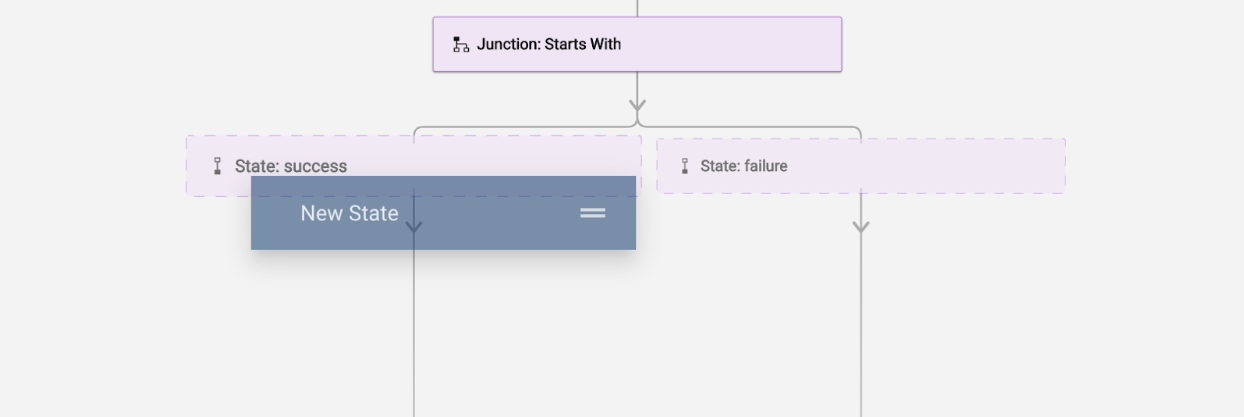
True/False Junction modules
There are only two possible pathways for the workflow to follow: true or false. All True/False modules create the junction as a group for you.
Here’s a list of the True/False Junction modules:
- More: Is a referenced value more than another one?
- Less: Is a referenced value less than another one?
- Equals: Does a referenced value equal another one?
- Match: Does a referenced string exactly match another one?
- Contain: Does a referenced string contain another string?
- Starts with: Does a referenced string start with another string?
- Ends with: Does a referenced string end with another string?
- Is empty: Does the referenced string exist?
Once you have added the Conditional Junction type you prefer, drag the states to the workflow builder. You need to do this to configure the module's success and failure branches.
As an example, you could determine if a value meets a requirement by bringing in data from a sheet. Then, you can compare that data to the requirement specified in the More type of Conditional Junction.
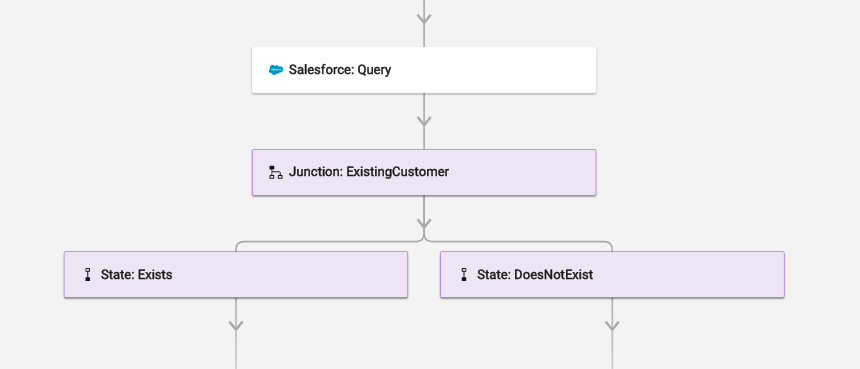
Using external tools to make junction decisions
You can also have external tools interact with Bridge to make junction decisions.
In this scenario, the workflow is identifying whether or not an account exists in Salesforce. If there is an account, it goes down the State: Exists path. If there's no existing account, it goes down the State: DoesNotExist path.
Conditional junctions with more than two pathways
There is no limit to how many products can be made available.
Multiple routes based on referenced data
For a workflow with more than two pathways:
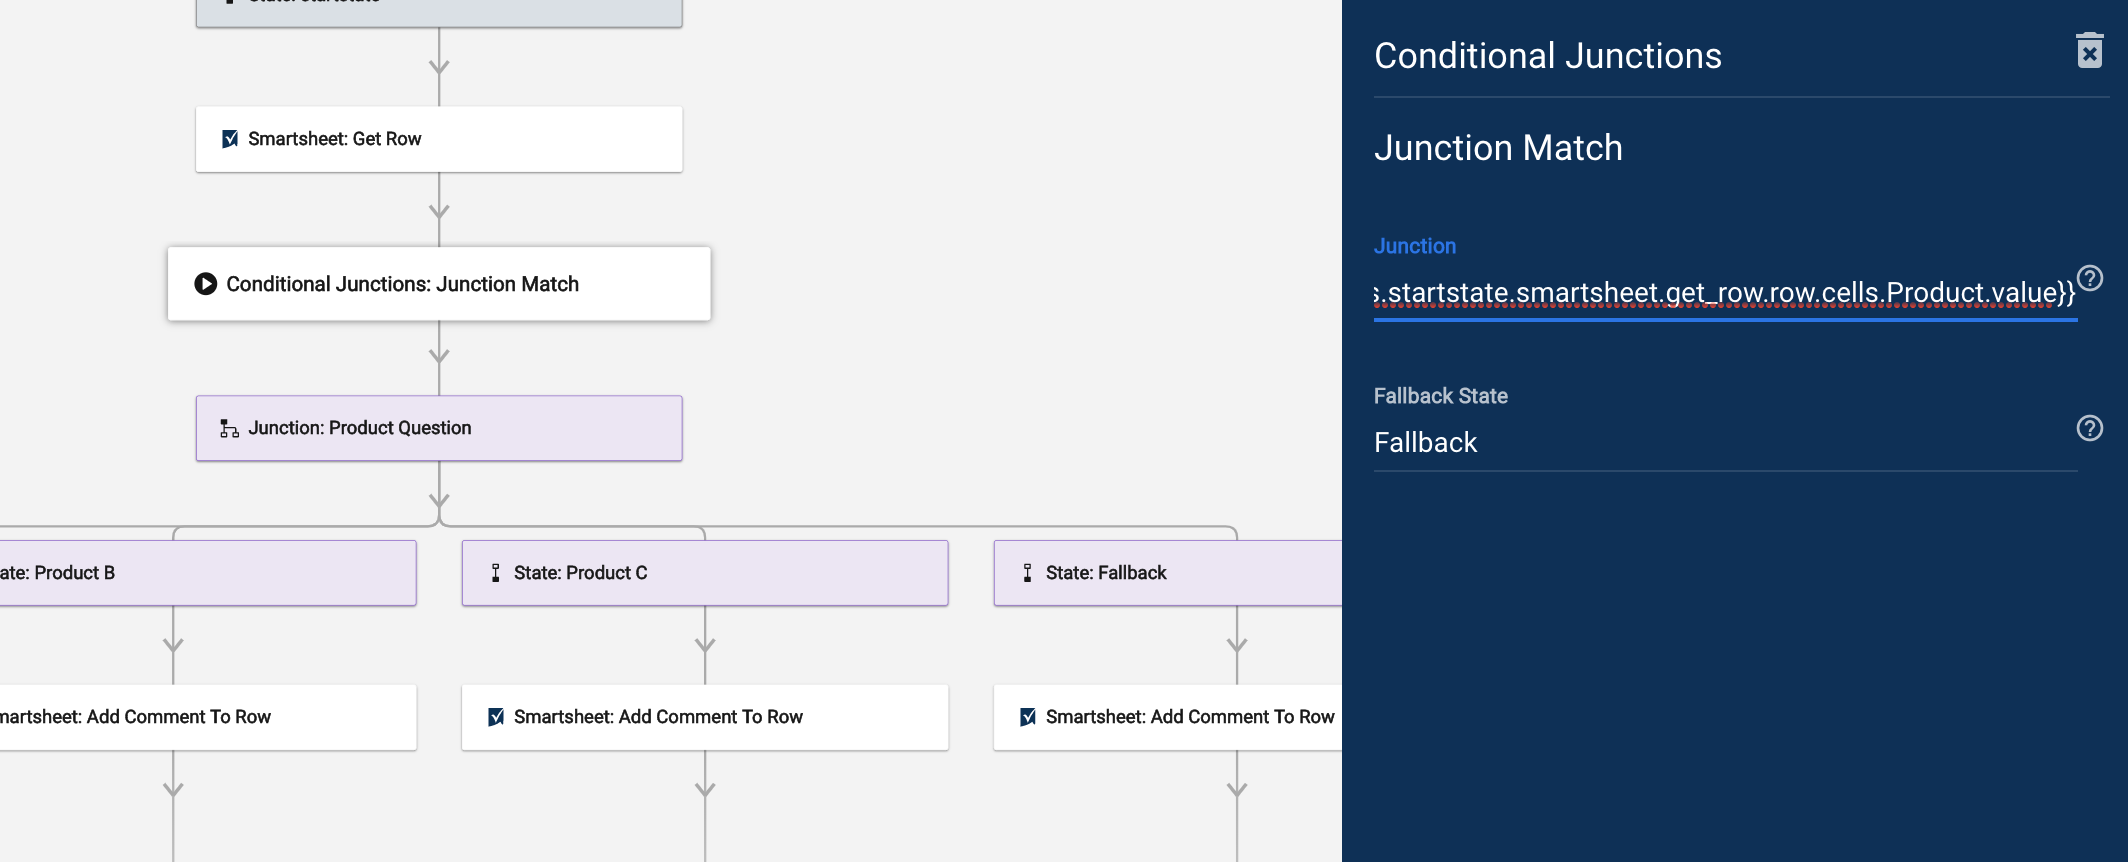
- Add Conditional Junction: Junction Match.
- Then add the Junction itself.
- The Junction element matches the referenced data with its corresponding state (based on the state name). That said, this element is what pushes the workflow to the necessary path.
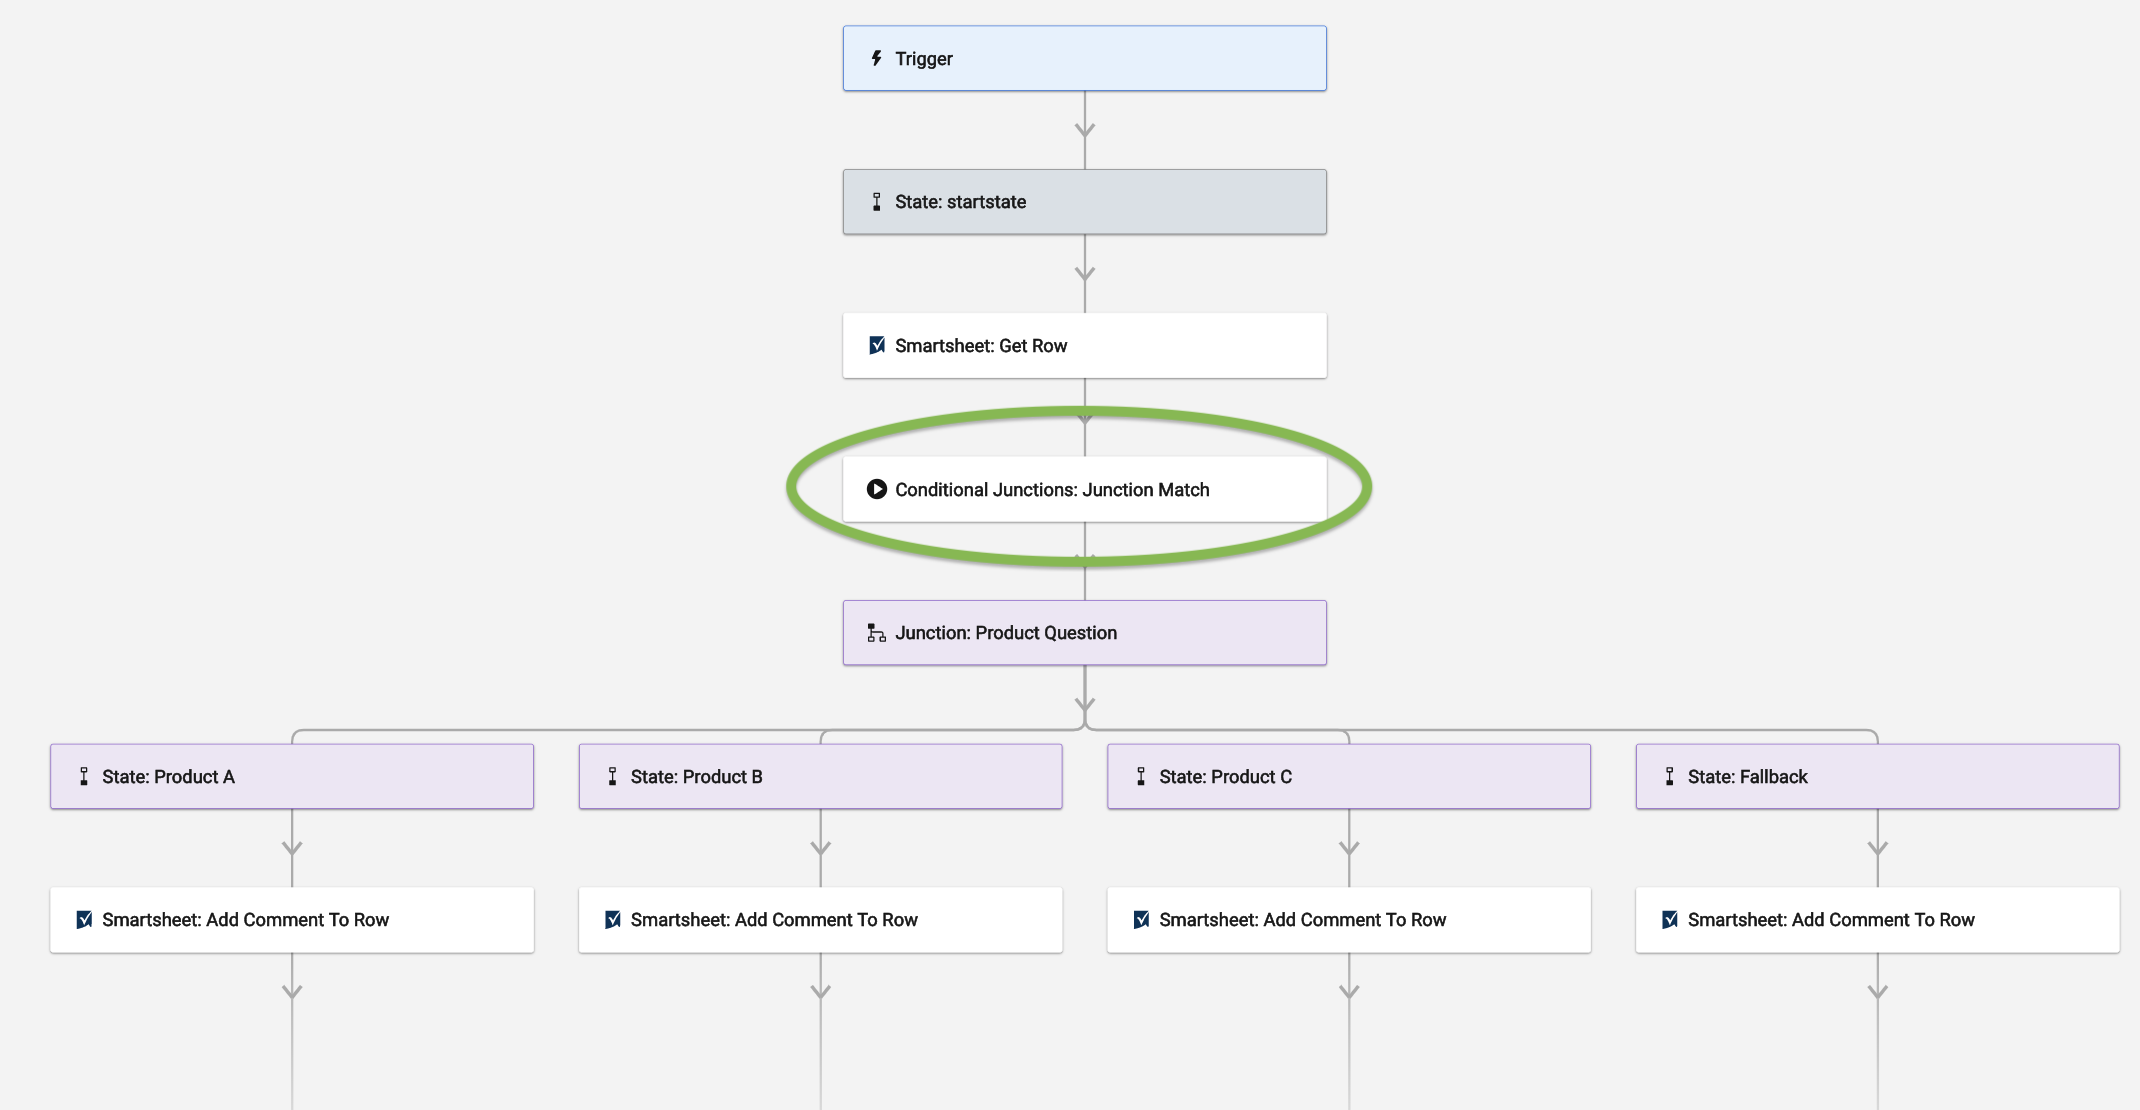
For example, a user has filled out a Smartsheet form identifying Product A, B, or C in a column. To specify the Smartsheet cell where the type of product was selected, add in the Junction Match element. It will then read the cell and tell the workflow which of the junction state names matches that selected product.
You’ll also want to add an alternate state for the workflow to follow if none of the values entered in the cell match Product A, B, or C. This is called a Fallback State.
Configure the Junction Match
Junction Match is case sensitive, so ensure the title of your States are exactly the same as your values.
- Open up the Junction Match.
- In the Junction field, add the data reference.
- In this example, the data reference is the product value gathered from the Get Row module.
- In the Fallback State field, put the name of your alternate state.