Applies to
Create a Brandfolder workspace
Use Bridge to automatically create a Brandfolder workspaces.
For example, you have a high-level campaign planning tracking sheet. You can use this Bridge template to automatically create a Brandfolder Workspace when you set the row status to Planning. This sheet change triggers the workflow in Bridge to create the Workspace in Brandfolder. Then, it'll include a direct URL to the workspace back into your sheet, so it's easy to find as you review your campaign plans.
The Bridge workflow builder must ensure both integrations are authenticated. Refer to Brandfolder integration overview and Smartsheet Bridge Integration: Overview and setup to see how to authenticate them.
Systems in use
- Smartsheet
- Brandfolder
Workflow trigger
- Smartsheet - When Column Values are Changed
Workflows in this template
- Create a Brandfolder Workspace Based on a Status Change
- Get Brandfolder IDs
Permissions needed
- Smartsheet: The user building the workflow in Bridge should have at least an Editor permission on the sheet
- Brandfolder: The user building the workflow in Bridge should have an API key and Admin access to the Brandfolder
Set up the sheet
You need the following for your sheet:
- The Sheet ID: To find this, on your sheet, select File > Properties
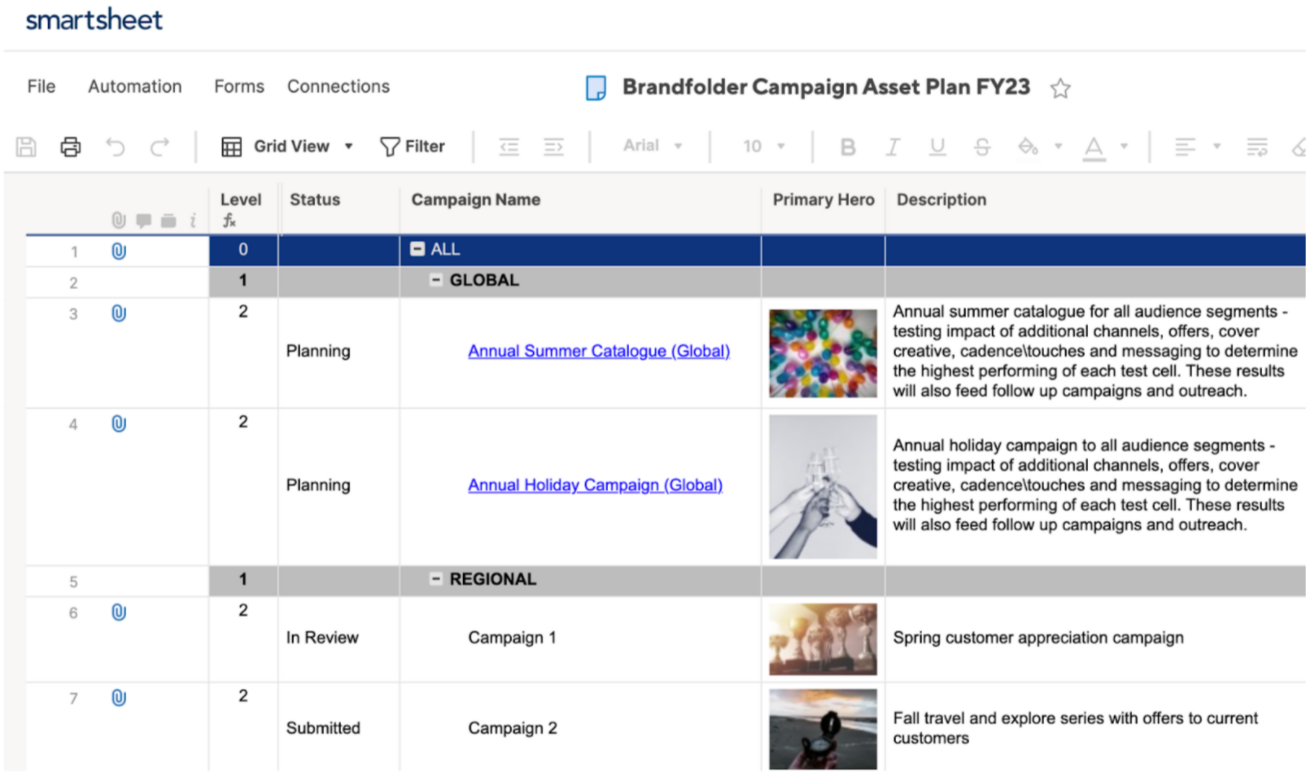
- A Text/Number column: Enter Campaign Name as the column name
- Optional: A column with the campaign description or details. You can set up a new sheet with the required columns or add them into your existing sheet to make this template work.
| Column Name (case sensitive) | Column Type | Purpose | |
|---|---|---|---|
| Required | Status | Dropdown | Acts as the trigger for the workflow |
| Required | Campaign Name | Text/Number | The data in this field in Smartsheet will be the name of your Brandfolder Workspace. |
| Optional | Description | Text/Number | If you add this, you can use the data in this field in Smartsheet as the tagline of your Brandfolder Workspace. |
While the Status column can have any values, it must include a Planning value for the workflow to work effectively.
In the example sheet below, the Campaign Name and Description columns are used in the workflow.
Deploy the template collection
- Log in to your Bridge account.
- In the Solution Center, find and select Create a Brandfolder Workspace template.
Give your collection a name.
The name you provide will be the prefix to the default workflow name. For example, if you name the collection Test, then your new workflow would appear as Test - Get Brandfolder IDs once you deploy it.
- To add your new workflow to the list of workflows, select Deploy.
Get your Brandfolder IDs
The workflow to create a workspace requires the Brandfolder ID to create the workspace in the correct Brandfolder. To get all the Brandfolder IDs for your account, run the Get Brandfolder IDs workflow first.
To run the Get Brandfolder IDs
- In the workflow designer, select the Get Brandfolder IDs workflow.
- Open the Run Log on the right bar
 . .
. . - Select Play
 .
.
Find the Brandfolder ID you need
- Open the Run Log.
- Select Refresh.
- Expand the Completed row.
- To review the Brandfolder names, expand the outputs.
- Once you find the right Brandfolder, hover over the brandfolder_id field, and then select
 .
. To copy the Brandfolder ID value, select Copy JSON Source.
Brandfolder Image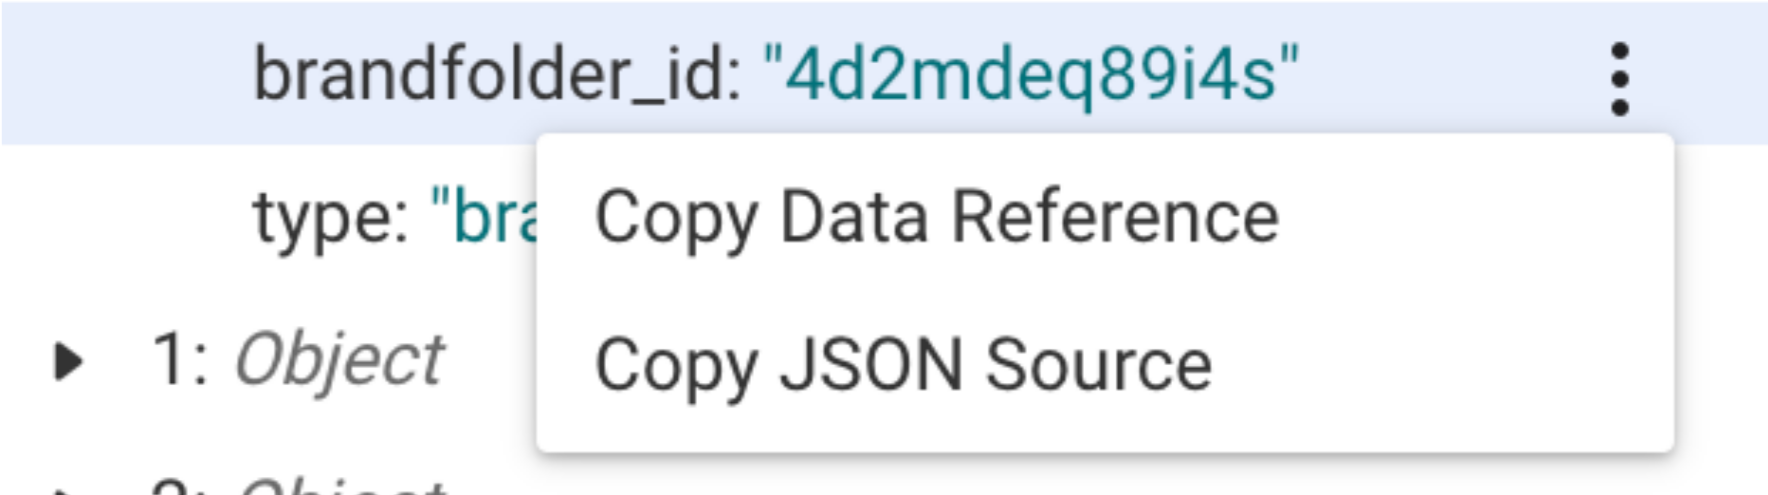
- Paste it in a notepad or any word processor until you’re ready to set up the next workflow.
Set up the Create a Brandfolder Workspace workflow
Brandfolder requirements to use this template
You need the following:
- The Brandfolder ID: You can get the IDs for all of your Brandfolders using the Get Brandfolder IDs workflow included in this template set
- Brandfolder API key: To get this, select your profile name > My Profile > Integrations
- Access to the Workspace feature: If your account doesn’t have access to the Workspace feature, you can use the Collection template
To set up the Create a Brandfolder Workspace workflow
- Go back to the workflow list.
- Select the Create a Brandfolder Workspace Based on a Status Change workflow.
- Select the Create Workspace module.
- In the Brandfolder ID field, paste your Brandfolder ID (without the quotation marks).
- Save the workflow.
Set up the trigger
The trigger you set up runs your new workflow every time the value in the Status column changes.
To set up the trigger
- Once authenticated, select the Triggers tab, and expand the Triggers section.
- Select Add to Triggers.
- In the Trigger Name field, add a unique name for your trigger.
In the Sheet ID field, enter the unique ID of the sheet.
To find this in your sheet, select File > Properties.
- In the Event Type field, select the When Column Values are Changed trigger.
- In the Column Name or ID field, type Status.
- In the Workflow list, select the Create a Brandfolder Workspace Based on a Status Change workflow.
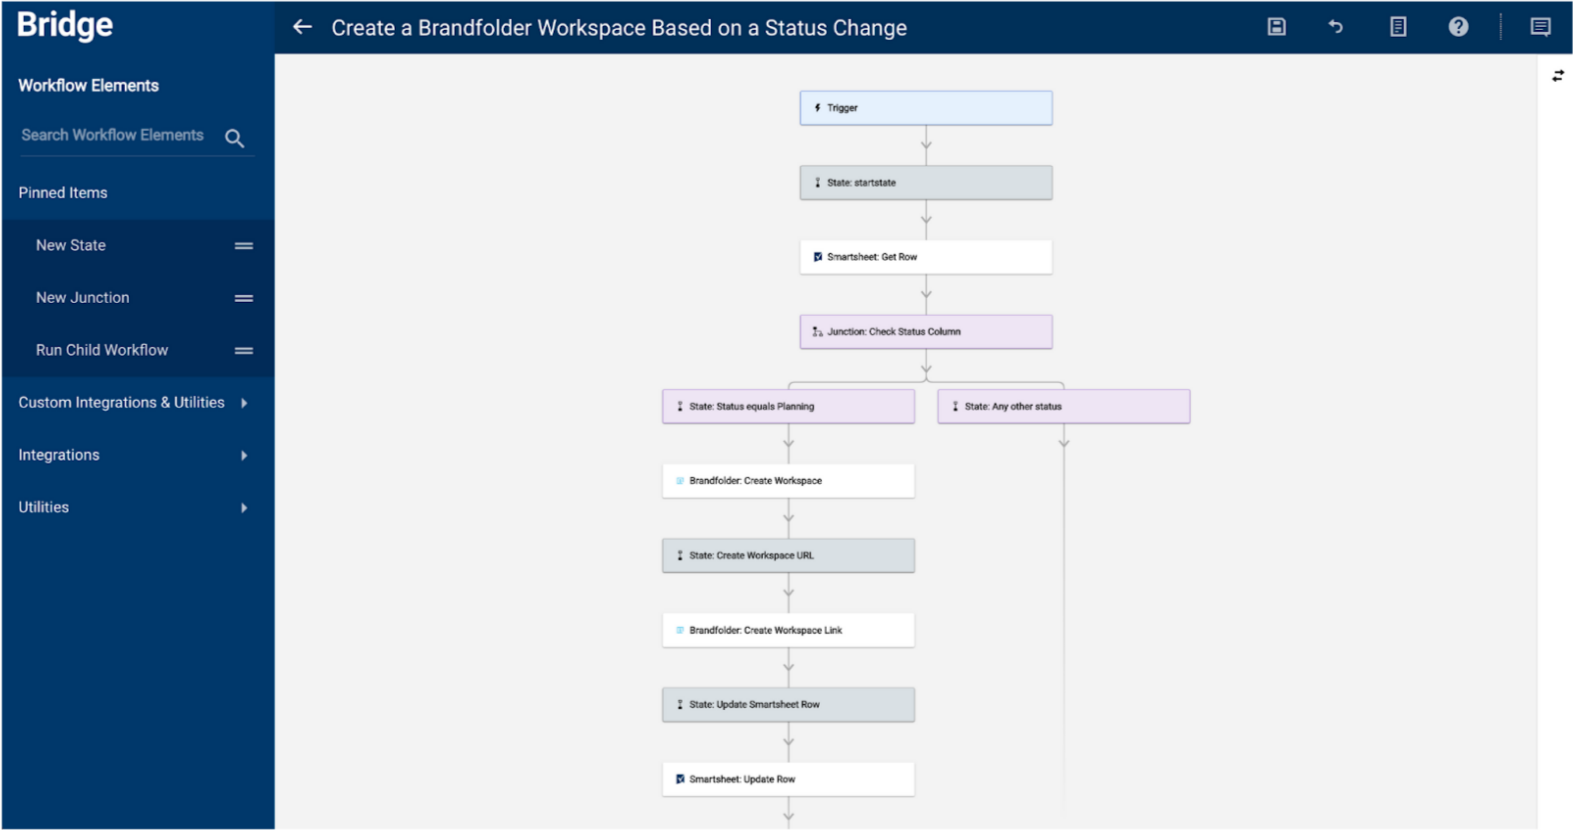
Workflow breakdown
Learn about what each element of the workflow does in the template below.
Most of the modules in this list use data references.
- Brandfolder: List Brandfolders - Gets all the Brandfolder data in your account. You can use this to see details about every Brandfolder, including IDs.
- Smartsheet: Get Row - When the Create a Brandfolder Collection Based on a Status Change workflow detects the change in the Status value in your Smartsheet sheet, the Get Row module grabs the data from that row.
- Junction: Check Status Column - Checks the value in the Status column, which compares a static value (e.g., Planning) to a data reference (the cell value in the Status column from the Get Row module). If the value in the data reference matches the static value, then the workflow follows the path to create a Brandfolder Collection. Any other value results in the opposite path, which stops the workflow.
- Brandfolder: Create Workspace - Creates a Workspace in a specific Brandfolder. You need a Brandfolder ID to direct where the Workspace should be created. The Workspace Name and Tagline fields in this module pull references from the Get Row module and put the column values for the Campaign Name and Description columns.
- Brandfolder: Create Workspace Link - Uses the ID for the new Brandfolder Workspace to create a direct URL to it. The data reference brings the Workspace ID from the Create Workspace module output.
- Smartsheet: Update Row - Uses the Workspace URL data reference. Then, it inserts the value as a hyperlink into the Campaign Name column. Once the workflow has run successfully, the Campaign Name value in your Smartsheet sheet will change to a hyperlink. When you select the link, your new Brandfolder Workspace opens in a new tab.