Applies to
- Pro
- Business
- Enterprise
Smartsheet for Gmail add-on
With the Smartsheet for Gmail add-on you can quickly copy what’s in an email message and add that information to rows in your sheets without leaving Gmail.
Once the information is captured in Smartsheet, all Smartsheet collaborators can see and act on the information. The Smartsheet for Gmail add-on works with Gmail and the Gmail app for Android phones.
Connect Gmail to Smartsheet
- From the G Suite Marketplace, navigate to the Smartsheet for Gmail Add-on and select INSTALL.
- Choose the Gmail account that you want to use with the add-on. If prompted, sign in with your Gmail account—use the email address and password that you use with Gmail. You may need to select INSTALL again.
- Select ALLOW.
When you see a Smartsheet...has been installed! message, that means you've been successful.
You only need to connect your Gmail account with your Smartsheet account one time.
If you use the Gmail app for Android phones, the add-on is also available for you there once you've installed and connected it using these steps.
If you are a G Suite administrator, you can install the Smartsheet for Gmail add-on for your entire domain. For additional information about installing add-ons at the domain level, see the Google G-Suite Help Center.
Connect your Gmail and Smartsheet accounts
- Navigate to Gmail and open an email message.
- To open the Smartsheet for Gmail add-on, select the Smartsheet logo in the add-on panel.
Brandfolder Image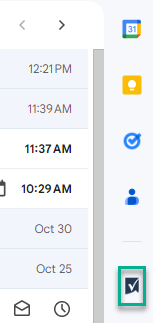
If you don't see the icon in the add-on panel right away, you may need to refresh your browser window. - In the Smartsheet add-on panel, select CONNECT TO SMARTSHEET.
- A new window opens with a message saying that the app is requesting access to Smartsheet.
Brandfolder Image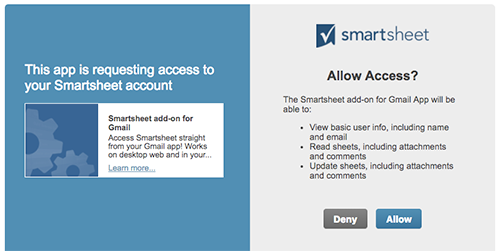
- Select Allow to allow the add-on to access Smartsheet.
You’re done! Now that you’ve installed and connected the add-on, your Smartsheet account is available in the add-on panel. To view sheets from the panel, select BROWSE ALL SHEETS.
Use the Smartsheet for Gmail add-on
Once the Smartsheet for Gmail add-on is installed and connected to your Smartsheet account, you are able to do the following:
- Add a comment containing the message body and its metadata (who the message was from, the subject, the date it was sent, and so on)
- Include attachments from email messages as attachments to the comment.
- Modify the contents of other fields in a row directly from the add-in panel (that is, you don’t need to switch to Smartsheet to make changes to sheet data)
How you do these things are nearly the same regardless of whether you are accessing Gmail from an internet browser or via the Gmail app for Android phones.
Add information from your email it to a row in Smartsheet
- From Gmail or the Gmail app for Android phones, open an email message.
- Select the Smartsheet logo in the upper-right corner of the email window. If you are working from the Gmail app tap the add-on icon at the bottom of the email message.
- Locate the sheet to which you want to add the contents of the email. You can do this by searching or browsing.
- Search: Type the name of the sheet in the search field near the top of the add-on panel and select SEARCH.
-or- - Browse: Select BROWSE ALL SHEETS to navigate through your available sheets.
- Search: Type the name of the sheet in the search field near the top of the add-on panel and select SEARCH.
- Choose from the following to include message text and attachments:
Add the email message text to a row
Select whether you want to add the information to a new row or to an existing row:
- New row: Select Add a row at the top of the add-on panel. The new row is added to the bottom of the sheet.
You have the option to type information into the row’s Primary Column. (It’s a best practice to type a value here—the name of the task, for example.)
- Existing row: Select the row in the add-on panel. The content from the row's Primary Column is displayed in the app panel. You can change or update the content.
Exclude attachments
Any attachments associated with the email message are uploaded and attached to the row comment by default (inline images are considered attachments and are also included).
If you don't want to include an attachment, switch the slider next to the attachment's name to off.
- New row: Select Add a row at the top of the add-on panel. The new row is added to the bottom of the sheet.
- Select the down arrow to review the other columns in the sheet and edit them as desired.
- Select APPLY CHANGES to add the information to the desired row.
When you see the Success! message, that means the information was added or updated as you specified.
You can copy text from only one email message at a time. If you navigate away from one message to a different message—even if that message is in the same email thread—before you select APPLY CHANGES, your changes are lost.
Troubleshoot Issues with the Smartsheet for Gmail Add-on
When I enter a value into a field in the add-on panel, I receive a message similar to the following: The Value for cell in column 00028901279323, did not conform to the strict requirements for type COLUMN_TYPE.
In Smartsheet, it’s possible to restrict data entry for certain column types. If you attempt to enter a value into a column that doesn’t support that type (for example, if you type a number in a Contact column), you receive an error. In this situation, you need to enter the right type of data into the field.
I’m unable to modify some column values from the add-on.
When you're working in the Smartsheet for Gmail add-on, you aren't able to edit values in cells that contain the following:
- Date
- Duration
- Checkbox
- Formulas
- Contact List (when multiple contacts per cell is enabled)
Note that if you have the appropriate permissions, you can change these values directly in Smartsheet.
I don’t see an option to install the add-on (or the INSTALL button is greyed out).
If you are using Gmail in an environment where G Suite is managed by an admin, it may be that your admin has disabled the use of G Suite Marketplace add-ons. If this is the case, you need to contact your admin and request that they enable the Smartsheet add-on for use at your business. For more information, have your G Suite administrator see Turn a Marketplace app on or off for users in the G Suite Administrator Help (the Google Support site).
I installed the add-on but the Smartsheet icon doesn’t show up in Gmail.
The first time you use the add-on after installing it, you may need to refresh your browser window before you're able to see the Smartsheet icon in the add-on pane. Also, depending on the number of add-ons you have, you may need to scroll through the list of add-ons to find and select the Smartsheet icon.
I can only see a few lines of the email message in the add-on panel.
Currently, the add-on panel displays only a few lines of text at a time. To review the full text of the comment, select See full text. (Note that this full text view is read-only at this time.) If you want to more easily modify the contents of the email message, switch to Smartsheet, locate the row that the comment was added to, and modify the comment there. For more information about working with comments, see the Related Articles section below.
I’m unable to see the add-on panel from my Inbox.
The add-on appears when you select an email message to view. When you open an email message, you see the Smartsheet logo in the panel on the right side of the window. Select the Smartsheet logo to open the add-on panel.
I’m unable to see the add-on panel when viewing an email from the desktop browser version of the add-on (but I can see it from my mobile device).
Some third-party Chrome browser extensions don't yet auto-detect Gmail add-ons and may cover up the right portion of the screen, including the add-on panel.
To work around this issue, you may be able to disable elements of the Chrome browser extension that’s causing the issue. For more information about how to manage Chrome extensions, see Install and manage extensions in the Google Chrome Web Store Help.
As you identify Chrome extensions that exhibit this behavior (that is, as you find extensions that cover up the add-on panel), notify the developers of the extensions directly so that they can correct the issue. Contact information for the developer is provided on the Chrome Web Store listing for the extension.
How do can I uninstall the add-on?
To uninstall any add-in that you obtain from the G Suite Marketplace, you have to go to the G Suite Marketplace site. For more information, see the "Manage apps (users)" section of the About G Suite Marketplace article in Google Help.
How to open Smartsheet directly from the add-on panel?
Once you add information to the sheet, you receive a Success! message. You can selectnthe sheet name in this message to open Smartsheet in a new browser tab.